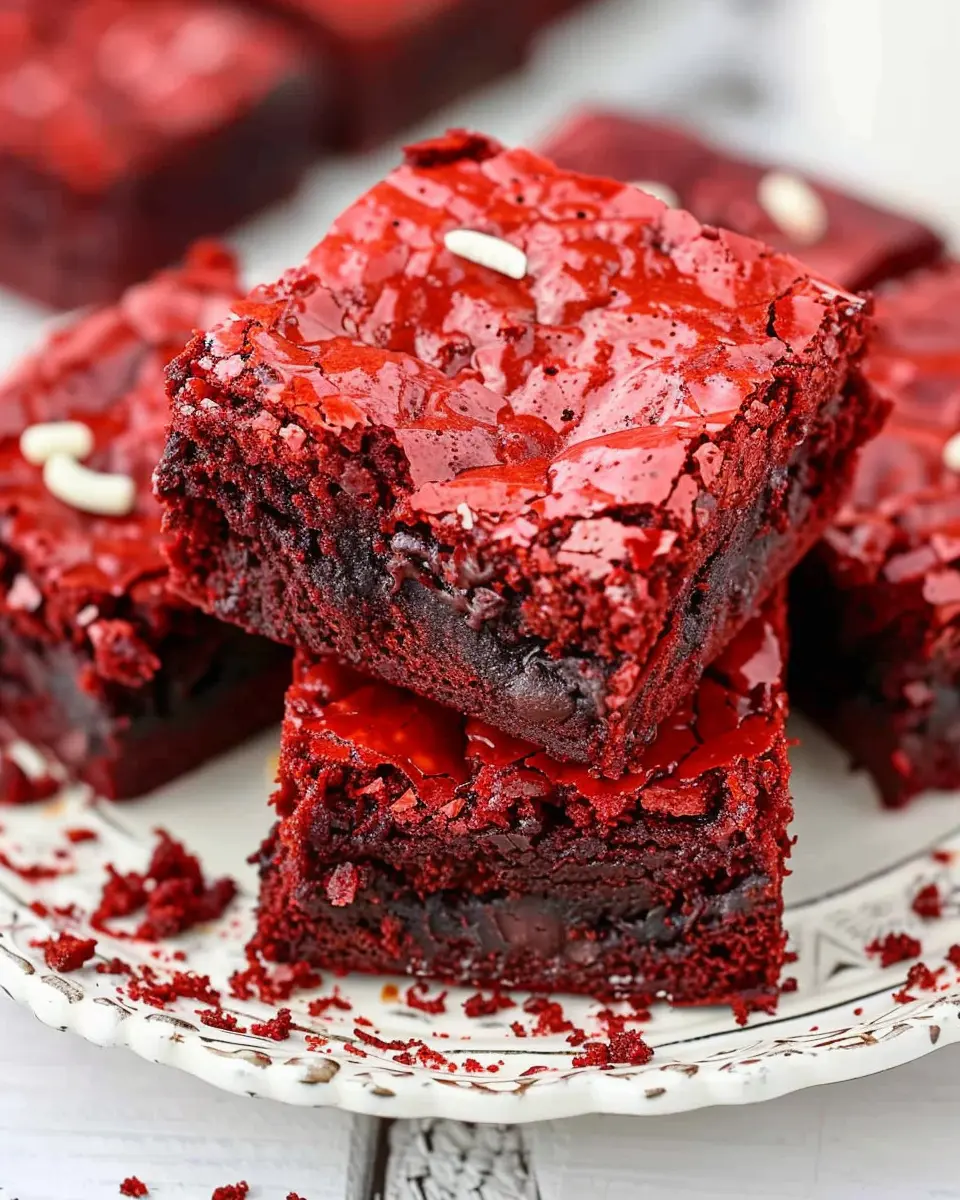
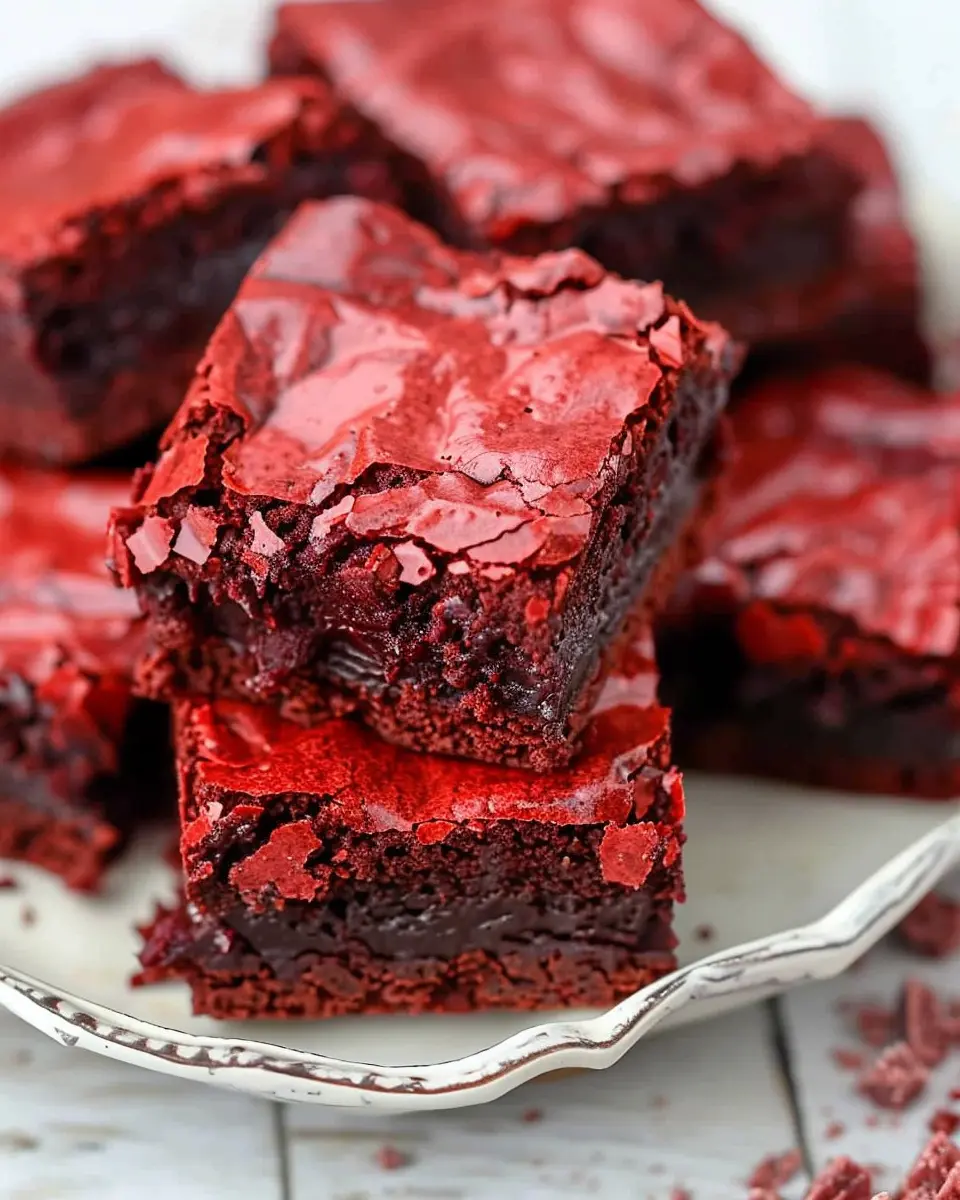
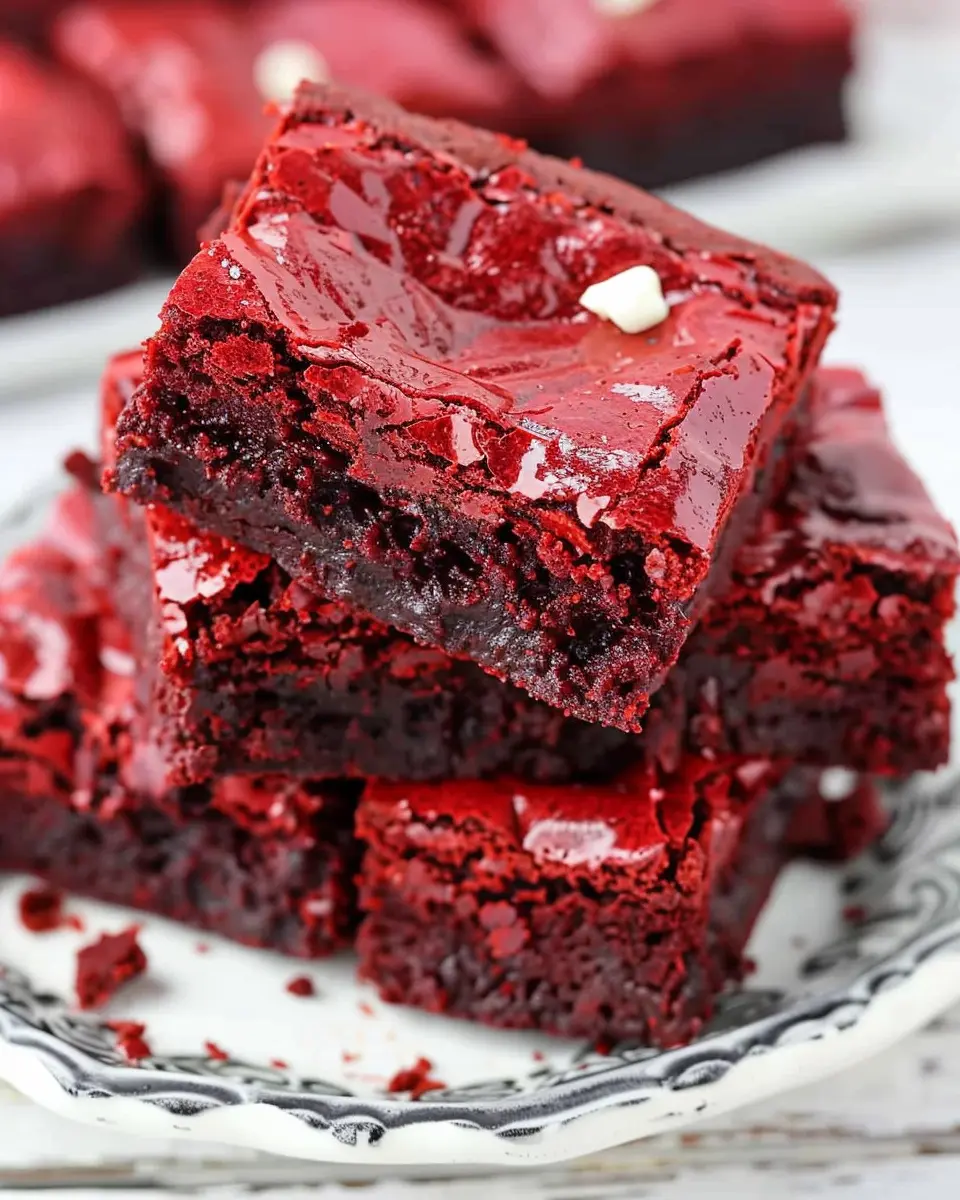
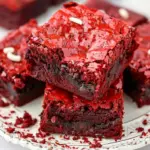
Introduction to Best Homemade Red Velvet Brownies
When it comes to dessert, red velvet brownies stand out as a true showstopper. But why single them out? These brownies are not just a pretty face; they combine the rich, chocolaty goodness of traditional brownies with the unique flavor profile of red velvet cake. The result is a luxurious treat that’s perfect for both special occasions and cozy nights in.
Why Red Velvet Brownies are a Must-Try
Red velvet has been a beloved favorite for generations. Originating from the South, this cake is known for its striking red hue and hints of cocoa. It doesn’t just look appealing; the flavor is a delightful balance of mild cocoa and buttery vanilla. When you transform this classic into a brownie, you’re creating something that’s fudgy, rich, and incredibly satisfying.
Imagine biting into a warm, gooey brownie that’s both decadent and velvety smooth—it’s pure bliss! It’s no wonder that many are searching for the best homemade red velvet brownies they can whip up in their own kitchens.
-
Versatile Dessert: These brownies can easily elevate any gathering, whether it’s a birthday party or a casual get-together with friends.
-
Simple Ingredients: Most of the ingredients are pantry staples, making it a breeze to bake them on a whim.
-
Perfect for Sharing: Thanks to their stunning appearance, they’re an impressive treat to bring to a potluck or to surprise your colleagues at the office.
If you’re looking to impress guests or simply indulge yourself, take a moment to check out this Brownie Baking Guide for tips on achieving the ultimate texture.
With these best homemade red velvet brownies, you’ll create sweetness and joy in every bite. So, ready the mixing bowls and get your apron on—it’s time to bake something delicious!
Ingredients for Best Homemade Red Velvet Brownies
Essential Ingredients for the Brownies
To create the best homemade red velvet brownies, you’ll want to gather these key ingredients for a scrumptious treat. Here’s what you’ll need:
- All-purpose flour: This provides the structure.
- Granulated sugar: For sweetness that balances the cocoa.
- Unsweetened cocoa powder: Essential for that rich chocolate flavor.
- Eggs: They give moisture and help bind everything together.
- Vegetable oil: This keeps the brownies moist and tender.
- Buttermilk: Adds a lovely tang and depth of flavor.
- Red food coloring: The star of the show! It gives your brownies that signature hue.
- Vanilla extract: A touch to enhance the flavors.
Key Ingredients for the Cream Cheese Frosting
No red velvet brownie is complete without a creamy topping. For the frosting, you’ll need:
- Cream cheese: Rich and tangy, it’s a must-have.
- Unsalted butter: Provides a smooth and creamy texture.
- Powdered sugar: Sweetens the frosting and helps it hold together.
- Vanilla extract: Adds an extra layer of flavor to balance the sweetness.
With these ingredients, you’re on your way to baking an irresistible dessert that’s perfect for any occasion. For more tips on baking basics, check out resources from the Joy of Baking and elevate your skills today!
Step-by-Step Preparation of Best Homemade Red Velvet Brownies
When it comes to indulging in a rich, flavorful treat, best homemade red velvet brownies hit the sweet spot. These delightful brownies combine the signature flavors of red velvet cake with the fudgy goodness of brownies, resulting in a treat that’s perfect for any occasion. Let’s walk through the step-by-step preparation to ensure your baking adventure is both fun and successful!
Preheat and Prepare Your Baking Pan
Before diving into the mixing bowl, it’s crucial to set the stage for your baking masterpiece. Start by preheating your oven to 350°F (175°C). This ensures your brownies bake evenly. While the oven warms up, grab an 8×8-inch baking pan and line it with parchment paper. This little trick helps you pull the brownies out easily once they’re baked. You can lightly grease the parchment paper for extra security, ensuring those fudgy brownie edges come out perfect.
Melt the Chocolate and Butter
Now, let’s create that decadent chocolatey base that will make your brownies irresistible. In a medium saucepan, melt 1/2 cup (1 stick) of unsalted butter and 4 ounces of high-quality semi-sweet chocolate over low heat. Stir occasionally until fully melted and smooth. This step is crucial because the gentle melting keeps the chocolate from seizing, preserving its lush texture. If you’re in a hurry, you can melt the chocolate and butter in the microwave using short bursts, stirring in between.
Mix the Wet Ingredients
Once your chocolate and butter are melted and slightly cooled, it’s time to mix the wet ingredients. In a large mixing bowl, whisk together:
- 1 cup of granulated sugar
- 2 large eggs
- 1 teaspoon of vanilla extract
- 2 tablespoons of red food coloring
The red food coloring is what gives these brownies their signature hue! Mix everything together until well combined. You’ll know it’s ready when the color is vibrant and the mixture is slightly fluffy. It’s like creating your own magic potion!
Combine the Dry Ingredients
Now let’s bring the dry ingredients into the mix. In a separate bowl, whisk together:
- 1 cup of all-purpose flour
- 1/4 cup of unsweetened cocoa powder
- 1/2 teaspoon of baking powder
- 1/4 teaspoon of salt
Mixing these ingredients separately ensures that the leavening agent is evenly distributed, avoiding any lumps in your best homemade red velvet brownies. Gradually add your dry mixture to the wet ingredients, folding gently with a spatula until just combined. Avoid over-mixing—this will help maintain that fudgy texture!
Bake to Perfection
Pour your brownie batter into the prepared baking pan, smoothing the top with a spatula. Pop those beauties into the preheated oven and bake for approximately 25-30 minutes. Keep an eye on them as oven temperatures can vary. Use the classic toothpick test: insert a toothpick into the center, and if it comes out with a few moist crumbs (not wet batter), you’re golden!
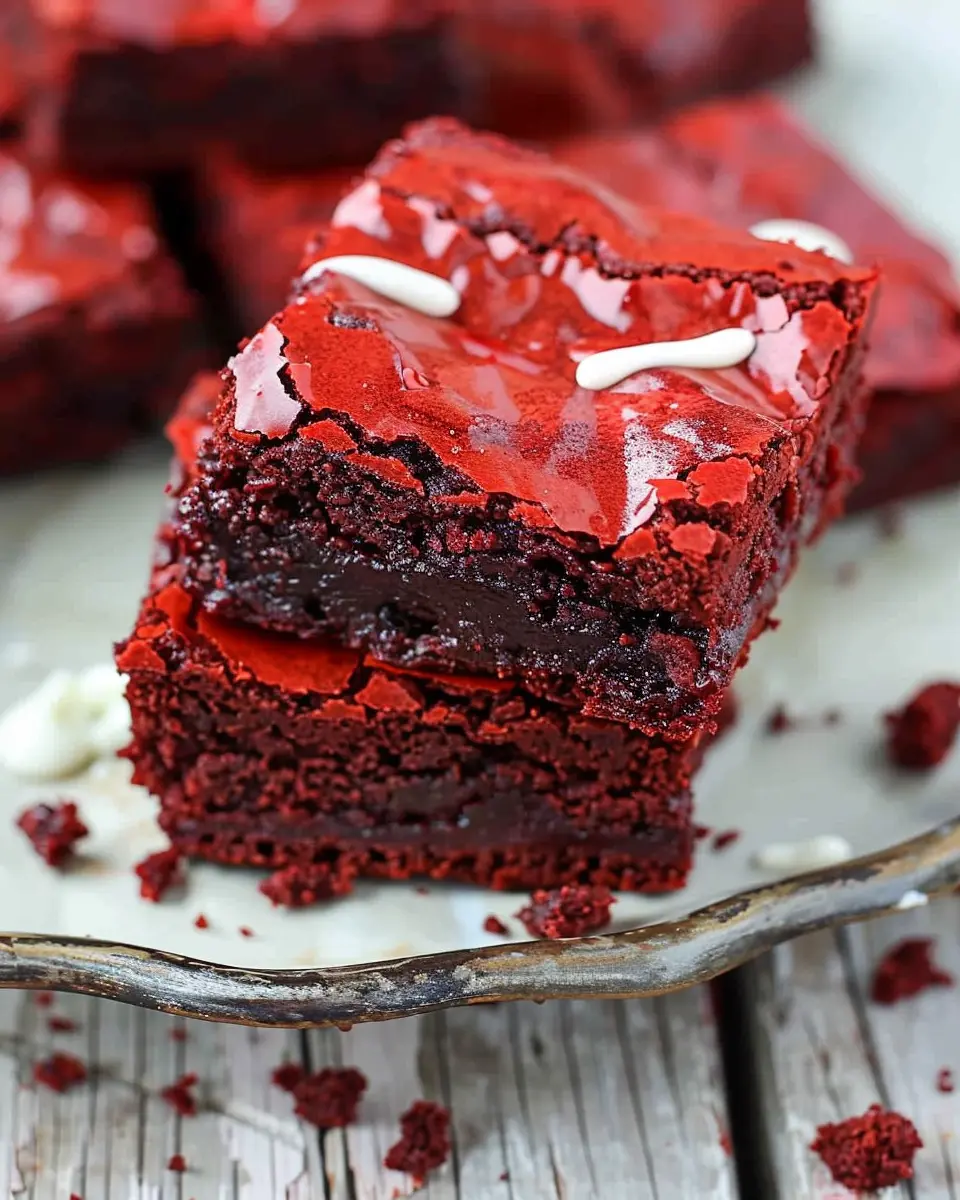
Cool and Frost Your Brownies
Once baked, remove the brownies from the oven and allow them to cool in the pan for about 10-15 minutes. While they’re cooling, how about whipping up a quick cream cheese frosting? Mix together:
- 4 ounces of cream cheese, softened
- 1/4 cup of unsalted butter, softened
- 1 cup of powdered sugar
- 1/2 teaspoon of vanilla extract
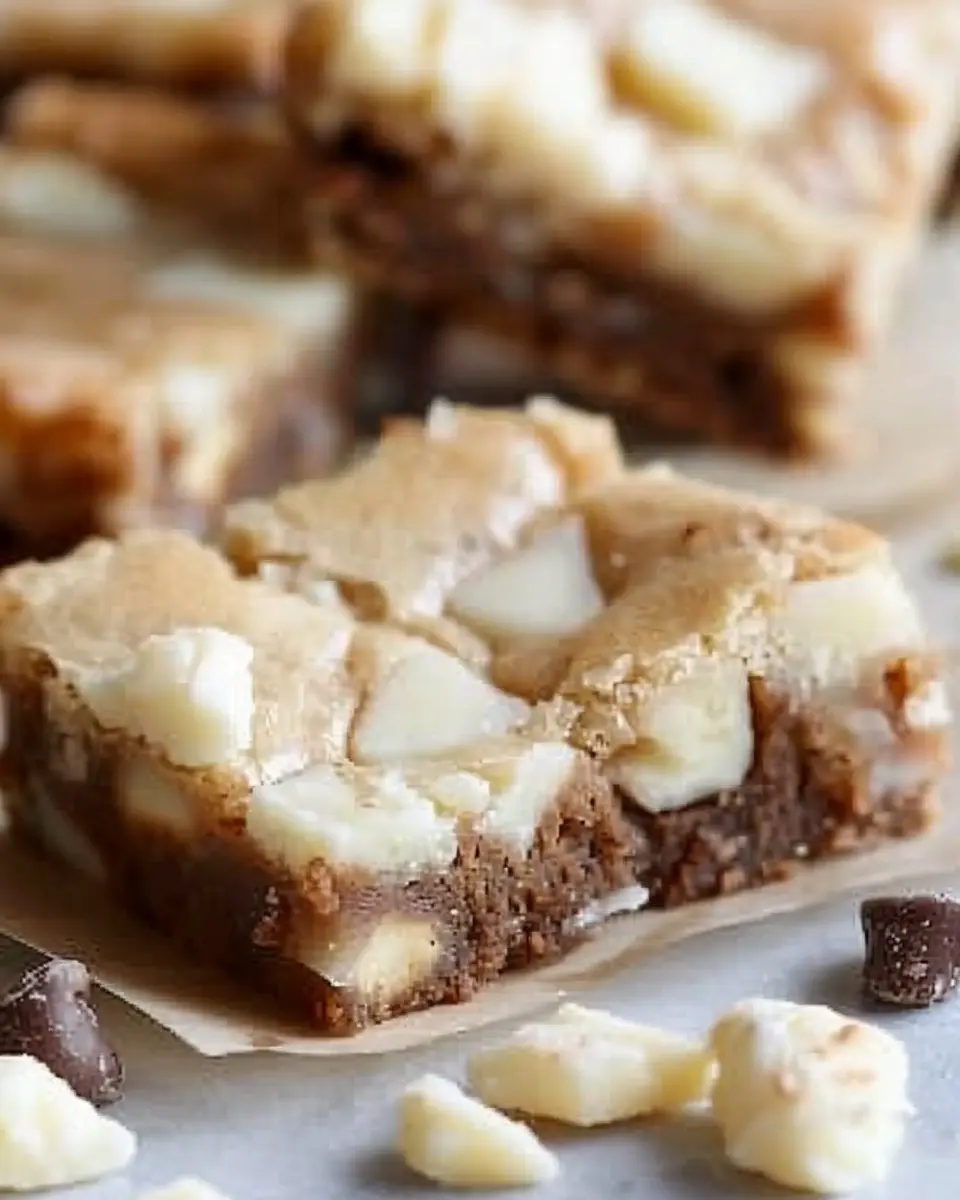
Spread this luscious frosting over the cooled brownies for a creamy finish. Be generous, and don’t forget to sprinkle some cocoa powder or heart-shaped sprinkles on top for visual flair!
Enjoy your best homemade red velvet brownies at your next gathering, or keep them all to yourself (we won’t judge)! This step-by-step guide will have you baking like a pro in no time. Happy baking!
Variations of Best Homemade Red Velvet Brownies
There’s something magical about the rich red color and decadent taste of best homemade red velvet brownies. They’re a treat to savor, but you can give them a twist to match your preference or mood. Let’s dive into two delightful variations!
Adding Nuts for a Crunch
A fantastic way to elevate your best homemade red velvet brownies is by adding nuts. Walnuts or pecans work beautifully, providing a delightful contrast to the soft, fudgy texture. Not only do they add a satisfying crunch, but they also introduce a nuttiness that complements the sweet cocoa flavor. Just chop them coarsely and fold them into the batter before baking. You’ll be surprised at how this simple addition transforms each bite!
Swapping the Frosting for a Ganache
If you’re a chocolate lover, consider swapping out the traditional cream cheese frosting for a luxurious ganache. Melt together dark chocolate and heavy cream to create a rich, glossy topping that takes your brownies to the next level. The chocolate ganache not only enhances the flavor but also adds a smooth finish that makes every bite indulgent. Drizzle it over the cooled brownies and let it set for an ultra-decadent treat.
These variations not only give you options but also let you personalize your best homemade red velvet brownies. So, next time you bake, consider giving these twists a try! Have you experimented with different toppings before? What are your favorite additions? Share your thoughts and let’s make these brownies even more delicious together!
Cooking Tips and Notes for Best Homemade Red Velvet Brownies
Preventing Dry Brownies
One of the biggest challenges with brownies, especially when making these best homemade red velvet brownies, is preventing them from becoming dry. To achieve that perfect fudgy texture, be sure to:
- Measure Ingredients Accurately: Too much flour can lead to dryness. Use the spoon-and-level method for precision.
- Avoid Overbaking: Start checking for doneness a few minutes before the recommended time. Your brownies should have a slight jiggle in the center.
- Add Moisture-Rich Ingredients: Incorporating ingredients like sour cream or buttermilk can enhance moisture and flavor.
For more tips on avoiding dry treats, check out this guide on brownie baking.
Importance of Room Temperature Ingredients
Using room temperature ingredients is key when baking best homemade red velvet brownies. This ensures:
- Better Mixing: Ingredients blend smoothly, leading to a more consistent batter.
- Improved Texture: Room temperature eggs and butter create a creamier mixture, which contributes to that coveted fudginess.
So, take a few minutes to pull your eggs and butter out of the fridge before you start whipping up these delicious brownies. For more on the science of baking, refer to this comprehensive baking resource.
Happy baking!
Serving Suggestions for Best Homemade Red Velvet Brownies
Perfect Pairings with Your Brownies
When indulging in your best homemade red velvet brownies, consider what will elevate that delicious chocolate flavor. These brownies pair beautifully with:
- Cream Cheese Frosting: A classic companion that enhances the red velvet experience.
- Fresh Berries: Raspberries or strawberries add a refreshing tartness that balances sweetness.
- Nutty Crunch: Try adding crushed walnuts or pecans for an unexpected texture.
- Creamy Ice Cream: Vanilla or a tangy berry flavor can take your dessert to the next level.
For a cozy gathering, serve your brownies with steaming cups of milk or a rich cup of coffee for an indulgent treat.
Creative Presentation Ideas
Let’s not underestimate the power of presentation! Here are some fun ways to showcase your best homemade red velvet brownies:
- Brownie Stack: Layer brownies with cream cheese frosting between them for a tower of delight.
- Plated Elegance: Arrange a couple of brownies on a decorative plate with a dusting of powdered sugar and a sprig of mint.
- Individual Portions: Cut brownies into bite-sized squares and serve them in mini cupcake liners for a delightful dessert display.
You can even check out sites like Epicurious for more inspiring dessert plating ideas. You’ll impress friends and family with not only taste but stunning visuals!
Time Breakdown for Best Homemade Red Velvet Brownies
When it comes to making the best homemade red velvet brownies, knowing your timeline can make the process smoother and more enjoyable. Here’s a handy breakdown of the time you’ll need:
Preparation Time
Preparing your ingredients is crucial for success. Set aside about 10 to 15 minutes to gather and measure everything. You’ll want to have your flour, cocoa powder, and all your wet ingredients at the ready for a seamless start.
Baking Time
Once you’ve mixed your batter, it’s time to bake! Pop those brownies into the oven for 25 to 30 minutes. Keep an eye on them, as you’ll want the edges firm while the center remains delightfully gooey.
Cooling Time
After baking, let your brownies cool for a delightful 20 to 30 minutes. This allows the flavors to meld beautifully and makes cutting them easier. Plus, the aroma filling your kitchen will have everyone eagerly waiting!
By planning your time wisely, you’re sure to impress friends and family with these irresistible brownies. Need more baking tips? Check out this ultimate guide to baking basics for some expert advice!
Nutritional Facts for Best Homemade Red Velvet Brownies
When it comes to indulging in the best homemade red velvet brownies, it’s good to know what you’re enjoying. These rich delights pack a flavorful punch while still giving you insights into their nutritious aspects.
Calories
Each brownie contains approximately 200 calories. This makes it a perfect treat to satisfy your sweet tooth without completely derailing your dietary goals.
Sugars
With about 18 grams of sugar per serving, these brownies provide that sweet kick you’re craving. For a little perspective, the American Heart Association recommends that women limit sugar intake to 25 grams per day.
Protein
You’ll find around 2 grams of protein in each brownie. While it’s not a protein powerhouse, pairing it with a glass of milk can help up your protein intake, making for a delightful snack.
For more insights into balanced baking, check out Healthline for details on how to create desserts that are both delicious and nourishing! Remember, enjoying best homemade red velvet brownies is all about moderation and finding joy in your treats.
FAQs about Best Homemade Red Velvet Brownies
Can I Make These Brownies Gluten-Free?
Absolutely! To enjoy the best homemade red velvet brownies without gluten, simply substitute all-purpose flour with a gluten-free blend. You can find these blends at most grocery stores, and they often work well as a one-to-one replacement. Just keep an eye on your baking time, as gluten-free flours may vary slightly in moisture absorption, which could affect the texture. For a sturdy alternative, consider using almond flour or coconut flour, though you might need to adjust the liquid slightly.
What’s the Best Way to Store Leftover Brownies?
You’ll want to savor those delicious brownies for as long as possible! To store leftover best homemade red velvet brownies, follow these steps:
- Room Temperature: Place them in an airtight container lined with parchment paper. They will stay fresh for about 3-5 days.
- Refrigerator: For longer storage, keep them in the fridge, where they can last up to a week. Just make sure to wrap them tightly to avoid drying out.
- Freezer: For even more extended storage, freeze them! Cut the brownies, wrap them individually in plastic wrap, and place them in a freezer-safe bag. They can last for up to three months. When you’re ready to enjoy, simply thaw at room temperature or pop them in the microwave for a few seconds.
Can I Use Other Colors for Red Velvet Brownies?
While traditional red velvet is known for its striking hue, the flavor and texture are what truly matter! Feel free to experiment with different colors. For instance, you can easily swap out red food coloring for blue, green, or even purple. Just remember, if you’re changing colors, the basic recipe remains the same—it’s the same delicious flavor!
For additional tips and variations, check out sources like The Kitchn or Bon Appétit for inspiration. Happy baking!
Conclusion on Best Homemade Red Velvet Brownies
Final Thoughts and Encouragement to Try the Recipe
There you have it—the best homemade red velvet brownies recipe that’s sure to become a favorite in your dessert rotation! With their striking color and rich flavor, these brownies elevate any gathering from mundane to memorable.
Whether you’re celebrating a special occasion or simply indulging on a cozy weekend, these brownies are a delightful treat that’s easy to whip up. Don’t hesitate to get creative; add a sprinkle of sea salt or top with cream cheese frosting for an extra touch!
So, roll up your sleeves and get baking—your taste buds will thank you! For more inspiration, consider browsing The Spruce Eats for a variety of dessert ideas. Happy baking!
PrintBest Homemade Red Velvet Brownies That Are Irresistibly Indulgent
These homemade red velvet brownies are the perfect indulgence for any occasion, bringing a rich, chocolatey flavor with the signature red hue.
- Prep Time: 15 minutes
- Cook Time: 25 minutes
- Total Time: 40 minutes
- Yield: 12 servings 1x
- Category: Dessert
- Method: Baking
- Cuisine: American
- Diet: Vegetarian
Ingredients
- 1 cup all-purpose flour
- 1/2 cup cocoa powder
- 1 cup granulated sugar
- 1/2 cup unsalted butter, melted
- 2 large eggs
- 1 teaspoon vanilla extract
- 1 tablespoon red food coloring
- 1/2 teaspoon baking powder
- 1/4 teaspoon salt
- 1/2 cup cream cheese, softened
Instructions
- Preheat your oven to 350°F (175°C) and grease a baking pan.
- In a bowl, combine flour, cocoa powder, baking powder, and salt.
- In another bowl, mix together melted butter and sugar until well combined.
- Add eggs, one at a time, followed by vanilla extract and red food coloring. Mix well.
- Gradually incorporate the dry ingredients into the wet mixture until just combined.
- Pour the batter into the prepared baking pan.
- Dollop softened cream cheese across the surface of the batter and swirl with a knife.
- Bake for 20-25 minutes or until a toothpick inserted comes out clean.
- Let cool completely before cutting into squares and serving.
Notes
- For a richer flavor, try adding chocolate chips to the batter.
- Store any leftovers in an airtight container for up to 3 days.
Nutrition
- Serving Size: 1 brownie
- Calories: 200
- Sugar: 15g
- Sodium: 150mg
- Fat: 10g
- Saturated Fat: 6g
- Unsaturated Fat: 3g
- Trans Fat: 0g
- Carbohydrates: 25g
- Fiber: 1g
- Protein: 3g
- Cholesterol: 40mg
Keywords: Best Homemade Red Velvet Brownies, red velvet brownies, dessert recipes