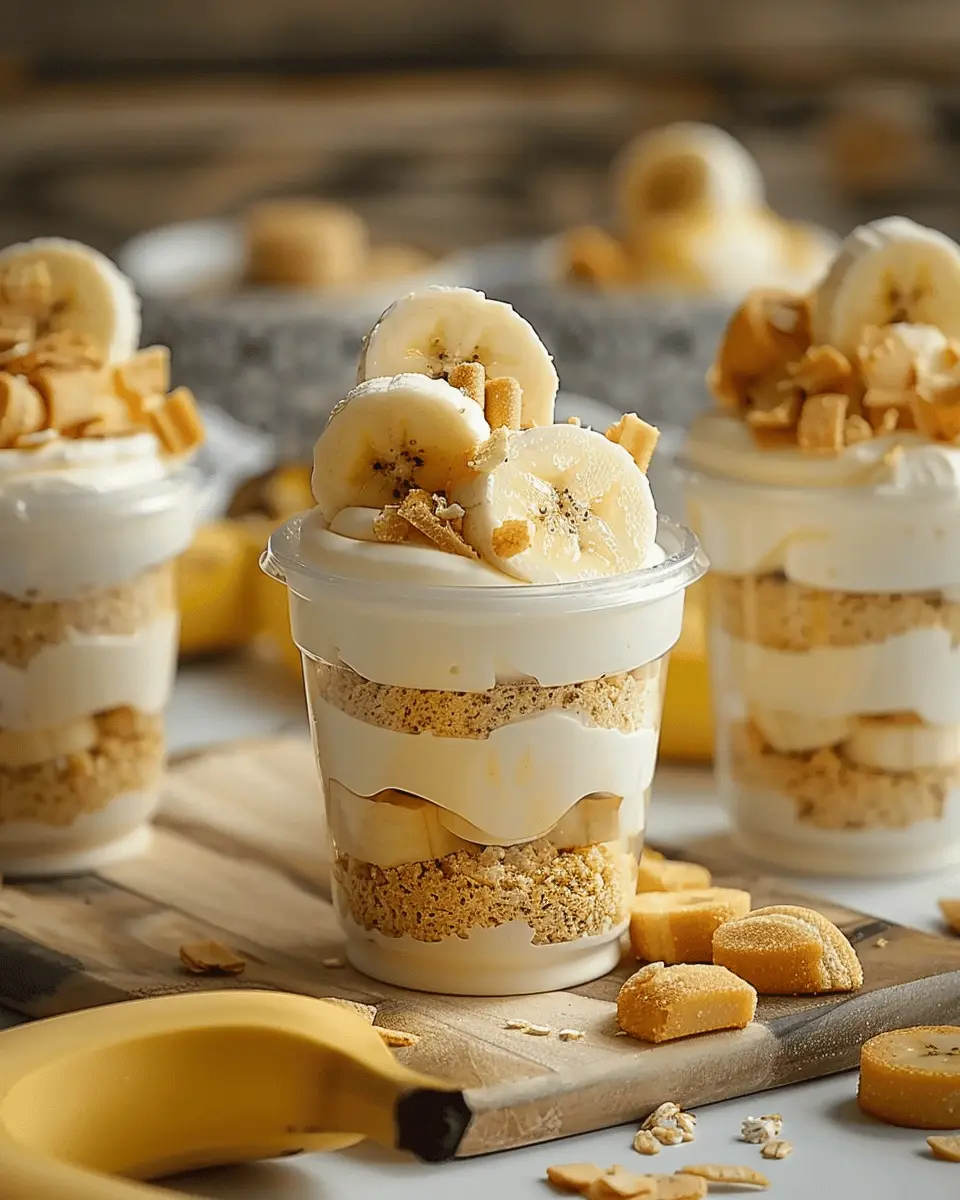
Introduction to Nilla Wafer Banana Pudding Cups
When it comes to quick desserts that bring a smile to your face, Nilla Wafer banana pudding cups hold a cherished place in many hearts. This classic treat combines creamy pudding, sweet ripe bananas, and crunchy Nilla Wafers. It’s not just the flavors that make it special; it’s the nostalgia intertwined with each delightful bite.
Why Nilla Wafer Banana Pudding is a Timeless Treat?
Have you ever noticed how certain foods can instantly transport you back to your childhood? For many, Nilla Wafer banana pudding does just that. The creamy texture and layered presentation evoke memories of family gatherings and potlucks. This dessert is incredibly versatile; it’s just as perfect for a casual weeknight treat as it is for a festive celebration.
-
Simplicity is Key: The beauty of this recipe lies in its simplicity. With just a handful of ingredients—vanilla pudding, bananas, and Nilla Wafers—you can whip up a delightful dessert that’s bound to impress. For those just starting in the kitchen, this is an excellent beginner-friendly recipe that yields delicious results.
-
Flavor Harmony: The subtle crunch of the Nilla Wafers contrasts beautifully with the smooth, creamy pudding and luscious bananas. This creates a flavor harmony that pleases the palate, making every spoonful a delightful experience.
-
Versatile Presentation: Serving this dessert in cups adds an element of fun and personalization. Each serving is perfectly portioned, making it a fantastic choice for parties or intimate dinners. Plus, who doesn’t love a treat that comes in its own little container?
According to Serious Eats, the layering not only enhances the visual appeal but also allows the flavors to meld together beautifully, creating a satisfying dessert that feels gourmet without the hassle.
Think about hosting a gathering soon? These Nilla Wafer banana pudding cups could be your secret weapon to winning over your guests. They’ll appreciate not just the taste but also the classic vibe you bring to the table. So get ready to blend nostalgia with flavor and elevate your dessert game!
Ingredients for Nilla Wafer Banana Pudding Cups
Creating delightful Nilla Wafer banana pudding cups at home is easier than you think! Let’s dive into the essential ingredients that will help you whip up this delicious treat.
Essential Ingredients
-
Nilla Wafers: The star of the show! Their classic vanilla flavor and crunchy texture provide the perfect base for your pudding cups. You’ll need about 20-25 cookies.
-
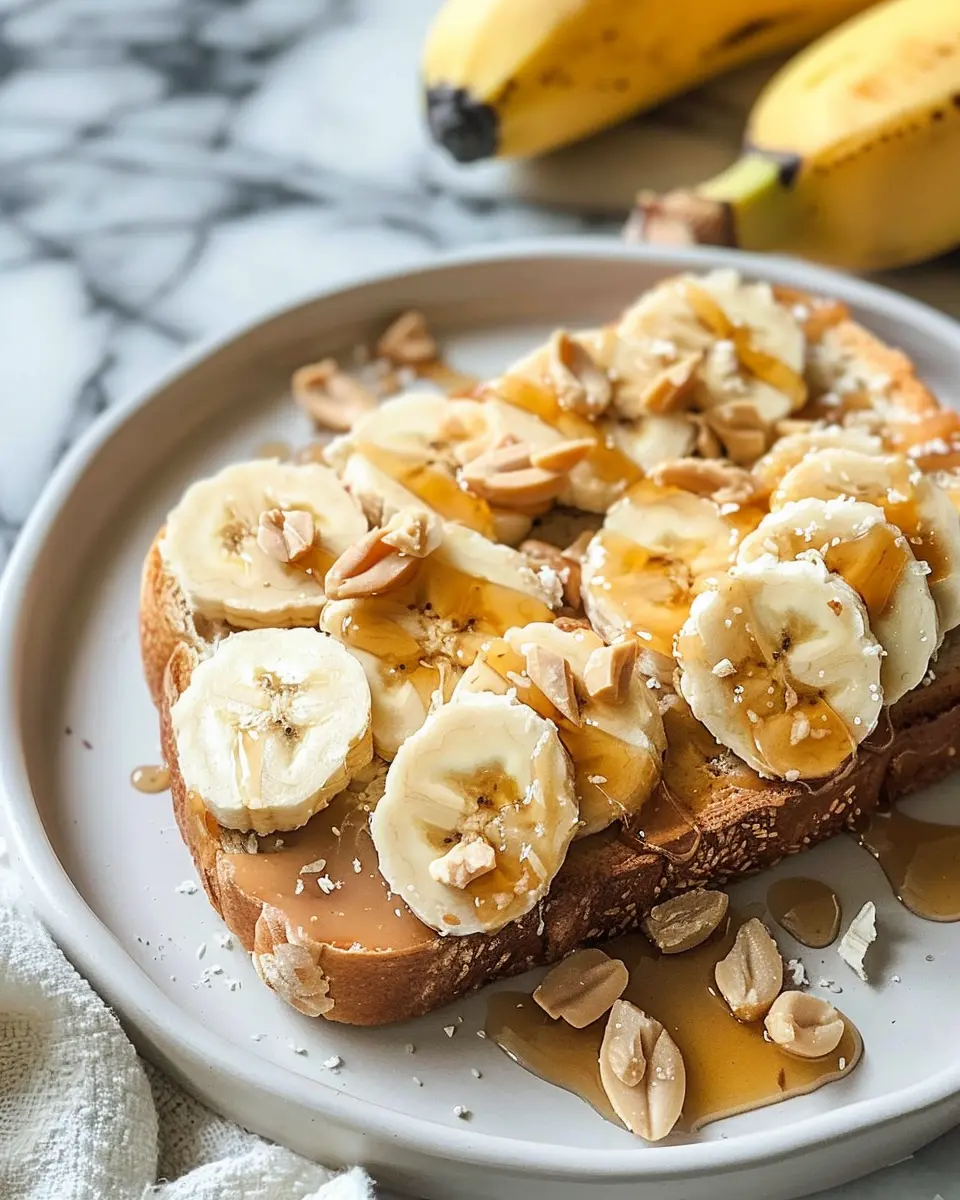
Bananas: Ripe, sweet bananas lend natural sweetness and creaminess. Choose a couple of medium-sized bananas; they’re the perfect addition to your cups!
-
Pudding Mix: A pack of instant vanilla pudding mix will make the process super quick. It’s what gives your cups that rich, creamy texture we all love!
-
Milk: Use whole milk for a rich flavor or opt for low-fat if you prefer. You’ll mix it with your pudding mix as directed.
-
Whipped Topping: For that light and fluffy finish, grab a tub of whipped topping or make your own from scratch if you’re feeling adventurous!
-
Optional Toppings: Consider adding crushed Nilla Wafers or sliced bananas for garnish before serving.
Gather these ingredients and you’re well on your way to making Nilla Wafer banana pudding cups. They’re perfect for a casual gathering or a just-because dessert! Want to know more about how these delightful treats fit into a balanced diet? Check out this article on healthy dessert choices.
Step-by-Step Preparation of Nilla Wafer Banana Pudding Cups
Creating those delightful Nilla Wafer banana pudding cups at home is not only satisfying but also incredibly simple! With a few ingredients and clear instructions, you’ll be indulging in this classic dessert in no time. Let’s dive into the steps, shall we?
Prepare the pudding mixture
Start by gathering your ingredients: vanilla pudding mix, milk, and optional vanilla extract for that extra flavor kick. You’ll want to measure out 2 cups of milk and whisk it together with a 3.4-ounce package of vanilla pudding mix in a mixing bowl. This is where the magic starts!
- Whisking tip: Use a whisk for a smooth texture—no lumps allowed!
- Chill time: Let it sit for about 5 minutes, allowing the mixture to thicken, while you enjoy a moment of anticipation for the tasty treat ahead.
Did you know that homemade pudding is often healthier than store-bought? You control the ingredients, allowing you to avoid unwanted additives. For more tips on making homemade pudding, check out this great food site.
Whip the cream
Now, let’s turn our attention to the whipped cream that brings this dessert to another level. You’ll need heavy whipping cream (about one cup) and a bit of sugar—usually two tablespoons is just right.
- Chill your bowl: For the best results, chill your mixing bowl and beaters in the freezer for 10-15 minutes. This promotes better whipping.
- Whip it good: Start whipping on medium speed until soft peaks form, then gradually add your sugar and continue to whip until stiff peaks form. Oh, the lightness of freshly whipped cream is just heavenly!
Feeling extra adventurous? Add a splash of vanilla extract to enhance the flavor profile even more!
Assemble the pudding cups
With your pudding and whipped cream ready, it’s time to combine these delightful creations! Gently fold the whipped cream into your pudding mixture, being careful not to deflate that airy goodness. This step is key, as it ensures a decadent texture in your Nilla Wafer banana pudding cups.
- Folding it in: Use a spatula and stir with a gentle hand—think of it as giving your pudding a cozy, fluffy blanket!
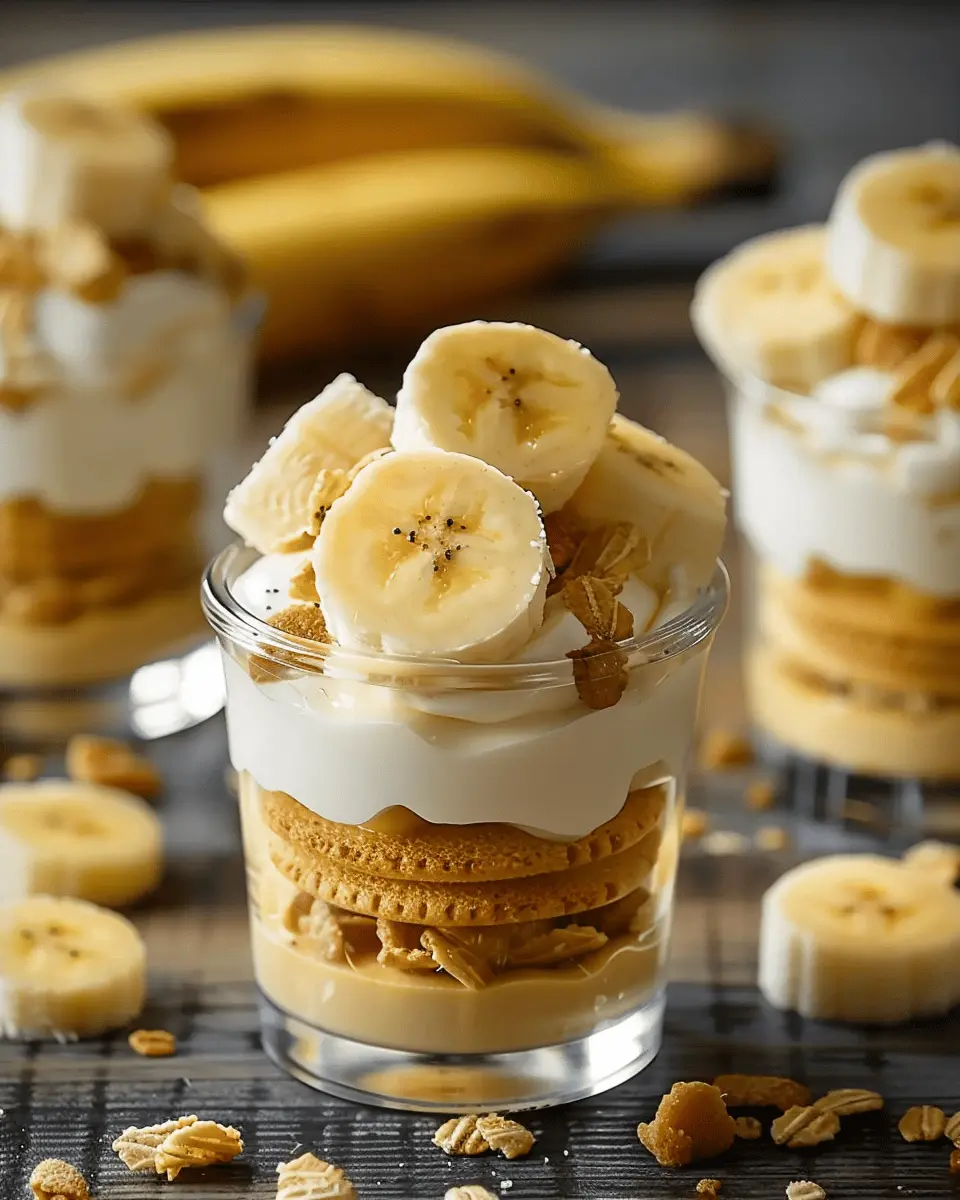
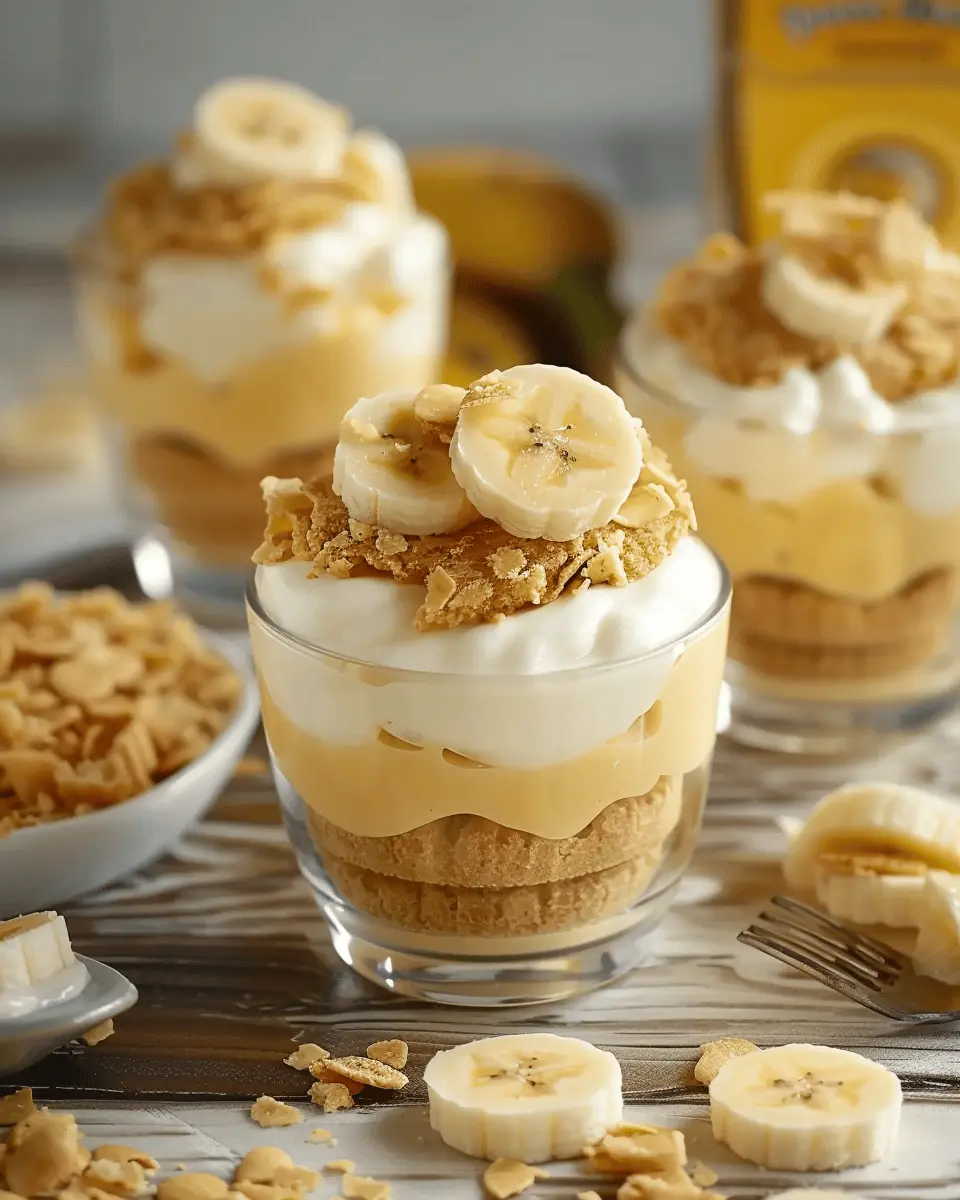
Layering the ingredients
Layers make everything look more exciting, don’t you think? To assemble your pudding cups, you’ll need a few essential ingredients:
- Nilla Wafers: Perfectly crunchy with a delicious vanilla flavor.
- Bananas: Slice some fresh bananas for that classic banana pudding essence.
Here’s how to layer:
- Start with a layer of your pudding mixture at the bottom of each cup.
- Next, place a layer of sliced bananas.
- Add a few Nilla Wafers for crunch.
- Repeat the layers until your cups are filled, finishing off with whipped cream on top.
Pro tip: Garnish with crushed Nilla Wafers or banana slices for a beautiful presentation!
Chill and store
Finally, you’ll want to let your Nilla Wafer banana pudding cups chill in the refrigerator for at least 2-3 hours, if not overnight. This allows all the flavors to blend beautifully and keeps the wafers slightly softened but still providing that needed crunch.
- Storage tips: If you’re making these ahead of time, consider covering the cups with plastic wrap to keep them fresh.
So there you have it! Each delightful cup you create will be the talk of the gathering. Feel free to customize with different toppings or flavors—perhaps a touch of peanut butter or caramel sauce? The possibilities are endless!
Planning to share your delightful creation? Don’t forget to snap a pic and share it with friends on social media. Happy cooking!
Variations on Nilla Wafer Banana Pudding Cups
When it comes to Nilla Wafer Banana Pudding Cups, the classic recipe is undeniably delicious, but why not switch things up a bit? Here are a couple of fun variations that can elevate your dessert game and make it even more enjoyable!
Adding chocolate chips or fudge
If you have a sweet tooth, adding chocolate chips to your Nilla Wafer Banana Pudding Cups is a game changer. The melty chocolate pairs wonderfully with the creamy pudding and the crunch of the wafers. Simply mix semi-sweet or dark chocolate chips into the pudding before layering. For a luxurious twist, drizzle warm fudge sauce over the top right before serving. This rich addition brings a whole new flavor dimension that chocolate lovers will adore!
Exploring different fruit toppings
While bananas are the star of the show, why not let other fruits shine, too? Try substituting sliced strawberries, blueberries, or even a mix of berries to create a fresh, vibrant dessert. You could also consider layering in some diced mango or peach for a tropical flair. Not only do these fruits add color, but they also provide delightful bursts of flavor that complement the creamy pudding perfectly. Plus, you’ll get a boost of vitamins and antioxidants!
Experimenting with these variations can turn your Nilla Wafer Banana Pudding Cups into a versatile delight suitable for any occasion. Check out this guide for more on the health benefits of adding fresh fruit to your desserts. Your friends and family will be impressed and appreciate the effort you took to mix things up!
Cooking Tips and Notes for Nilla Wafer Banana Pudding Cups
Creating delightful nilla wafer banana pudding cups is a breeze, especially with a few handy tips in your toolkit!
Use Ripe Bananas for Flavor
Opt for ripe bananas—they’re naturally sweet and will add a richer flavor to your pudding. Look for bananas with brown spots, which signal perfect ripeness.
Customize Your Cream
Feel free to mix up the flavor of your pudding. Use vanilla extract or a dash of almond extract to elevate the taste. If you enjoy a creamier texture, try adding a bit of whipped cream to your pudding for extra indulgence.
Layer It Right
When assembling your cups, start with a layer of crushed Nilla Wafers, followed by pudding, banana slices, and repeat. This creates an attractive layered effect that’s as enjoyable to look at as it is to eat!
Chill for the Best Experience
Refrigerate your completed cups for at least two hours. This helps the flavors meld together beautifully and ensures that your nilla wafer banana pudding cups are fabulously refreshing.
For more tips on mastering banana pudding, you can check out resources like Serious Eats. Happy cooking!
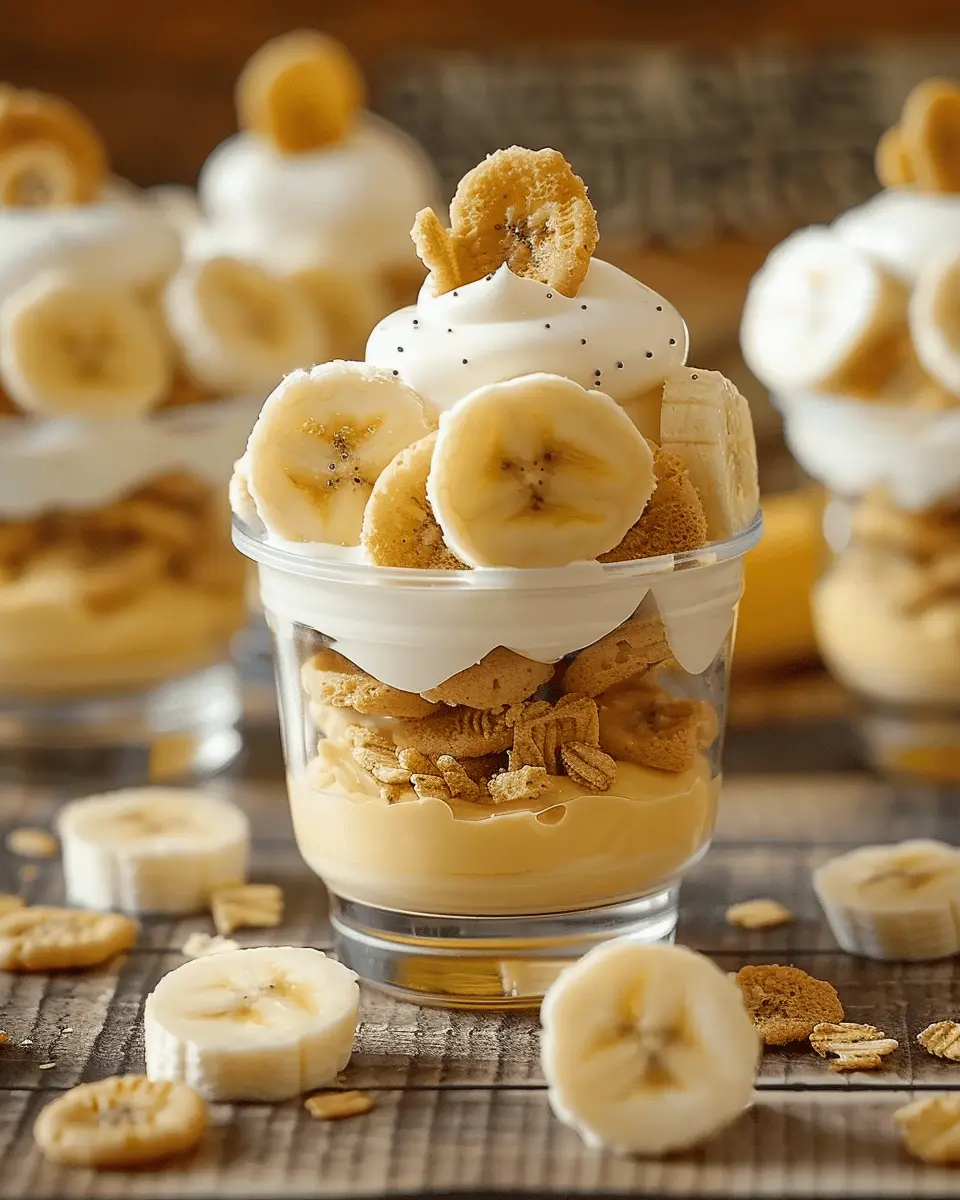
Serving Suggestions for Nilla Wafer Banana Pudding Cups
When it comes to indulging in nilla wafer banana pudding cups, presentation and serving can elevate this delightful dessert to a whole new level. Here are some creative ways to serve and enjoy:
Personal Touch with Toppings
-
Whipped Cream: A dollop of freshly whipped cream adds a fluffy texture and rich flavor. You might even try flavored creams like vanilla bean or coconut for an extra twist.
-
Fresh Bananas: Adding sliced bananas on top not only enhances the flavor but also gives a beautiful visual appeal. It’s like a mini fruit salad on your pudding!
-
Chocolate Shavings: For those who adore chocolate, a sprinkle of dark chocolate shavings can take your pudding cups up a notch. It complements the sweetness beautifully.
Make it a Party
If you’re hosting, why not create a nilla wafer banana pudding bar? Set out different toppings—think crushed nuts, sprinkles, and different fruits—and let your guests personalize their cups. This interactive approach is a hit, especially at gatherings!
Creative Serving Vessels
Instead of traditional cups, try serving your pudding in mason jars or elegant glass dishes. Not only does this make for a pretty presentation, but jars are also easy to transport if you’re heading to a potluck or picnic.
Remember, the way you serve your nilla wafer banana pudding cups can spark joy in your dessert experience, so get creative! For more inspiration on serving desserts, check out the Joy of Baking for fun ideas and recipes.
Time Breakdown for Nilla Wafer Banana Pudding Cups
Preparation Time
Creating your Nilla Wafer banana pudding cups is easy and quick, taking just about 15 minutes. This time includes gathering your ingredients, slicing bananas, and assembling your cups. It’s a fantastic option for those busy weeknights when you want a delightful dessert without a lot of hassle.
Chilling Time
Once you’ve put everything together, you’ll need to let your cups chill. They benefit from at least 2 hours in the fridge, ensuring the flavors meld beautifully and the pudding thickens to perfection. Or, if you can wait, overnight chilling is even better!
Total Time
Adding it all up, the total time to enjoy your Nilla Wafer banana pudding cups is around 2 hours and 15 minutes. This makes it an ideal dessert for last-minute gatherings or a sweet treat after dinner. Don’t forget to check out this food storage guide to ensure your leftovers stay fresh!
Nutritional Facts for Nilla Wafer Banana Pudding Cups
When indulging in Nilla Wafer Banana Pudding Cups, it’s good to know what you’re treating yourself to. Here’s a closer look at the nutritional breakdown of this delightful dessert.
Calories
Each serving of Nilla Wafer Banana Pudding Cups typically contains around 250 calories. While this is a tasty treat, be mindful of portion sizes if you’re watching your calorie intake.
Protein
These cute cups pack a modest punch with about 3 grams of protein per serving. It might not be a protein powerhouse, but those who include dairy in their diet can enjoy it as part of a balanced indulgence.
Sugars
With roughly 14 grams of sugar, the Nilla Wafer Banana Pudding Cups are definitely sweet! If you’re looking to reduce sugar, consider using less banana or opting for sugar-free pudding mixes.
If you’re curious about other dessert options or looking for healthier tweaks, check out resources from the American Heart Association. Enjoy your sweet treat, balancing it with mindful choices!
FAQs about Nilla Wafer Banana Pudding Cups
Can I make this recipe gluten-free?
Absolutely! If you want to enjoy these delicious Nilla Wafer banana pudding cups without gluten, simply opt for gluten-free cookie alternatives. There are various brands that offer gluten-free vanilla wafers or cookie varieties that mimic the taste of Nilla Wafers. Just make sure to check the ingredients to ensure they align with your dietary needs, and you’ll have a delightful treat that’s suitable for everyone.
How do I store leftover pudding cups?
If you find yourself with leftover Nilla Wafer banana pudding cups, it’s best to store them in the fridge. Cover each cup with plastic wrap or transfer the contents into an airtight container. They can stay fresh for about 2-3 days in the refrigerator. Just a quick tip: the wafers may become a bit soggy over time, so if you prefer a crunchy texture, consider adding extra wafers right before serving.
What if I don’t have Nilla Wafers?
No Nilla Wafers? No problem! You can get creative with your cookies. Regular vanilla cookies, shortbread, or even graham crackers can work as substitutes, giving your pudding a unique twist. If you’re feeling adventurous, try using crushed Oreo cookies for a chocolatey contrast or even puff pastry if you’re looking for something flaky. The versatility of this recipe allows you to tailor it to your preferences and spark some fun flavor experimentation.
By addressing common questions like these, you’re well on your way to impressing friends and family with your homemade Nilla Wafer banana pudding cups. If you want to dive deeper into baking or discover more on similar treats, consider checking out sources like Serious Eats or The Kitchn for additional inspiration!
Conclusion on Nilla Wafer Banana Pudding Cups
In summary, Nilla Wafer Banana Pudding Cups are not just a dessert; they embody nostalgia and simplicity, creating a perfect ending to any meal. Whether you’re hosting a casual get-together or simply treating yourself after a long day, these cups are incredibly quick to prepare and delightful in taste. The assembly is so straightforward that you’ll find yourself smiling as layers of creamy pudding and crunchy Nilla Wafers come together. For more inspiration, check out the National Pudding Society to learn more about various pudding-related recipes. Enjoy experimenting with flavors, and don’t hesitate to customize your cups!
PrintNilla Wafer Banana Pudding Cups: Easy Indulgence for All
A delicious dessert combining banana and vanilla flavors in a convenient cup.
- Prep Time: 20 minutes
- Total Time: 1 hour 20 minutes
- Yield: 6 servings 1x
- Category: dessert
- Method: no-bake
- Cuisine: American
- Diet: vegetarian
Ingredients
- 1 box Nilla wafers
- 2 cups vanilla pudding
- 4 ripe bananas, sliced
- 2 cups whipped cream
- 1 teaspoon vanilla extract
Instructions
- Layer the bottom of each cup with Nilla wafers.
- Top with a layer of vanilla pudding.
- Add a layer of sliced bananas.
- Spread a layer of whipped cream on top.
- Repeat layers until cups are filled.
- Finish with a dollop of whipped cream and a Nilla wafer on top.
- Refrigerate for at least 1 hour before serving.
Notes
- For added flavor, sprinkle some crushed Nilla wafers on top.
- Use ripe bananas for the best taste.
Nutrition
- Serving Size: 1 cup
- Calories: 250
- Sugar: 15 grams
- Sodium: 150 milligrams
- Fat: 10 grams
- Saturated Fat: 5 grams
- Unsaturated Fat: 3 grams
- Trans Fat: 0 grams
- Carbohydrates: 35 grams
- Fiber: 1 gram
- Protein: 3 grams
- Cholesterol: 20 milligrams
Keywords: Nilla Wafer Banana Pudding Cups, banana pudding, dessert, easy dessert