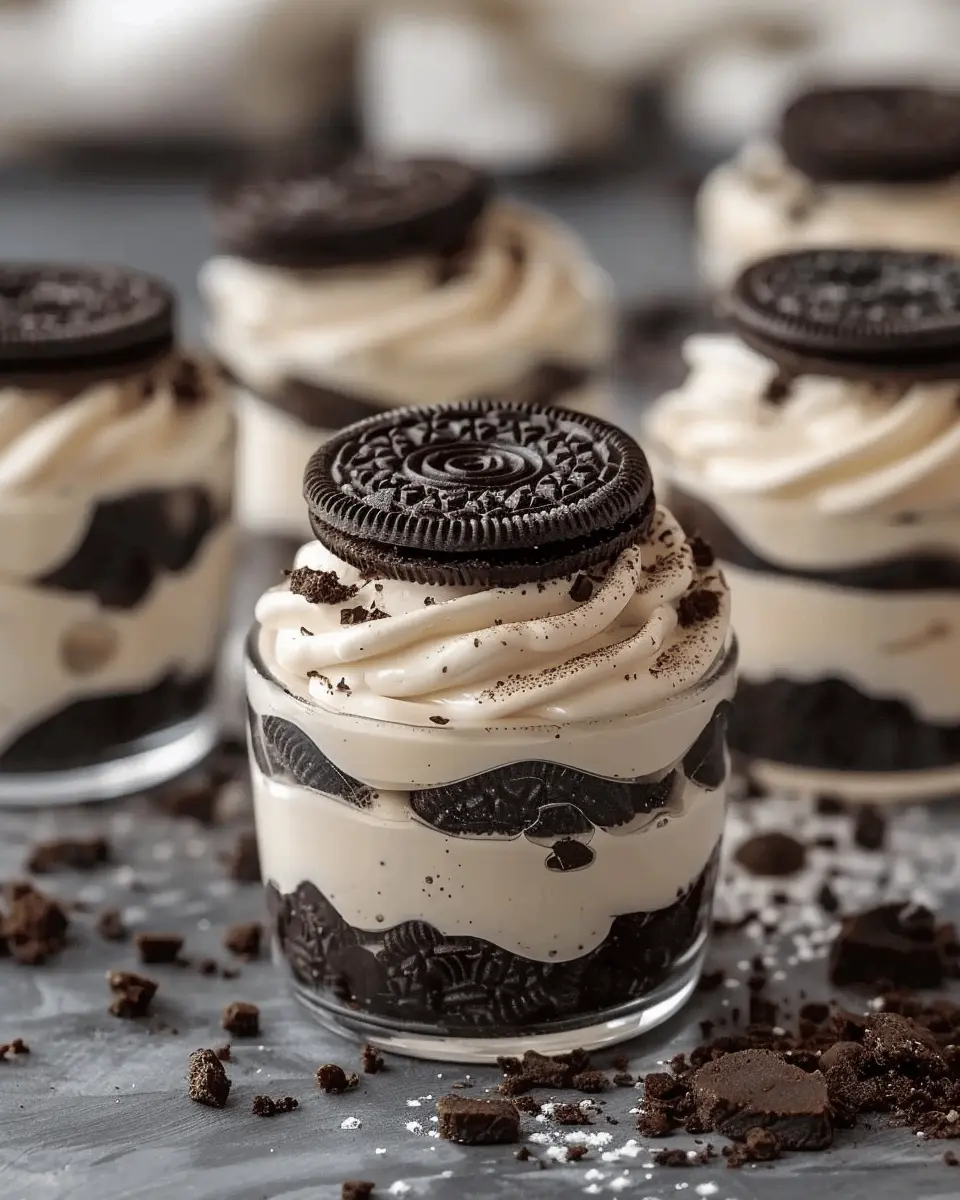
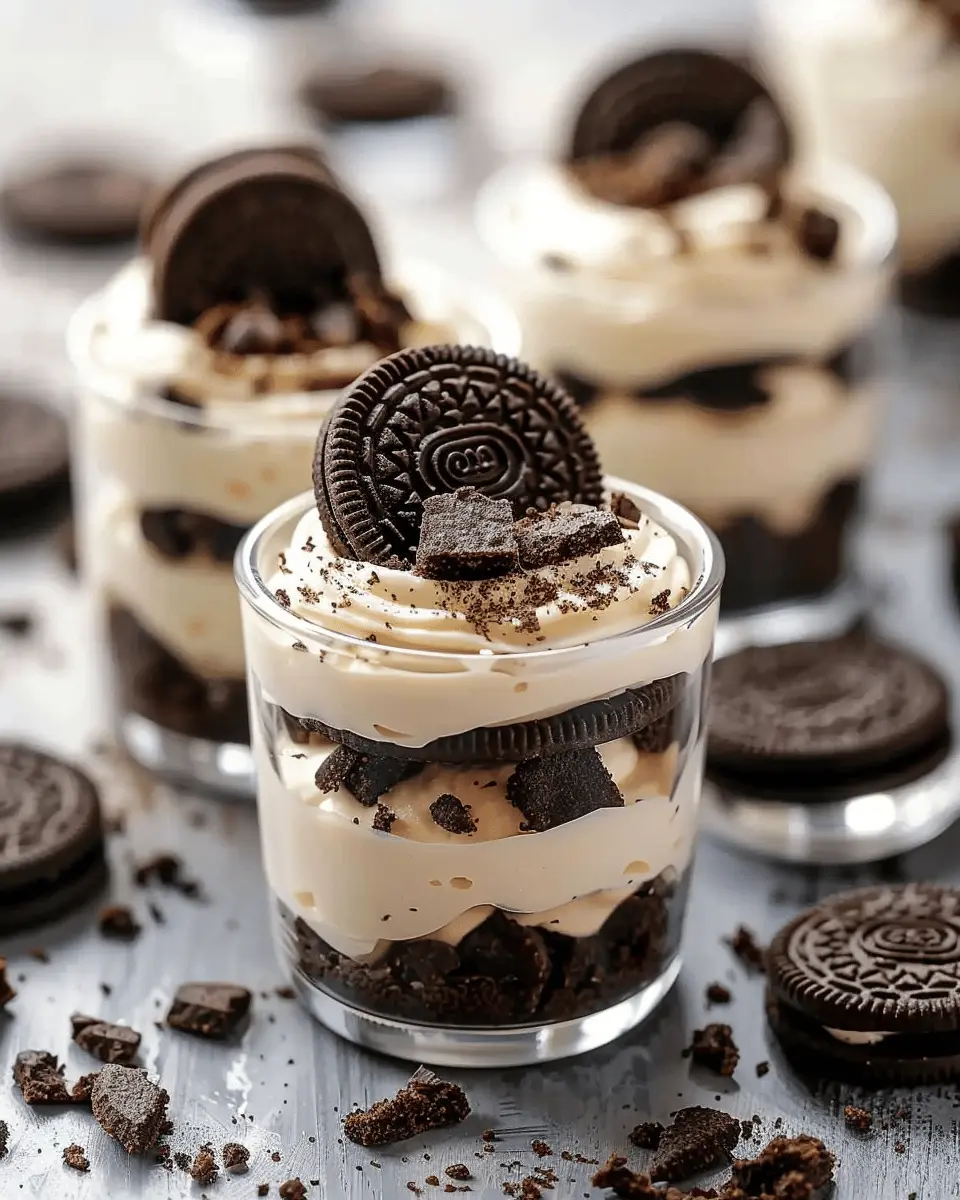
Oreo Dessert Cups: A Sweet Delight for Your Taste Buds
When it comes to quick and satisfying homemade treats, Oreo dessert cups are a game changer. Imagine a delightful concoction that’s not just easy to prepare but also irresistible to eat. These cups blend the rich, creamy taste of Oreo cookies with layers of silky deliciousness, creating a dessert that’s perfect for any occasion, from spontaneous get-togethers to cozy nights in.
Why Oreo Dessert Cups Are a Game Changer for Homemade Treats
First off, why should you consider whipping up these delectable cups? For starters, they’re incredibly versatile. You can customize them based on your favorite flavors, whether you’re in the mood for chocolate, vanilla, or something fruity. Plus, they require minimal ingredients and only a bit of prep time. This makes them a perfect project for young professionals juggling busy schedules.
Here’s what you’ll need to get started:
- Oreo Cookies (crushed, of course!)
- Cream Cheese (to add a rich depth)
- Whipped Topping (for that airy texture)
- Vanilla Extract (a splash goes a long way)
- Chocolate Sauce (for drizzling, if you’re feeling extra)
You simply combine the cream cheese, whipped topping, and vanilla until smooth. Layer them in a cup, alternating with crushed Oreos, and finish off with chocolate sauce. It’s as straightforward as that! You can check out this great resource on layering desserts for some additional inspiration.
But wait—do you know about the healthier options you can incorporate? Swap regular Oreos for gluten-free versions or try a plant-based whipped topping to make these cups suitable for various dietary preferences. That way, everyone can indulge without guilt.
Moreover, these Oreo dessert cups are great for gatherings. They can be prepared ahead of time and refrigerated, allowing you to spend more time enjoying the company. Have fun experimenting with toppings like crushed nuts or sprinkles to add that extra flair—your friends will surely be impressed!
So, are you ready to create this mouthwatering treat? Gather your ingredients, and get ready to impress your taste buds and your guests with these delightful Oreo dessert cups. You’re only a few steps away from the sweet satisfaction you deserve!
Ingredients for Oreo Dessert Cups
Creating Oreo dessert cups is an easy and delightful way to impress your friends or indulge in something sweet. Here’s what you’ll need:
Key Ingredients
- Oreo Cookies: Approximately 20 to 24 cookies serve well as both the crust and flavor backbone.
- Cream Cheese: About 8 ounces, softened, lends a rich creaminess to the filling.
- Whipped Topping: A generous 8-ounce tub of whipped topping creates that fluffy texture everyone loves.
- Sugar: Just a quarter cup helps sweeten the cream cheese mixture perfectly.
- Vanilla Extract: A teaspoon to enhance the overall flavor.
- Chocolate Sauce: For drizzling on top, a quarter cup seals the deal and adds visual appeal!
- Additional Oreo Crumbles: Save a few crushed cookies for garnish.
These ingredients combine just right to give each Oreo dessert cup that irresistible taste. If you’re curious about the science behind ingredient ratios, Food Network offers a great breakdown here.
Are you excited to get started? Let’s make dessert magic happen!
Step-by-Step Preparation of Oreo Dessert Cups
If you’re looking for a sweet treat that’s both indulgent and easy to make, Oreo dessert cups are a fantastic choice. With layers of delicious Oreo crust and a creamy filling, these dessert cups are sure to impress at any gathering. Let’s dive into the simple steps for crafting these delightful treats!
Create the Oreo Crust
The foundation of any great dessert is its crust, and for Oreo dessert cups, that means using crushed Oreos. Here’s how to make it:
- Ingredients Needed:
- 24 Oreo cookies
- 4 tablespoons of melted butter
Instructions:
- Start by placing the Oreo cookies in a sturdy ziplock bag. Use a rolling pin or your hands to crush them into fine crumbs. If you’re feeling fancy, you can even use a food processor for a finer texture—it’s a real time-saver!
- In a mixing bowl, combine the crushed Oreos with the melted butter. Stir until the mixture is well blended and resembles damp sand.
- Divide the crust mixture evenly among your dessert cups. Use the back of a spoon to press the crumbs firmly into the base of each cup. This will hold your layers together while giving a delightful crunch at the bottom!
Whip Up the Creamy Filling
Now that you have a delicious crust, it’s time to create that heavenly creamy filling. This rich and smooth layer perfectly complements the crunch of the Oreo crust.
- Ingredients Needed:
- 8 oz cream cheese, softened
- 1 cup powdered sugar
- 1 teaspoon vanilla extract
- 1 cup whipped cream (or whipped topping)
Instructions:
- In a bowl, beat the softened cream cheese until smooth, making sure there are no lumps.
- Add the powdered sugar and vanilla extract to the cream cheese, mixing thoroughly until fully integrated. This is where the sweetness really starts to shine.
- Gently fold in the whipped cream until the mixture is fluffy and light. Take your time here; you want to keep the air in the whipped cream to ensure your filling is light.
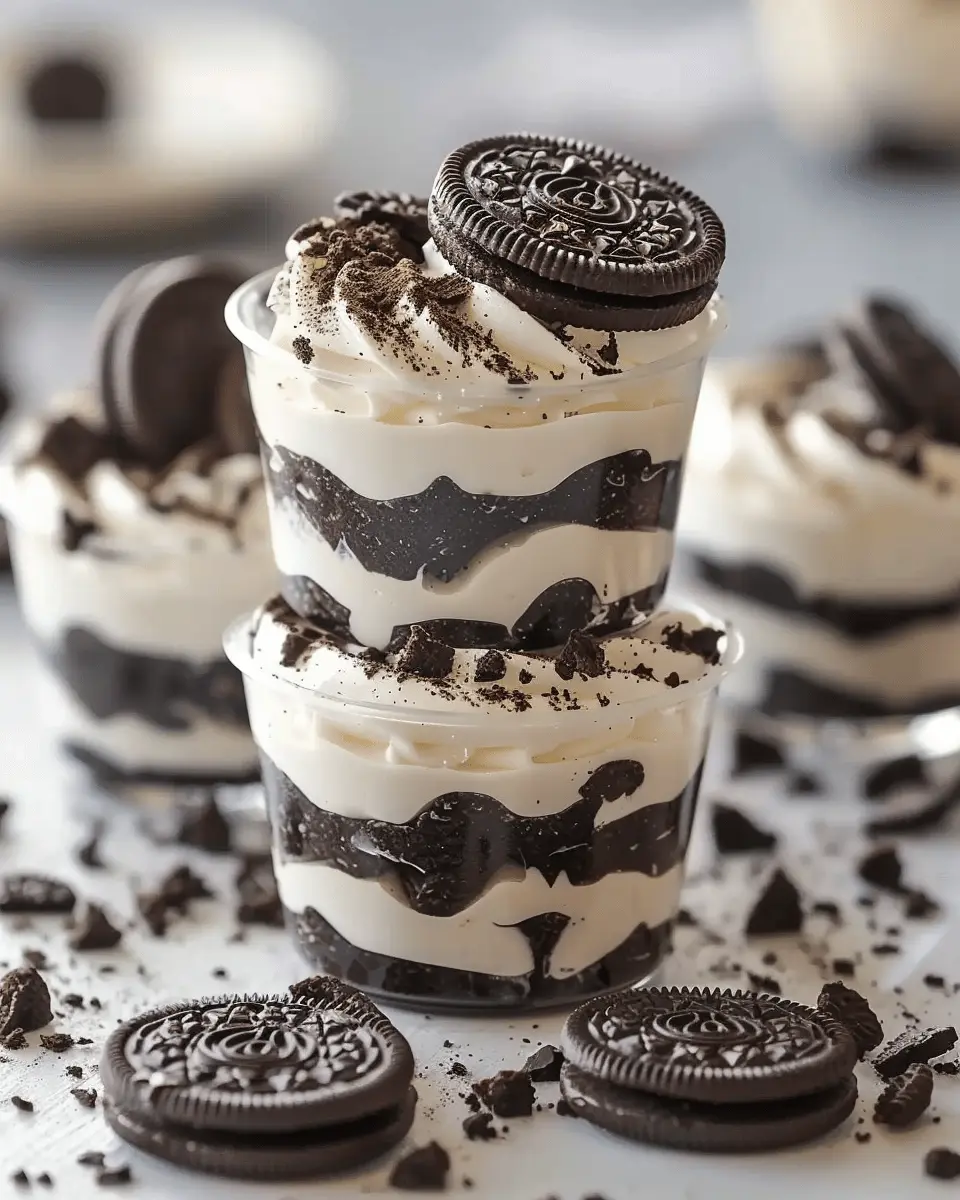
Layer the Ingredients in Your Dessert Cups
With the crust and filling ready, it’s time for the fun part—layering! This step is where your Oreo dessert cups start coming to life.
- Using a piping bag or a spoon, layer the creamy filling over the prepared Oreo crust in each dessert cup. If you want to get fancy, you can even create a swirl pattern!
- Next, add another layer of crushed Oreos on top of the filling for that quintessential Oreo flavor. Don’t be shy; the more layers, the better!
- Repeat the layering process until your cups are filled to your preferred height. A standard two to three layers work well for presentation!
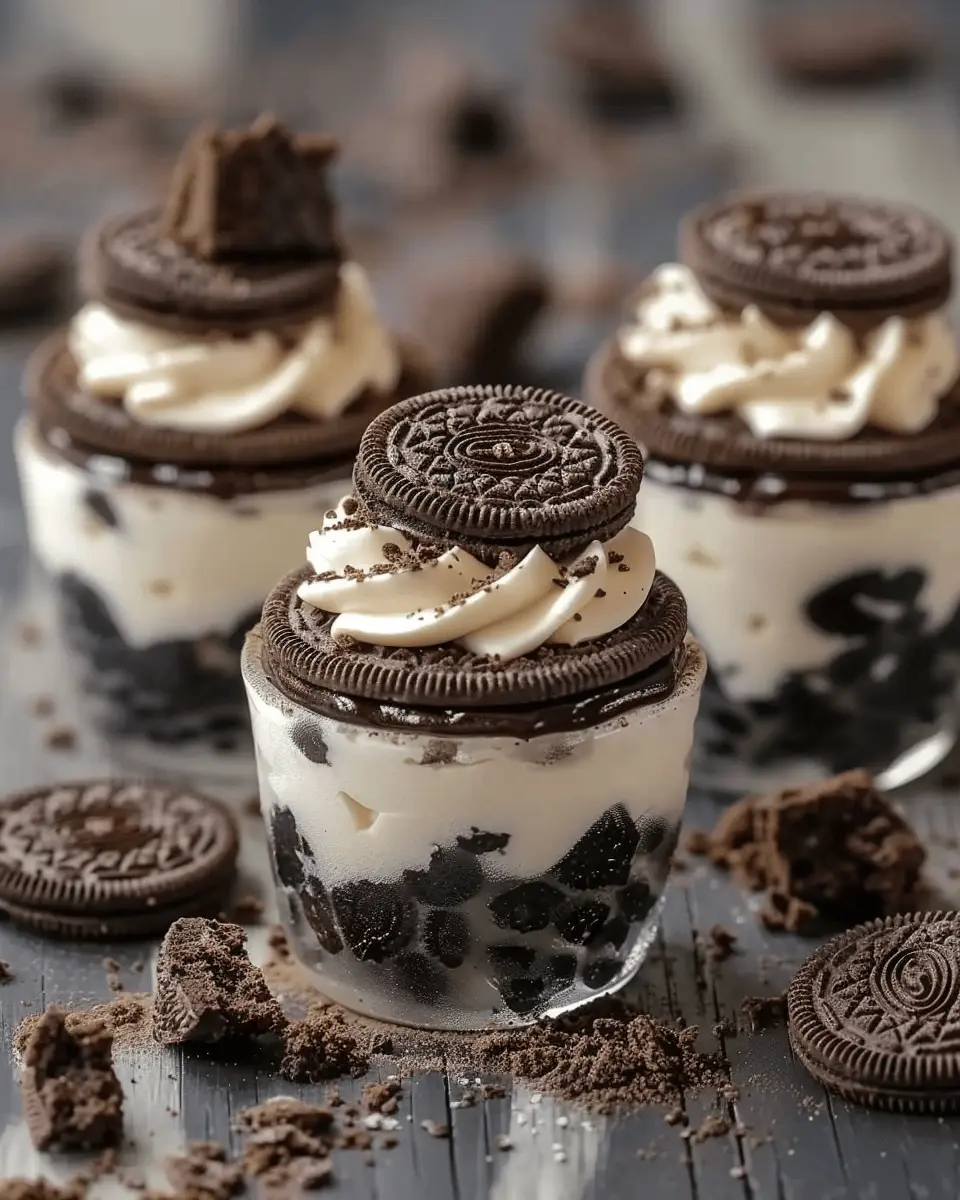
Garnish and Chill Before Serving
You’re almost there! To make your Oreo dessert cups extra special, don’t forget the final touches.
- Consider garnishing with additional whipped cream on top, chocolate shavings, or even some mini Oreo cookies for that wow factor.
- After garnishing, cover your dessert cups with plastic wrap and place them in the refrigerator. Let them chill for at least an hour before serving. Not only does this help meld the flavors together, but it also enhances the overall texture.
Enjoy the anticipation—there’s nothing quite like the moment you reveal a tray of these stunning dessert cups.
These Oreo dessert cups are perfect for any occasion, from casual get-togethers to formal celebrations. For more inspiration on dessert ideas, check out this great resource from The Kitchn. Once you give them a try, you might just find yourself whipping them up for every gathering. Happy baking, and enjoy your delicious creation!
Delicious Variations on Oreo Dessert Cups
When it comes to Oreo dessert cups, the possibilities are virtually endless! Whether you’re hosting a casual gathering or looking to elevate your weeknight treat, these variations will bring new life to your favorite dessert.
Nutty Oreo Dessert Cups
If you’re a fan of texture, why not add some crunch with a nutty twist? For Nutty Oreo Dessert Cups, simply incorporate crushed nuts like almonds, pecans, or hazelnuts into your layers. The pairing of creamy filling with a good dose of crushed nuts creates a delightful contrast that’s sure to impress. You can even sprinkle some on top for extra flair. Consider drizzling with a homemade caramel sauce for an irresistible finish!
Oreo Dessert Cups with Seasonal Fruits
Another fantastic way to upgrade your Oreo dessert cups is by incorporating fresh, seasonal fruits. For a refreshing summer treat, try layered strawberries, blueberries, or even peaches. The juicy sweetness of the fruit balances perfectly with the rich creaminess of the filling. During the fall, consider adding spiced apples or pears to give your dessert a warm, cozy feeling. Not only do fruits add great flavor, but they also provide a pop of color, making your cups visually inviting.
With these variations, you can easily customize your Oreo dessert cups to match your mood or the occasion. Who knew a simple dessert could be the perfect canvas for creativity? Check out resources like Food Network for more dessert ideas, and don’t hesitate to experiment with your favorite flavors. Happy dessert crafting!
Essential Cooking Tips for Oreo Dessert Cups
Creating delicious Oreo dessert cups is a delightful way to impress friends and family. Here are some essential tips to elevate your dessert-making game:
Choose Quality Ingredients
The success of your Oreo dessert cups hinges on fresh, high-quality ingredients. Opt for real cream cheese and rich whipped cream for that creamy texture. Brands like Philadelphia for cream cheese are renowned for their consistency and flavor.
Crushing Oreos Made Easy
Crushing Oreo cookies doesn’t have to be a chore. Use a food processor for a fine crumb, or place the cookies in a zip-top bag and crush them with a rolling pin. This keeps the pieces even and helps with layering in your cups.
Layering like a Pro
When assembling your dessert cups, think about the visual appeal. Alternate layers of crushed Oreos, cream mixture, and perhaps even chocolate drizzle. This not only looks gorgeous but also adds various flavors with every bite—perfect for impressing guests!
Mind the Chilling Time
Allow your Oreo dessert cups to chill for at least two hours before serving. This will help the flavors meld beautifully, enhancing the overall taste.
For more insights on creating mouth-watering desserts, check out Bon Appétit for tips on flavor pairings and presentation.
With these tips, your Oreo dessert cups will be the talk of the party!
Serving Suggestions for Oreo Dessert Cups
When it comes to serving Oreo dessert cups, presentation can elevate your dessert from simple to spectacular. Here are some delightful ideas to enhance your serving game.
Toppings Galore
Feel free to get creative with toppings! Here are a few of my favorites:
- Crushed Oreo cookies for that extra crunch.
- Whipped cream for a light, airy texture.
- A drizzle of chocolate or caramel sauce for a touch of sweetness.
Fun Variations
Why not switch things up? Consider layering the cups with:
- Fresh berries like strawberries or raspberries for a burst of flavor and color.
- Chopped nuts for a nutty crunch.
- Sliced bananas for a creamy addition that complements the Oreo flavor.
Serving for Gatherings
Whether it’s a casual get-together or a special occasion, these Oreo dessert cups are sure to impress:
- Serve in individual cups to make it easy for guests to grab and enjoy.
- Arrange in a decorative tiered stand for a stunning display.
- Pair with a rich hot chocolate or coffee to balance the sweetness.
For more dessert inspiration, check out websites like Food Network or AllRecipes for similar recipes and serving ideas!
Time Breakdown for Making Oreo Dessert Cups
Preparation Time
Getting started with your Oreo dessert cups is a breeze! You’ll need approximately 15 minutes to gather your ingredients and whip everything together. This includes crushing those delightful Oreos and mixing up the creamy filling.
Chilling Time
Once you’ve assembled your cups, it’s time for a little patience. Let your creation chill in the fridge for about 2 hours. This step is crucial for allowing the flavors to meld beautifully.
Total Time
In total, you’re looking at around 2 hours and 15 minutes from kitchen to table. Sound manageable? Trust me, the end result is totally worth the wait! Plus, serving these cups is always a crowd-pleaser. For even more dessert ideas, check out Food Network’s dessert section.
With just a bit of effort and some chilling time, you’ll have an indulgent treat that’s perfect for parties or just a cozy night in!
Nutritional Facts for Oreo Dessert Cups
When indulging in Oreo dessert cups, it’s good to know what you’re treating yourself to. Here are some quick nutritional insights to keep you informed while still enjoying this delicious treat.
Calories
A single Oreo dessert cup typically contains around 250-300 calories, depending on how generously you layer those ingredients! If you’re keeping an eye on your intake, it’s a good idea to consider portion sizes.
Sugar Content
These delightful cups have a sugar content ranging from 20 to 28 grams per serving. While sweet flavors are a hallmark of any dessert, you might want to balance your intake throughout the day. For a closer look at daily sugar recommendations, check out the guidelines from the American Heart Association.
Protein
You can expect each cup to provide about 3-5 grams of protein. While this isn’t a significant source, pairing your Oreo dessert cup with a protein-rich snack could round out your treat time nicely. If you’re curious about boosting the nutritional value of desserts, consider adding Greek yogurt as a creamy layer in your Oreo dessert cups!
Whether you’re making these for a gathering or a cozy night in, having a handle on the nutritional breakdown can enhance your enjoyment of this sweet treat!
Frequently Asked Questions about Oreo Dessert Cups
Can I make these dessert cups ahead of time?
Absolutely! One of the beautiful things about Oreo dessert cups is their flexibility. You can prepare the components ahead of time and combine them just before serving. This ensures that everything maintains its perfect consistency and taste. For the best results, layer the ingredients in cups and keep them chilled in the refrigerator for up to 24 hours. Just remember to keep the whipped cream separate if you prefer it to stay fresh and fluffy.
What can I substitute for cream cheese?
If you’re looking to switch things up or have a dietary restriction, there are several delicious alternatives to cream cheese. Here are a few options:
- Greek Yogurt: This offers a tangy flavor and creamy texture, plus it adds some extra protein.
- Mascarpone Cheese: It’s rich and creamy, making it a luxurious substitute.
- Silken Tofu: Blend it until smooth for a dairy-free option that’s still creamy.
Each of these substitutes will bring a unique flavor profile to your Oreo dessert cups, so feel free to experiment!
How do I store leftover Oreo Dessert Cups?
To keep your Oreo dessert cups fresh, simply cover them with plastic wrap or store them in an airtight container. They can be kept in the fridge for up to three days. Just keep in mind that the texture of some ingredients, like whipped cream, may change over time. If the whipped cream loses its fluffiness, you can always add a fresh layer before serving.
If you’re looking for more tips on storing desserts, you might find this food storage guide handy. Enjoy creating your Oreo dessert cups!
Final Thoughts on Oreo Dessert Cups
Creating Oreo dessert cups is not just a recipe; it’s an experience that brings joy to any gathering. These cups are versatile, allowing you to customize them with your favorite flavors to make them uniquely yours. Whether you’re celebrating a birthday or just treating yourself after a long week, these sweet delights are perfect for any occasion.
Consider pairing your dessert cups with a refreshing drink, like iced coffee or homemade lemonade, to balance the sweetness. If you’re feeling adventurous, try adding a layer of fresh fruit for a pop of color and freshness. Remember, the key to success lies in enjoying the process—so get creative and have fun!
PrintOreo Dessert Cups: Easy Indulgence for Any Sweet Tooth
Delight in these Oreo Dessert Cups, a simple yet luxurious treat perfect for satisfying any sweet tooth.
- Prep Time: 15 minutes
- Cook Time: 0 minutes
- Total Time: 2 hours 15 minutes
- Yield: 4 servings 1x
- Category: Desserts
- Method: No-Bake
- Cuisine: American
- Diet: Vegetarian
Ingredients
- 1 package Oreo cookies
- 1 cup cream cheese, softened
- 1 cup heavy cream
- 1/2 cup powdered sugar
- 1 teaspoon vanilla extract
- 1/4 cup chocolate syrup
Instructions
- Crush the Oreo cookies into small pieces and set aside.
- In a bowl, beat the cream cheese and powdered sugar until smooth.
- In another bowl, whip the heavy cream until stiff peaks form.
- Fold the whipped cream into the cream cheese mixture gently.
- Layer the crushed Oreos and cream mixture in dessert cups.
- Drizzle with chocolate syrup.
- Refrigerate for at least 2 hours before serving.
Notes
- For added crunch, reserve some crushed Oreos to sprinkle on top before serving.
- This dessert can be made a day in advance for convenience.
Nutrition
- Serving Size: 1 cup
- Calories: 320
- Sugar: 28g
- Sodium: 200mg
- Fat: 22g
- Saturated Fat: 12g
- Unsaturated Fat: 8g
- Trans Fat: 0g
- Carbohydrates: 30g
- Fiber: 1g
- Protein: 3g
- Cholesterol: 70mg
Keywords: Oreo Dessert Cups, easy dessert, sweet indulgence