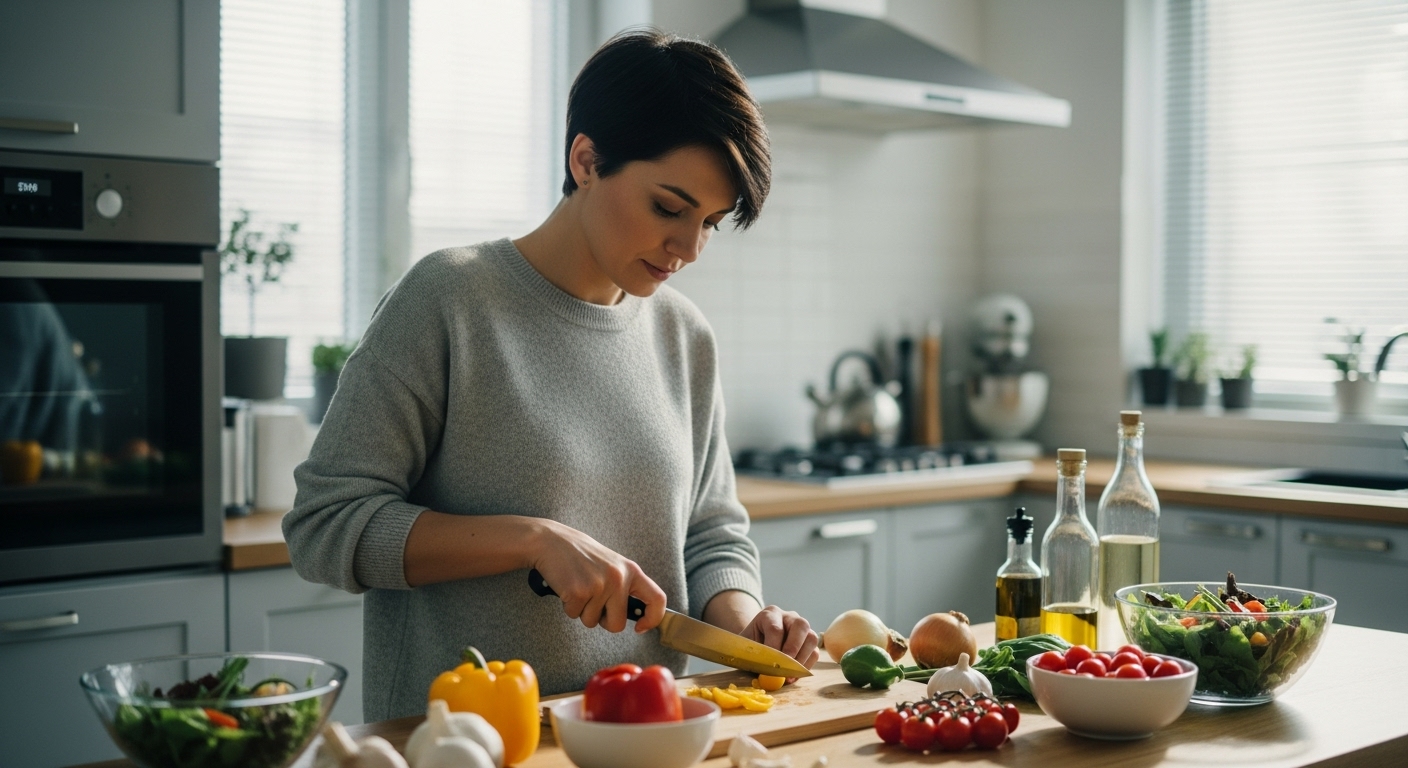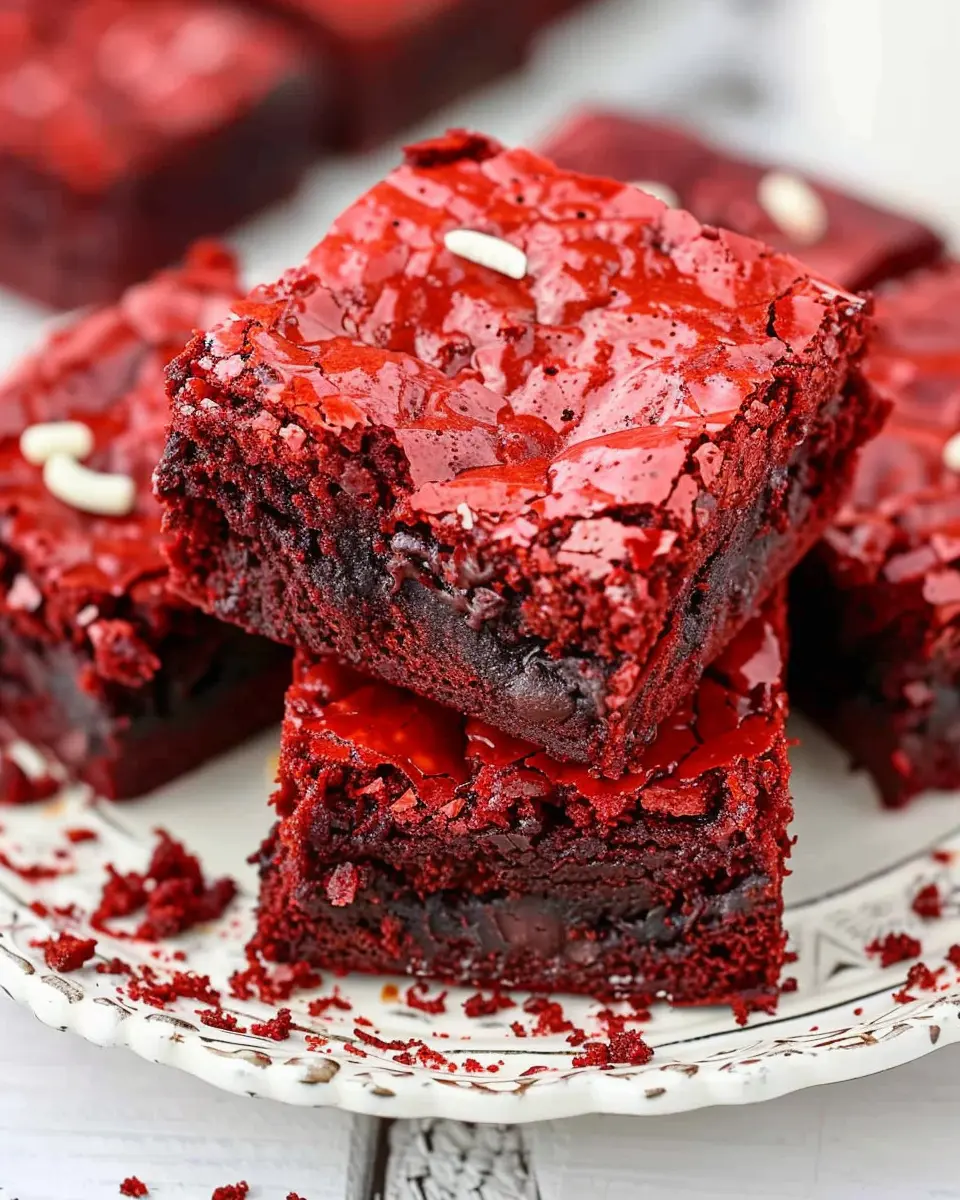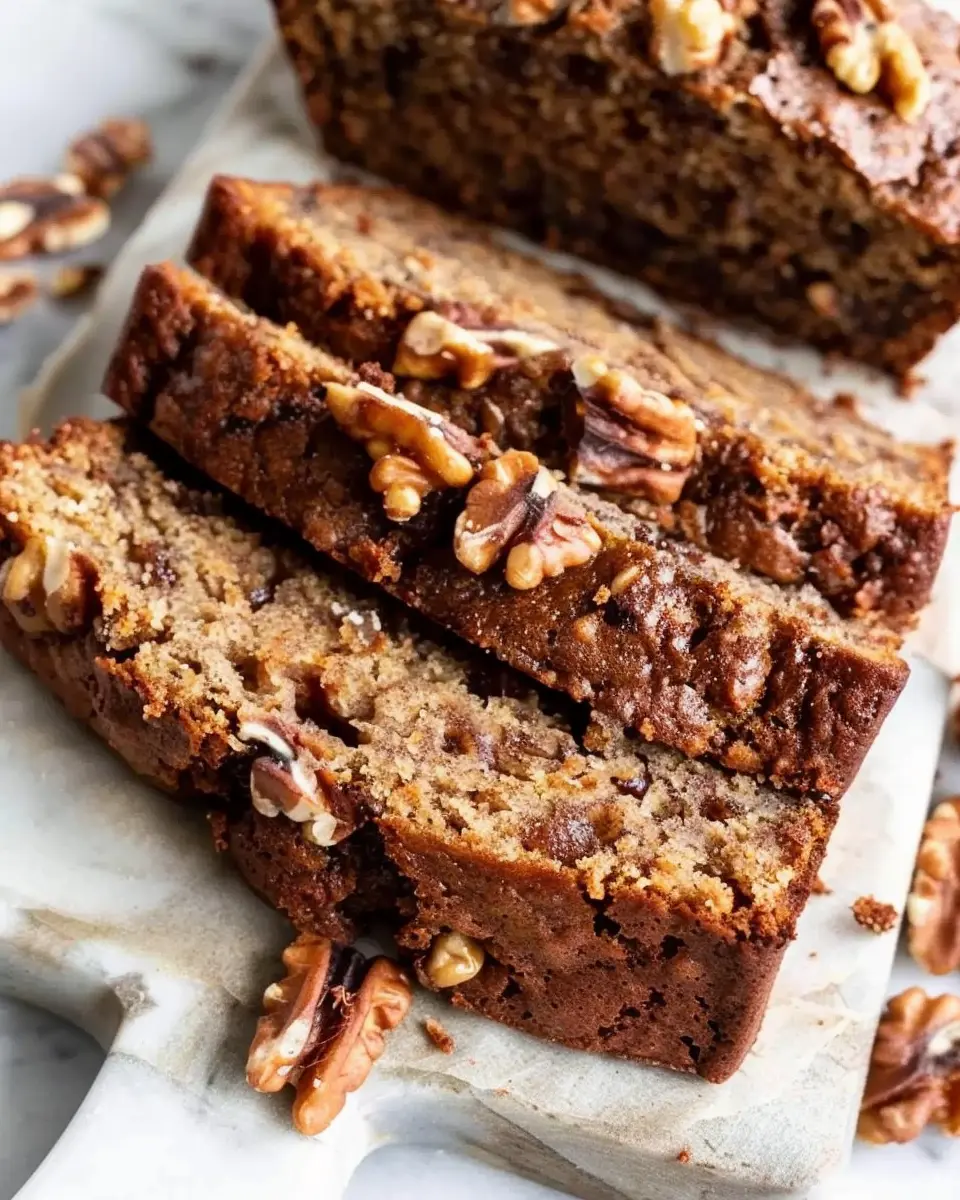
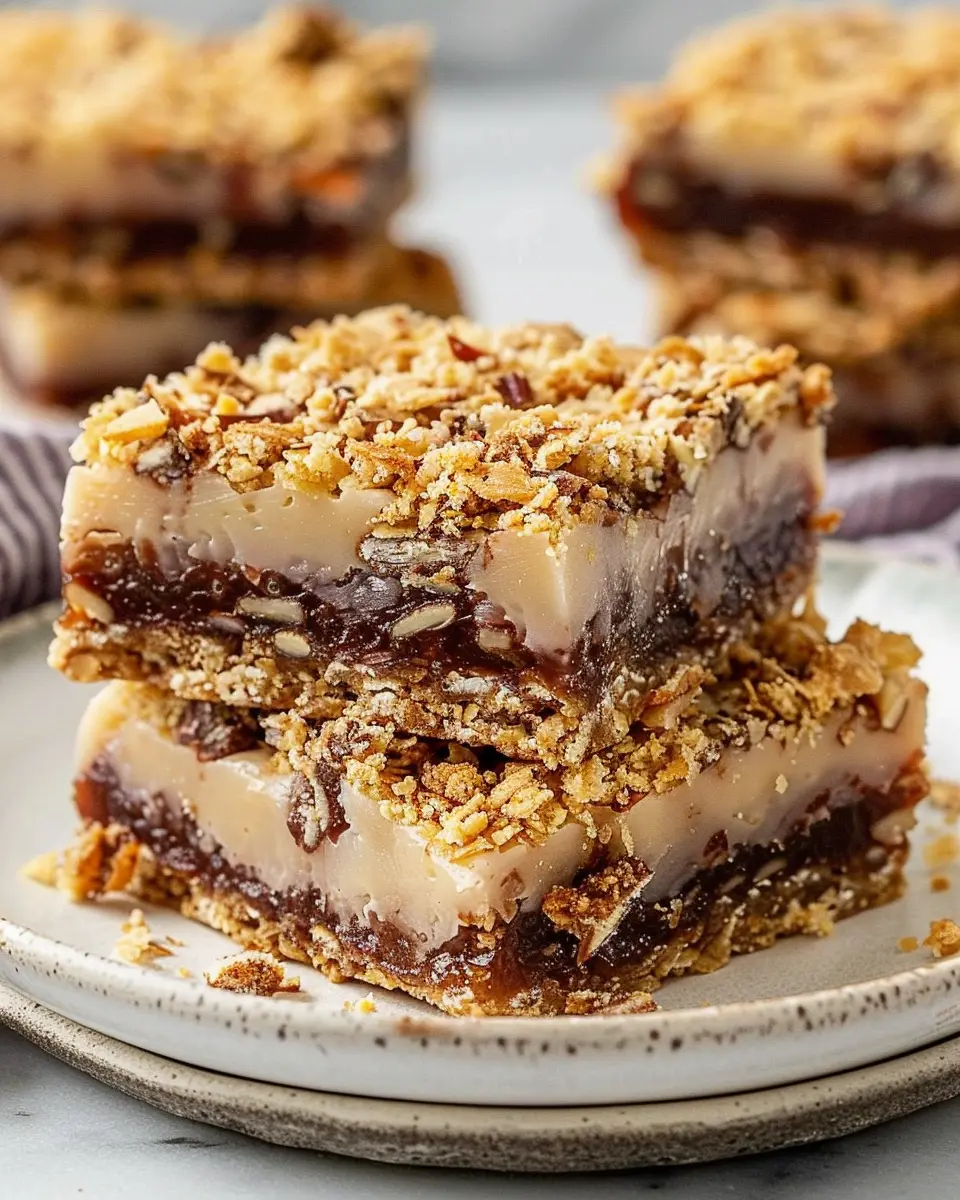
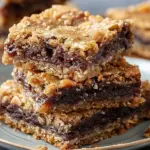
Introduction to Homemade Bars Recipe
When it comes to snacking, finding the right balance between delicious and nutritious can be quite the challenge. That’s where homemade bars come in! Not only are they easy to make, but they’re also customizable to suit your taste preferences and dietary needs. Plus, they’re a fantastic alternative to store-bought options that often contain unnecessary additives and preservatives.
Why Homemade Bars are a Game-Changer for Your Snack Time
Imagine this: you’re in the middle of a hectic workday, and your energy is plummeting. Instead of reaching for those sugary snacks that leave you feeling sluggish, you whip out a homemade bar packed with wholesome ingredients. Homemade bars are not just a snack; they’re a game-changer. Here are a few reasons why:
-
Control Over Ingredients: When you make your own bars, you have complete control over what goes into them. Want to add more protein? Go for it. Prefer to sweeten with honey instead of refined sugar? Absolutely! You can create a bars recipe that perfectly aligns with your dietary preferences.
-
Cost-Effective: Purchasing pre-made snacks can become pricey, especially if you opt for high-quality options. Making your own bars at home saves you money, and you can create larger batches to last throughout the week.
-
Endless Variety: From oat and nut bars to fruit and chocolate combinations, the variations are nearly endless. Feeling adventurous? Try adding ingredients like turkey bacon or coconut for a unique twist.
Studies have shown that people who prepare their meals at home tend to eat healthier overall. By preparing your snacks, you foster a healthier relationship with food (source: Harvard Health).
Personal Tip: I often whip up a batch of these bars over the weekend. It’s a fun activity, and having a healthy snack option ready to go is a game-changer for my busy weekday schedule. Plus, they make great on-the-go options for brunch with friends or quick breakfast fuel.
In summary, homemade bars are an excellent addition to any snacking routine. They are nutritious, satisfying, and, best of all, easy to customize. So, grab your favorite ingredients, and let’s dive into some fantastic bars recipes that you can enjoy anytime!
Ingredients for Homemade Bars Recipe
Essential Components for Delicious Bars
When embarking on your Bars Recipe adventure, having the right ingredients is crucial for achieving that perfect blend of texture and flavor. Here’s what you’ll need:
-
Base Ingredients: Start with rolled oats or graham cracker crumbs for that hearty texture. Combine these with a binding agent, like honey or maple syrup, which adds sweetness and moisture.
-
Nutritious Add-Ins: Explore options such as nuts, seeds, and dried fruits. Almonds and cranberries are popular choices that contribute flavor and nutritional benefits, thanks to their healthy fats and antioxidants.
-
Flavor Enhancers: Don’t forget to add a sprinkle of cinnamon or a touch of vanilla extract. These ingredients make every bite a little more irresistible.
Baking Tools You’ll Need
To whip up your bars, a few essential tools will make the process smoother and more enjoyable:
-
Mixing Bowl: A medium or large bowl will help combine all those ingredients effortlessly.
-
Baking Pan: A square or rectangular baking dish lined with parchment paper is perfect for easy removal and slicing.
-
Spatula or Spoon: For mixing and spreading the batter evenly in your pan.
If you’re itching for more details on perfecting your homemade bars, check out resources from sites like Food Network or Allrecipes, which offer a wealth of tips and variations to explore!
Step-by-step Preparation of Homemade Bars Recipe
Creating your own homemade bars is not only satisfying but also allows you to customize the ingredients to fit your taste and dietary preferences. Whether you’re looking for a sweet treat or a quick snack, these simple steps will guide you in making delicious bars right in your kitchen.
Preheat Your Oven
The first step in any baking adventure is to preheat your oven. This ensures that your bars will cook evenly and attain that perfect golden-brown color. Set your oven to 350°F (175°C), and while it heats, you can gather your ingredients and prepare your baking pan. It’s always a good idea to preheat your oven first to avoid any unexpected delays during the baking process.
Prepare Your Baking Pan
Now that your oven is warming up, let’s focus on the baking pan. A 9×13 inch pan works perfectly for making bars. Here’s what you need to do:
- Grease the pan: Use a bit of unsalted butter or non-stick spray so your bars won’t stick when you try to cut them.
- Line with parchment paper: For an added layer of convenience, cut a piece of parchment paper large enough to line the bottom (and up the sides, if desired). This makes it super easy to lift your bars out after baking.
By taking these steps, you ensure that cleanup is quick and your bars come out perfectly shaped.
Mix the Dough
With the oven preheated and your baking pan ready, it’s time to whip up the dough for your bars. You can customize it with your favorite add-ins, but here’s a simple base recipe to follow:
- In a large mixing bowl, combine 1 cup of melted butter, 1 cup of brown sugar, and 1 cup of white sugar.
- Stir in 2 large eggs and 1 teaspoon of vanilla extract (or almond extract if you’re feeling adventurous).
- Next, sift in 2 cups of all-purpose flour, 1 teaspoon of baking powder, and 1/2 teaspoon of salt. Combine well until you have a smooth mixture.
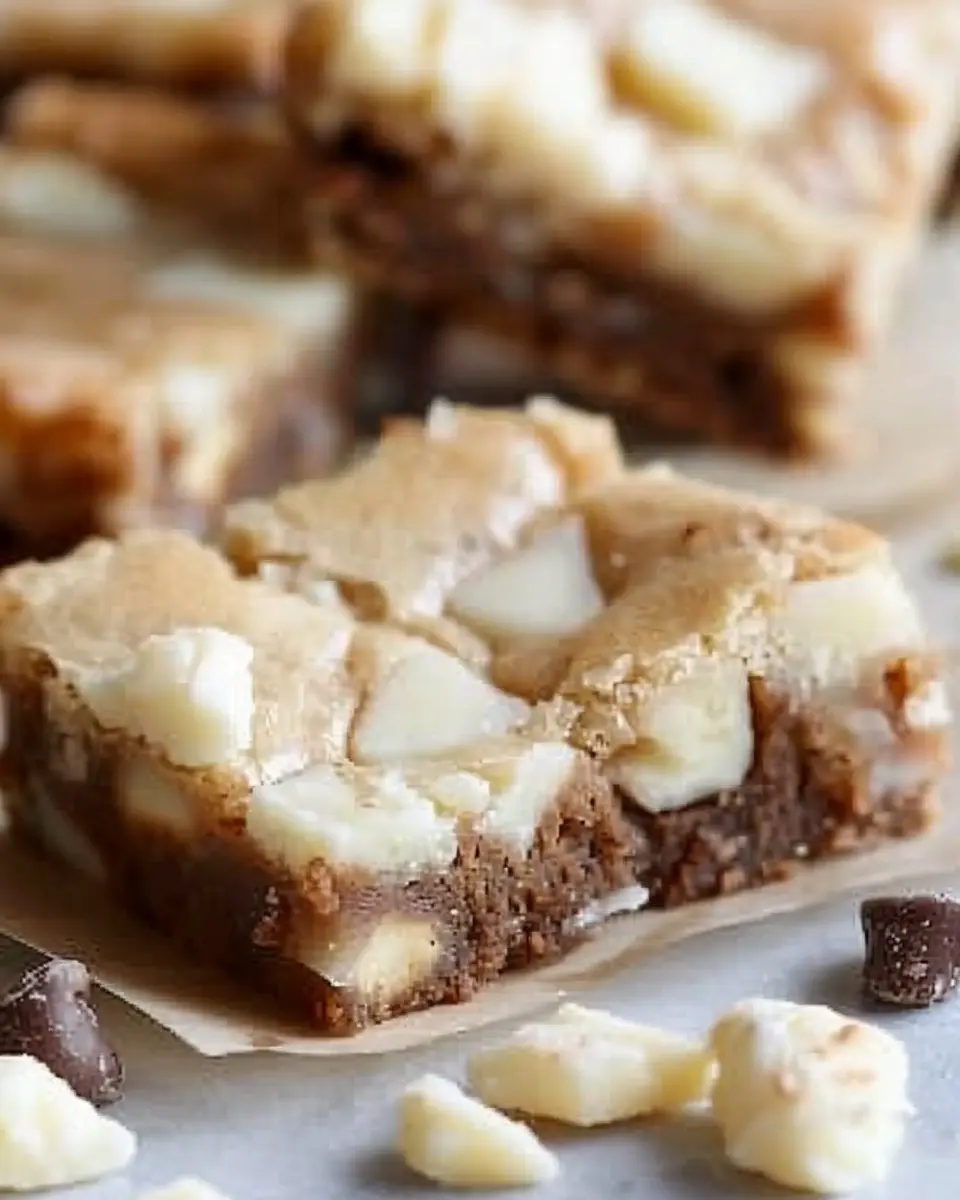
- Feel free to fold in chocolate chips, nuts, or dried fruits to elevate your bars.
This dough is versatile; the beauty of a bars recipe lies in its ability to let you get creative!
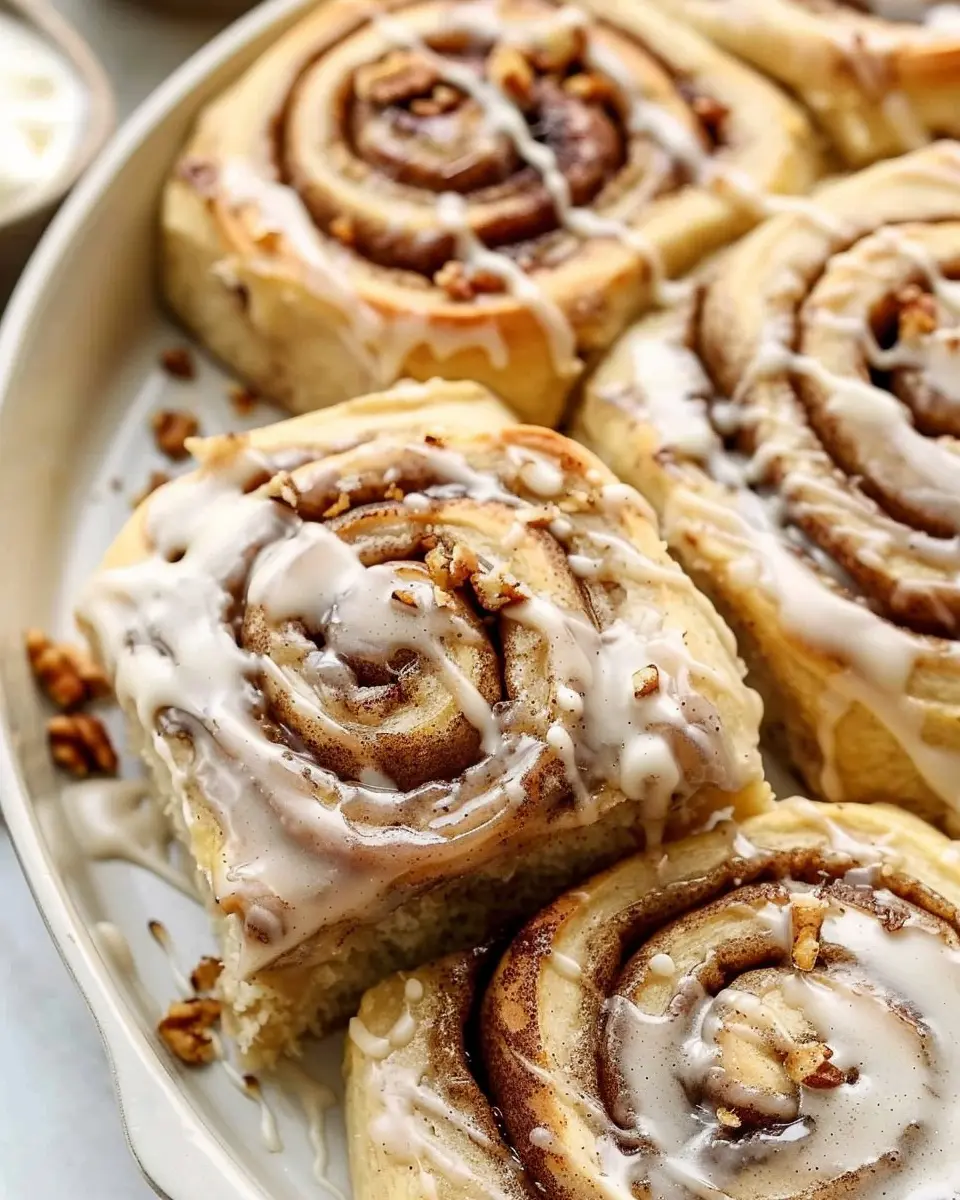
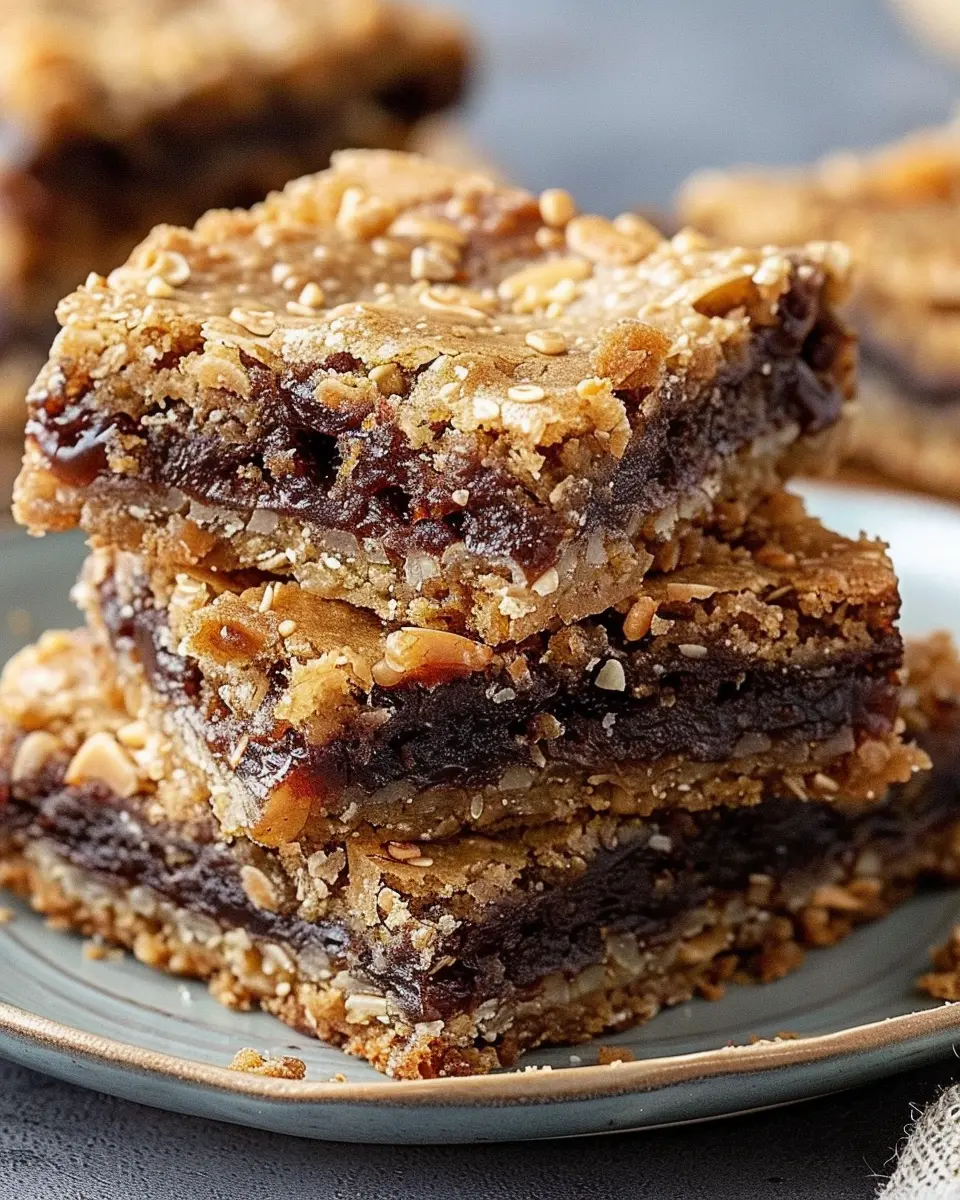
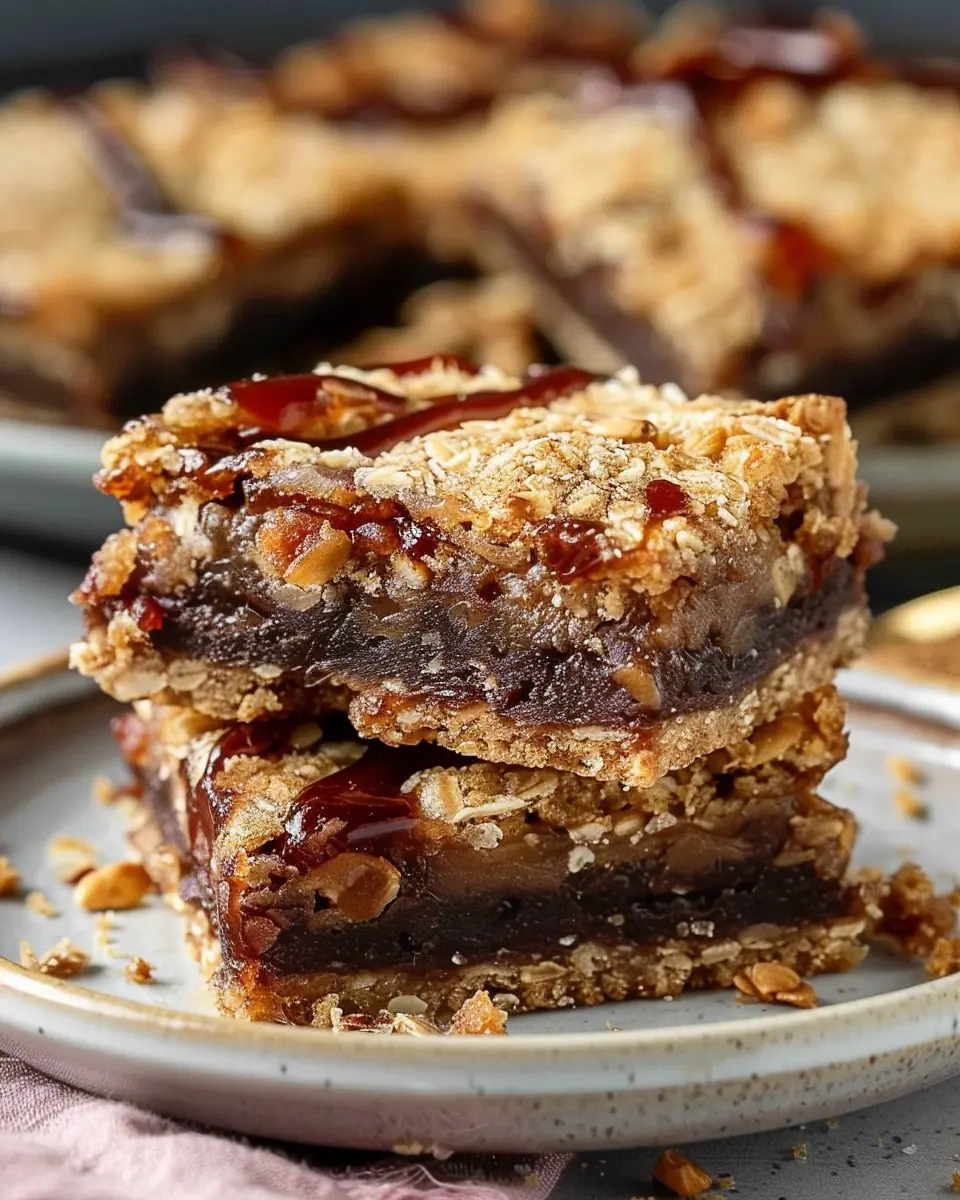
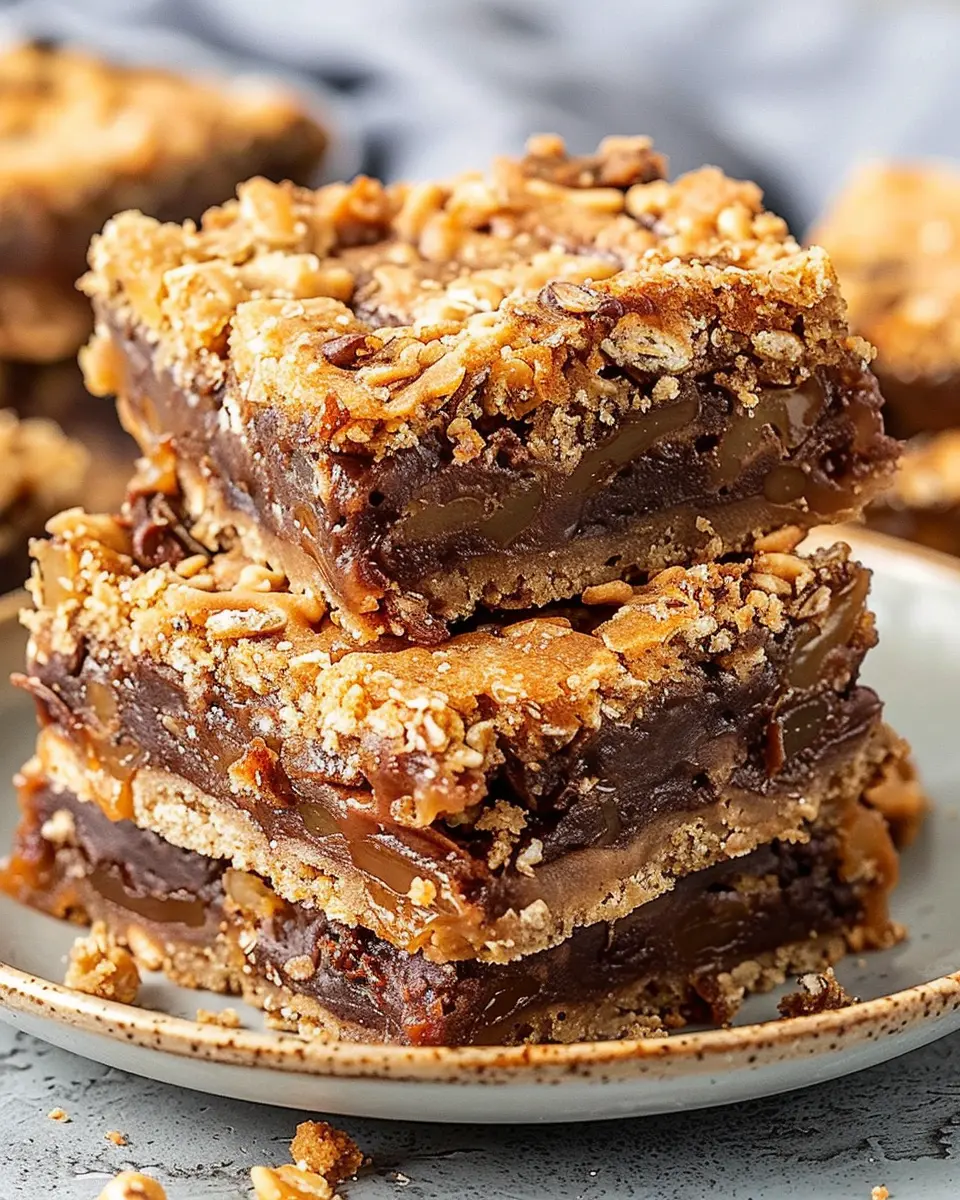
Layer the Caramel and Dough
Now comes the fun part. If you want to add a delicious caramel layer (and honestly, who wouldn’t?), here’s how:
- Prepare your caramel by melting 1 cup of caramel candies with 1 tablespoon of water in a saucepan over low heat, stirring until smooth.
- Take half of your dough mixture and spread it evenly in your prepared baking pan.
- Pour the warm caramel over this bottom layer and spread it evenly.
- Finally, crumble the remaining dough over the caramel to form a topping.
This layering method not only enhances flavor but adds texture, making your bars irresistibly tasty!
Bake Your Bars
Place the pan in your preheated oven and bake for approximately 25 to 30 minutes. You want the edges to be golden and a toothpick should come out with a few crumbs—not completely clean, as that might indicate overcooking.
While they’re baking, the kitchen will fill with a delightful aroma that’ll have everyone eagerly awaiting their moment to shine. Baking at home is truly a treat for all senses!
Cool and Cut Your Bars
After your bars are out of the oven, it’s vital to let them cool completely in the pan. This could take about 30 minutes to an hour. Patience is key here; cutting them too soon might lead to a messy result.
- Once cooled, use the parchment paper to lift the entire batch out of the pan.
- Place it on a cutting board and cut into squares or rectangles, whichever size you prefer.
Enjoying these homemade bars is a perfectly delightful way to treat yourself or share with friends.
Incorporating homemade snacks into your routine doesn’t just enhance your diet; it can save you money and allow you to avoid added preservatives. Want to dive deeper into creating your own unique flavor profiles? Check out resources available from organizations like the American Association of Cereal Chemists for some science fun behind your favorite foods!
Conclusion
By following these steps, you can master the art of making your own bars at home. It’s a fun, rewarding process, and you’ll be amazed at how easily you can create something delicious. Try playing around with different flavor combinations; the possibilities are endless! Happy baking!
Variations on Homemade Bars Recipe
Creating your own bars at home can be a fun experiment in the kitchen. Let’s explore some delightful variations that cater to different dietary needs and seasonal inspirations!
Nut-Free Options
If you’re looking for a nut-free bars recipe, consider substituting nuts with seeds such as sunflower or pumpkin seeds. These not only add a pleasant crunch but are also rich in healthy fats and proteins. You might also want to try rolled oats as the base instead of nut flours. A combination of dates and dried fruits can enhance the sweetness and provide essential vitamins. For more detailed recipes, check out SnackNation for ideas that fit a nut-free diet.
Vegan Alternatives
For vegan enthusiasts, swapping traditional ingredients for plant-based options is straightforward. Use maple syrup or agave nectar as a sweetener, and coconut oil instead of butter. Instead of dairy, try using almond or oat milk to bind the ingredients. If you’re missing the texture provided by eggs, consider using flaxseed meal mixed with water as an egg substitute. These changes can yield delicious, guilt-free bars that everyone will love—check out Minimalist Baker for some tasty vegan treats.
Seasonal Flavor Ideas
Getting creative with flavors can make your bars even more exciting! Think about infusing your recipe with seasonal fruits such as pumpkin in the fall or berries during summer. Adding spices like cinnamon or nutmeg can bring warmth and excitement, while incorporating citrus zest can provide a refreshing twist. Whether you’re making a pumpkin spice bar for the holidays or a lemon blueberry bar, the options are endless! Consider browsing Food52 for more seasonal inspirations.
Making these variations not only complements your personal taste but also allows you to cater to friends and family with specific dietary needs. Happy snacking!
Cooking Tips and Notes for Homemade Bars Recipe
Tips for Perfect Caramel Layers
Getting that perfect caramel layer in your Bars Recipe can be a game-changer. Here are some tips:
- Use a Candy Thermometer: This helps ensure that your caramel reaches the correct temperature for that perfect chewy texture.
- Stir Constantly: Stir the mixture as it cooks to prevent burning and ensure even coloring.
- Let It Cool: Allow the caramel to cool slightly before pouring it over the base. This helps it set better without running.
The Importance of Chilling Your Bars
Chilling your bars is crucial for several reasons:
- Easier to Slice: Cold bars hold their shape and make cutting into squares much more manageable.
- Flavor Development: Allowing the bars to chill can enhance the flavors as they meld together. Trust me, it’s worth the wait!
- Texture Matters: A chilled bar has a firmer texture, providing a delightful contrast between the layers.
Consider this step a treat for your tastebuds—be patient, and enjoy your homemade creation! For more baking tips, check out King Arthur Baking.
Serving Suggestions for Homemade Bars Recipe
Pairing with Fresh Fruits
Nothing elevates your homemade bars quite like the addition of fresh fruits! They not only enhance the flavor but also bring a burst of color to your plate. Here are some fantastic combinations:
- Berries: Raspberries or blueberries pair beautifully with nutty flavors and can add a refreshing zing.
- Bananas: Sliced bananas complement sweet bars, providing a creamy texture that balances crunch.
- Apples: For a crunchier twist, consider diced apples. They add moisture and subtle sweetness.
When serving, think about creating a fruit platter alongside your bars. This not only offers variety but also encourages your guests to enjoy a balanced treat.
Ideal Beverages to Complement Your Bars
The right beverage can really set the mood when enjoying your bars recipe. Here are a couple of ideas:
- Herbal Tea: A soothing chamomile or mint tea can beautifully complement the flavors of your bars, offering a calming effect.
- Sparkling Water: Add a splash of citrus for a refreshing fizzy drink. It’s an excellent palate cleanser!
These selections not only enhance the experience but also ensure that your treat feels sophisticated yet accessible, perfect for any gathering! For more beverage ideas, check out this guide.
With these serving suggestions, your homemade bars will surely wow friends and family alike!
Time Breakdown for Homemade Bars Recipe
Preparation Time
Getting started on your Bars Recipe is a breeze! You’ll typically need about 15–20 minutes to gather your ingredients, prepare your baking dish, and mix everything together. Make sure to have all your ingredients on hand; a well-organized kitchen can make this even quicker!
Baking Time
Once your mixture is in the oven, let it bake for approximately 25–30 minutes. You’ll want to keep an eye on those delicious bars as they start to turn golden brown. The aroma wafting through your kitchen will be hard to resist!
Cooling Time
After baking, patience is key! Allow your bars to cool completely in the pan for at least 30 minutes. This cooling period helps them firm up, making slicing easier. Pro tip: You can place them in the fridge for a quicker chill!
For more helpful tips on baking times and techniques, check out Baking Basics. These time estimates should help you plan your day deliciously!
Nutritional Facts for Homemade Bars Recipe
Caloric Breakdown per Serving
When you whip up your own homemade bars, understanding the caloric breakdown can help you enjoy them guilt-free. Each serving typically contains around 200-250 calories, depending on the ingredients and portion size.
- Base Ingredients: Nuts, oats, and natural sweeteners contribute a hearty chunk of the calories.
- Add-Ins: Extras like chocolate chips or dried fruit can boost the calorie count, so tailor them to your dietary preferences!
Overview of Key Nutrients
This Bars Recipe packs a punch with essential nutrients that contribute to a balanced diet:
- Protein: Depending on the nut variety used, you can get up to 6g of protein per bar, ideal for muscle recovery.
- Fiber: With ingredients like oats, you can expect about 3g of dietary fiber, promoting digestion and keeping you full longer.
- Healthy Fats: Nuts provide heart-healthy fats that are great for energy.
For more information on daily nutritional values, check out resources like the USDA FoodData Central for comprehensive details. It’s a great tool to help you make tailored decisions about your snacks!
Remember, the beauty of homemade bars lies in their versatility and the control you have over the ingredients—making it easier to fit them into your healthy lifestyle. What flavors will you experiment with next?
FAQ about Homemade Bars Recipe
Can I substitute ingredients?
Absolutely! One of the best things about a bars recipe is its versatility. If you don’t have certain ingredients on hand or are looking for healthier options, you can easily swap or omit items. For example, instead of oats, you could try using quinoa flakes or almond flour for a gluten-free version. If you’re out of honey, agave syrup works just as well. Want to add some crunch? Toss in some nuts or seeds, but bear in mind any allergies. Feel free to explore! For more substitution ideas, check out this helpful guide.
How do I store leftover bars?
Storing your delicious homemade bars is simple. Wrap them individually in parchment paper or plastic wrap to keep them fresh longer, then store them in an airtight container. They can stay at room temperature for a few days, but if you want to keep them for a week or longer, refrigeration is your best bet. You can even freeze them for up to three months—just be sure to layer them with parchment paper to prevent sticking.
What’s the best way to enhance flavors?
To take your bars recipe to the next level, consider adding spices like cinnamon or nutmeg, or a splash of vanilla extract. You can also play around with add-ins like dried fruit, chocolate chips, or even a sprinkle of sea salt on top for that sweet-and-salty vibe. Each addition elevates the overall flavor profile, turning a good bar into something truly special. Experiment with what you love, and don’t hesitate to share your discoveries!
Getting creative in the kitchen can be fun and rewarding. Happy baking!
Conclusion on Homemade Bars Recipe
Final Thoughts on Creating Your Own Delicious Bars
In crafting your own bars recipe, the possibilities are endless. Homemade bars not only allow you to customize flavors and ingredients but also let you control what goes into them. This means you can craft delightful treats that are free from preservatives and artificial additives.
Consider experimenting with different bases, such as oats or nut butters, to find your perfect combination. Feel free to incorporate ingredients like turkey bacon or chicken ham for a savory twist.
As you refine your bar-making skills, you’ll find that sharing them with friends and family becomes a delightful way to bond over delicious creations. Don’t forget to check out resources like The Kitchn for inspiration and tips!
PrintBars Recipe: Indulgent Homemade Treats Your Family Will Love
Indulge in homemade bars that are perfect for family gatherings and snacks. Easy to make and deliciously rich, these bars are sure to be a hit!
- Prep Time: 15 minutes
- Cook Time: 30 minutes
- Total Time: 45 minutes
- Yield: 16 bars 1x
- Category: Desserts
- Method: Baking
- Cuisine: American
- Diet: Vegetarian
Ingredients
- 2 cups graham cracker crumbs
- 1 cup melted butter
- 1 cup sugar
- 1 cup chocolate chips
- 3 large eggs
- 1 teaspoon vanilla extract
- 1/2 cup chopped nuts
Instructions
- Preheat the oven to 350°F (175°C).
- In a bowl, mix the graham cracker crumbs with melted butter and press into a greased baking dish.
- In another bowl, beat together the sugar, eggs, and vanilla extract.
- Stir in the chocolate chips and nuts, then pour the mixture over the crust.
- Bake for 25-30 minutes or until set.
- Let cool before slicing into bars.
Notes
- For a richer flavor, add a pinch of salt to the chocolate mixture.
- These bars can be stored in an airtight container for up to a week.
Nutrition
- Serving Size: 1 bar
- Calories: 250
- Sugar: 15g
- Sodium: 150mg
- Fat: 15g
- Saturated Fat: 8g
- Unsaturated Fat: 5g
- Trans Fat: 0g
- Carbohydrates: 30g
- Fiber: 1g
- Protein: 3g
- Cholesterol: 50mg
Keywords: bars recipe, homemade treats, family snacks