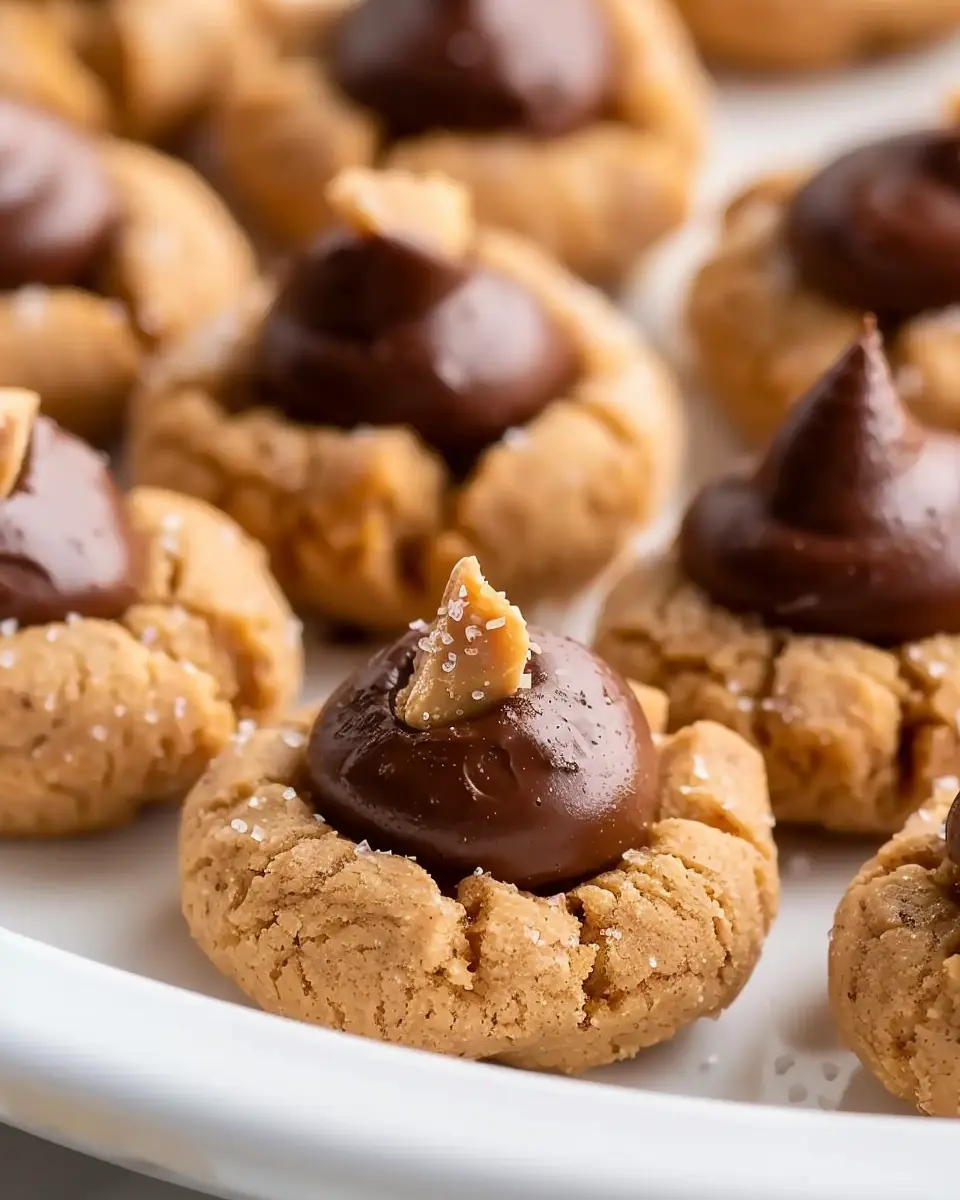
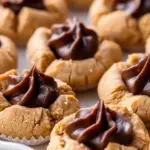
Introduction to Perfect Peanut Butter Blossoms
Peanut Butter Blossoms are more than just cookies; they’re a nostalgic experience that brings back memories of childhood baking sessions and holiday gatherings. What makes these treats so beloved? Perhaps it’s the delightful combination of creamy peanut butter and rich chocolate. A classic dessert adorned with that iconic Hershey’s Kiss on top, these cookies perfectly balance sweetness, savory nuttiness, and a satisfying texture.
Why are Peanut Butter Blossoms a timeless favorite?
One of the primary reasons for their enduring popularity is their simple yet delightful recipe. Most people have the core ingredients on hand: peanut butter, sugar, flour, and eggs—essentially pantry staples. This simplicity enables young professionals, busy parents, and novice bakers alike to whip up a batch without much fuss.
Did you know that the true origin of Peanut Butter Blossoms can be traced back to the 1950s? They quickly became a household favorite, making appearances at potlucks and holiday cookie swaps across the nation. According to a study by the American Baking Association, cookies are one of the top three desserts Americans crave. In light of this fact, having a recipe for perfect peanut butter blossoms in your collection is a must.
Moreover, there’s a certain warmth and joy that comes from biting into a freshly baked cookie, with the chocolate melt-in-your-mouth sensation harmonizing with the crunchy peanut butter. It’s no wonder these treats are also popular for gift-giving during the holidays or as a sweet surprise for loved ones.
If you’re curious about baking tips or want to explore the science behind the ingredients, you might find resources like King Arthur Baking and Food Network quite enlightening. Both offer a wealth of information on baking techniques and ingredient substitutions, ensuring your cookie journey is a success.
In the following sections, we’ll dive deep into how to achieve the perfect peanut butter blossoms, guaranteeing they’ll not only look beautiful but taste absolutely irresistible. So dust off your mixing bowl and get ready to make some magic in the kitchen!
Ingredients for Perfect Peanut Butter Blossoms
Essential Ingredients for the Perfect Balance
Crafting perfect peanut butter blossoms starts with the right blend of ingredients, ensuring every bite is a delightful mix of sweet, nutty, and chocolaty goodness. Here’s what you’ll need:
-
Creamy Peanut Butter: Choose a good quality, creamy variety—this adds richness. Did you know that peanut butter contains healthy fats and protein? It’s a delicious way to incorporate these nutrients into your treats!
-
Granulated Sugar and Brown Sugar: These two sugars work together to create that sought-after chewiness. Brown sugar adds moisture and a hint of caramel flavor, while granulated sugar contributes a nice crunch.
-
All-Purpose Flour: This staple provides structure. For a gluten-free option, consider using almond flour, which offers a nutty taste that complements the peanut butter.
-
Egg: A simple egg binds everything together; it’s essential for achieving the perfect texture.
-
Chocolate Kisses: The classic finishing touch that transforms ordinary cookies into something special. Consider using dark chocolate for a richer flavor.
If you’re looking to dive deeper, the American Peanut Council is a fantastic resource for all things peanut butter-related! Happy baking!
Step-by-Step Preparation of Perfect Peanut Butter Blossoms
If you’re ready to embark on the delicious journey of baking perfect peanut butter blossoms, you’re in for a treat! These delightful cookies, with their soft peanut butter flavor and sweet chocolate centers, are sure to charm everyone’s heart. Here’s a straightforward, step-by-step guide that will help you create these delectable cookies with ease.
Gather All Your Ingredients
Before you dive into baking, make sure you have everything ready. Here’s what you’ll need:
- 1 cup creamy peanut butter
- 1/2 cup unsalted butter, softened
- 1 cup granulated sugar
- 1 cup packed brown sugar
- 2 large eggs
- 1 teaspoon vanilla extract
- 2 3/4 cups all-purpose flour
- 1 teaspoon baking soda
- 1 teaspoon baking powder
- 1/2 teaspoon salt
- Sugar for rolling
- Hershey’s Kisses for the topping
Make sure everything is fresh, especially the baking powder and baking soda, which are key to getting those cookies to rise just right.
Preheat Your Oven
While you’re gathering your ingredients, go ahead and preheat your oven to 350°F (175°C). Preheating is crucial for baking because it ensures that your cookies will bake evenly. If you start with a properly heated oven, you can enjoy those perfect peanut butter blossoms in no time.
Sift and Mix Dry Ingredients
Taking the time to sift your dry ingredients isn’t just for show: it’s crucial for the texture of your cookies. In a bowl, combine the flour, baking soda, baking powder, and salt. Sift them together and set aside. This process not only merges the ingredients but also introduces some air, giving your baked goods a lighter, fluffier feel.
Cream the Butter and Peanut Butter
In another large bowl, combine the softened unsalted butter and creamy peanut butter. Using a hand mixer or stand mixer, beat them together until the mixture is smooth and creamy. This method integrates air into the butter and peanut butter, creating a wonderful base for your cookies.
Incorporate Sugars and Wet Ingredients
Next, it’s time to add the sugars. Gradually mix in the granulated sugar and brown sugar until well combined. Then, add in the eggs, one at a time, and finish with the vanilla extract. Mixing in this order allows each ingredient to fully incorporate, yielding a rich, sweet batter that’s just begging to be scooped onto your baking sheet.
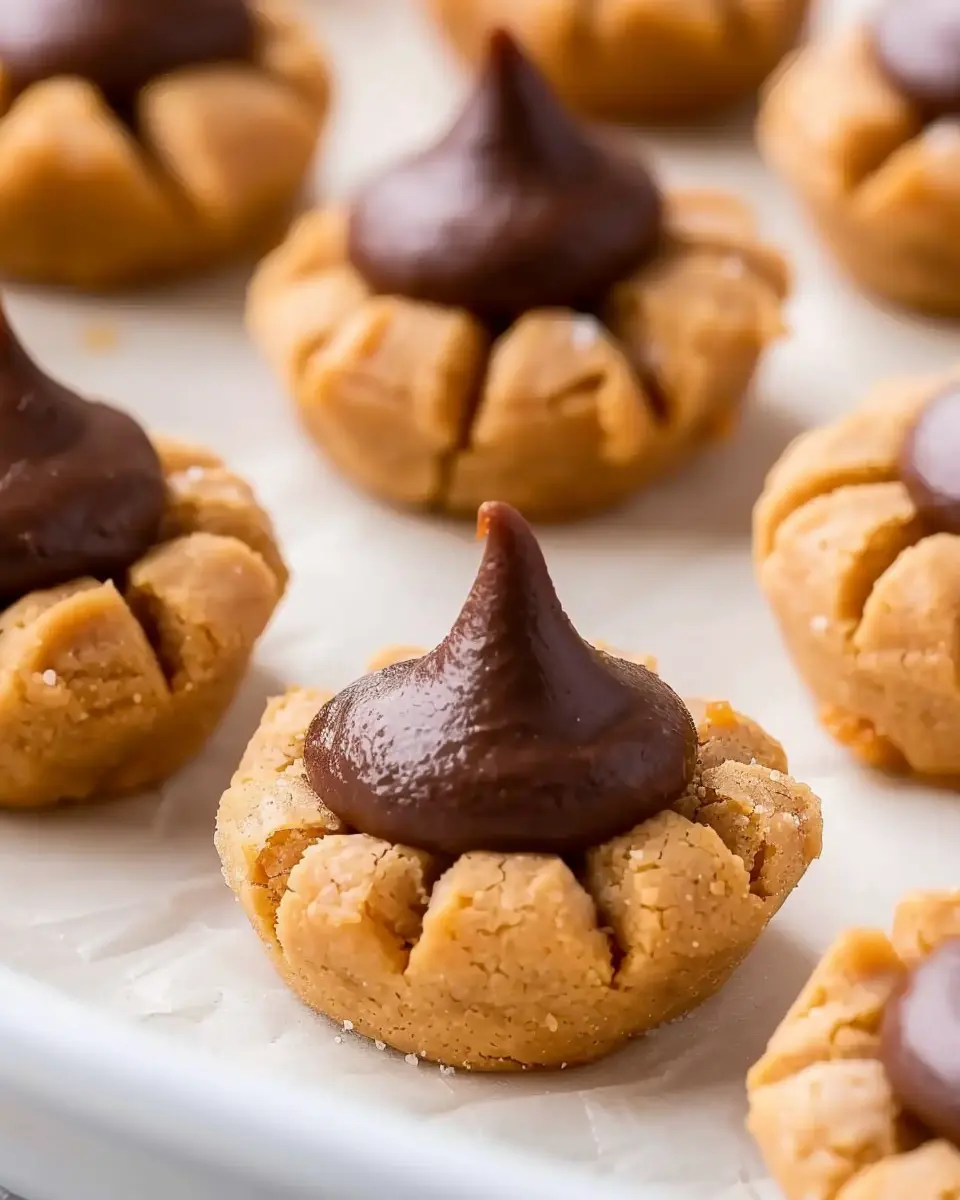
Form and Roll the Dough Balls
Once your batter is ready, it’s time to shape your cookies. Using your hands or a cookie scoop, take a tablespoon of dough and roll it into a ball. Roll each ball in sugar for a little extra sweetness and a beautiful crackled top. Place the dough balls on a baking sheet lined with parchment paper, leaving space for them to spread.
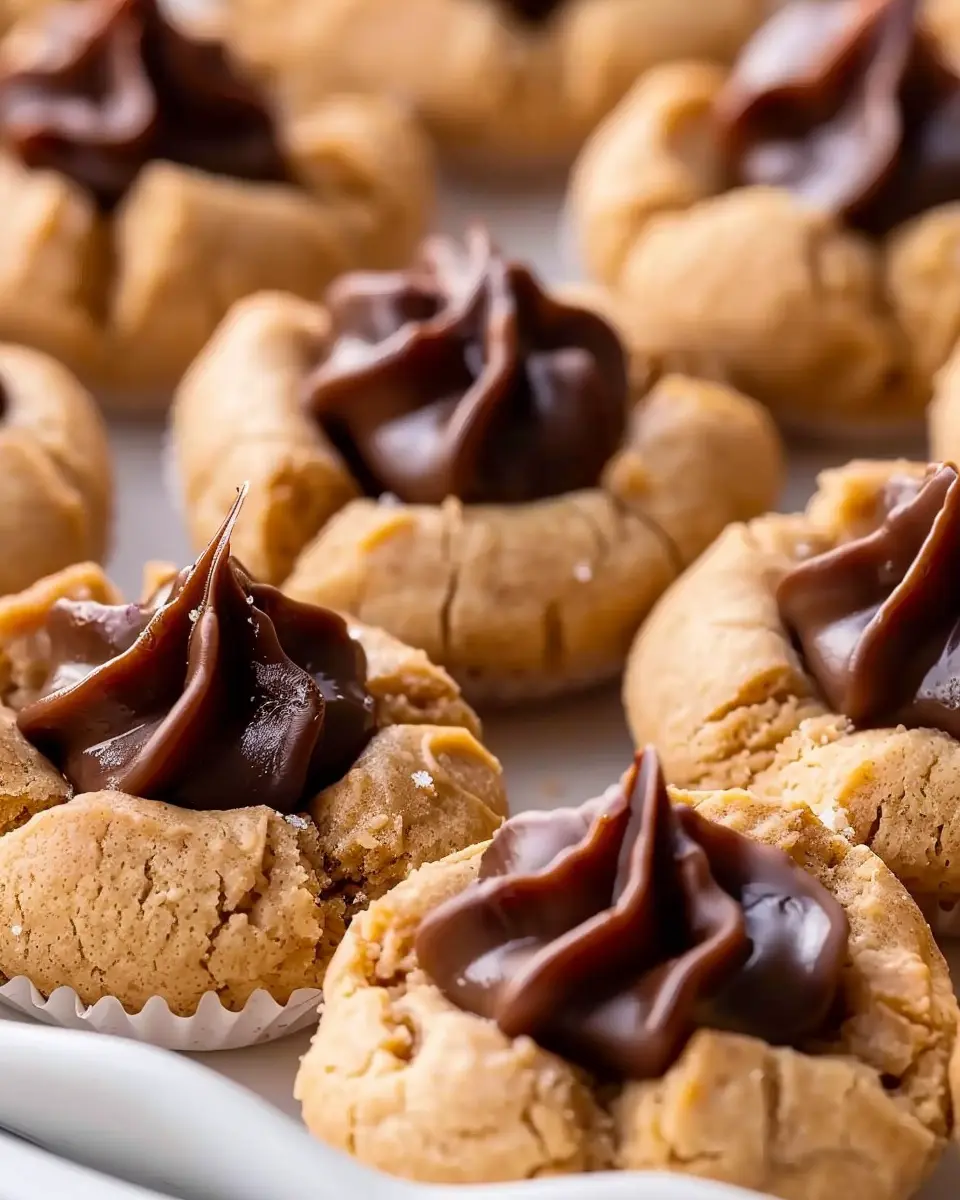
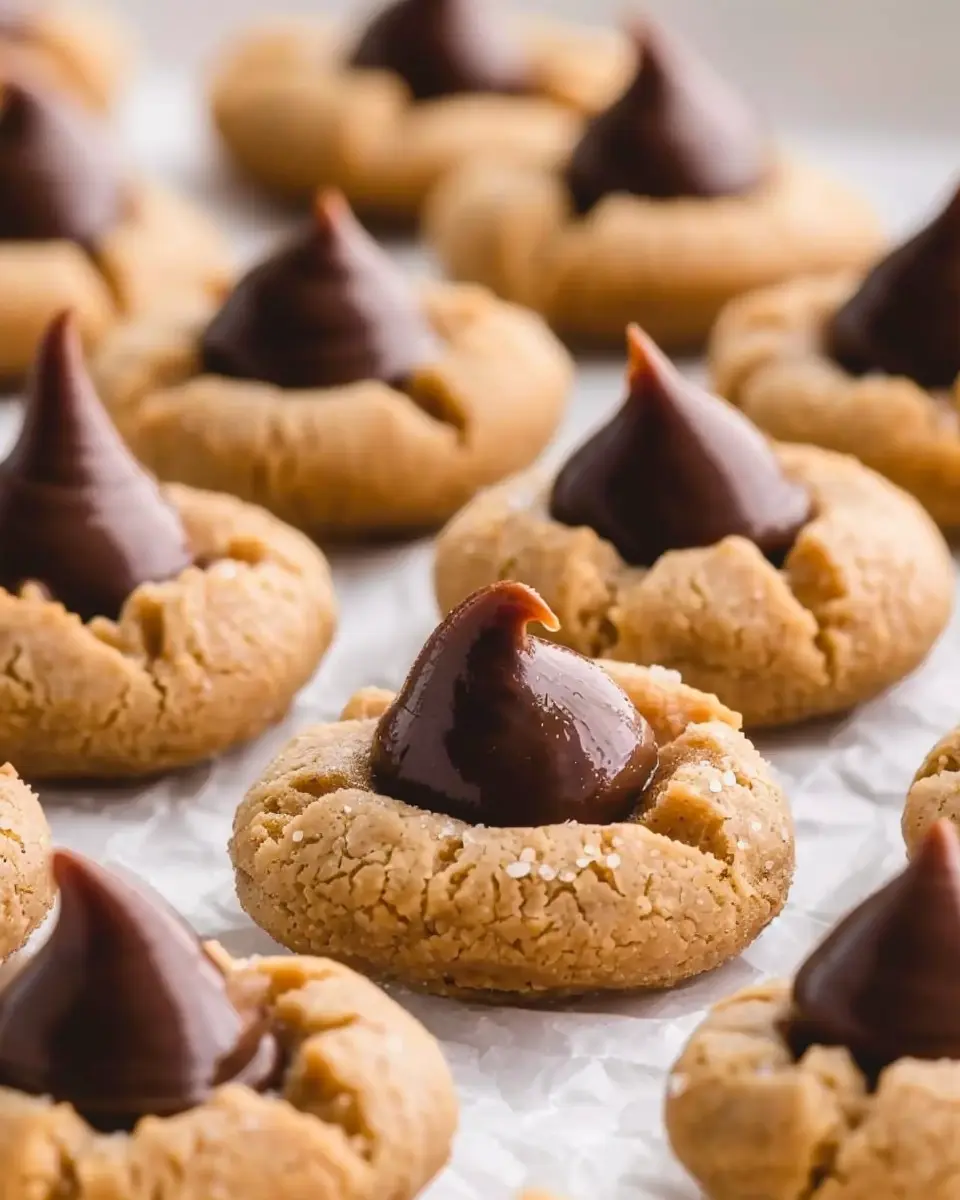
Bake and Add Hershey Kisses
Pop the cookies into your preheated oven and bake for about 10 minutes, or until the edges are golden brown. Now, here’s the fun part — right when you take the cookies out, gently press a Hershey’s Kiss into the center of each cookie. The heat from the cookie will soften the chocolate just perfectly.
Cool and Enjoy!
Once your perfect peanut butter blossoms are out of the oven, allow them to cool on the baking sheet for a few minutes before transferring them to a wire rack. This step is super important! It helps the cookies set properly while allowing the chocolate to stay melty and delicious.
Now that you’ve mastered the art of creating these iconic cookies, share them with friends, or enjoy them all yourself (we won’t tell)! And if you want to explore more cookie recipes, check out resources like Serious Eats for inspiration. Happy baking!
Variations of Perfect Peanut Butter Blossoms
When it comes to crafting the perfect peanut butter blossoms, the possibilities are endless. Why not experiment a bit? Let’s dive into some delightful variations!
Swapping in Other Nut Butters
Feeling adventurous? Swap out traditional peanut butter for almond butter, cashew butter, or even sunflower seed butter! Each offers a unique flavor profile. For instance, using almond butter will give a slightly sweeter note, while sunflower seed butter will lend a nutty richness that’s perfect for those with nut allergies. These alternatives can create a delicious twist while keeping the essence of those beloved perfect peanut butter blossoms intact.
Adding Chocolate Chips or Other Candies
While a classic peanut butter blossom features a chocolate kiss on top, why not get creative? Mix in chocolate chips or even butterscotch chips into the dough for an added burst of flavor. Additionally, you can top your cookies with M&Ms or Reese’s pieces to up the fun factor. Just imagine biting into a soft, peanut buttery cookie and discovering pockets of melted chocolate or chewy candy!
Gluten-Free Adaptations
For those following a gluten-free lifestyle, you can easily adapt this recipe. Substitute all-purpose flour with a gluten-free blend or oat flour to retain the cookies’ texture and taste. Many specialty flours like almond flour can also enrich the flavor! With this small change, you can still enjoy wonderfully perfect peanut butter blossoms without compromising on taste.
By trying these variations, you’re sure to impress your friends and family, showcasing just how versatile these cookies can be. Explore more about different nut butters and their benefits at Healthline and never stop experimenting in the kitchen!
Cooking Tips and Notes for Perfect Peanut Butter Blossoms
Importance of Ingredient Temperature
Getting the temperature of your ingredients just right is essential for achieving those perfect peanut butter blossoms. Room temperature butter helps create a creamy batter that holds together beautifully, while cold eggs incorporate smoothly. If you’re short on time, just submerge your egg in warm water for about five minutes to bring it to the right temperature quickly. Remember, the right temperature can make or break your cookie texture!
Handling the Dough
When it’s time to handle the dough, remember to keep it slightly chilled. This helps the cookies hold their shape while baking. Use a cookie scoop for uniformity, ensuring they’re about one inch apart on the baking sheet to allow for spread. You might even consider chilling your formed dough balls in the fridge for 15 minutes before baking. This small step can enhance your results, resulting in soft and chewy cookies that are simply irresistible!
For more tips on baking cookies, check out The Food Network. Happy baking!
Serving Suggestions for Perfect Peanut Butter Blossoms
Delightful Pairings with Milk or Hot Cocoa
What could be better than relaxing with a batch of perfect peanut butter blossoms paired with a cold glass of milk or a warm mug of hot cocoa? The creamy texture of peanut butter combined with chocolate melts beautifully on the palate when enjoyed with these classic beverages. Opt for whole milk or a rich, gourmet hot cocoa to elevate the experience. Did you know that milk can enhance the flavor of chocolate? According to studies, the fat in milk complements chocolate, making each bite of your cookie taste even more delicious.
Presentation Ideas for Gatherings
When it comes to gatherings, presentation matters! Showcase your perfect peanut butter blossoms on a beautiful tiered platter or in decorative jars tied with ribbons for a charming touch. Want to make them more festive? Dust them lightly with powdered sugar or drizzle melted chocolate over the top for an eye-catching garnish. For an even more themed setup, consider matching the decoration to the occasion—think spooky designs for Halloween or pastel colors for springtime parties.
Embrace these serving suggestions, and you’ll leave your guests raving about your delightful treats! If you’re seeking more inspiration on dessert presentations, Pinterest has fantastic ideas to explore.
Time Breakdown for Perfect Peanut Butter Blossoms
Preparation Time
Getting started on your perfect peanut butter blossoms is quick! You’ll need about 15-20 minutes to gather your ingredients and mix your dough. Make sure you have everything on your countertop before diving in—this makes the process smoother and more enjoyable.
Baking Time
Once your delicious dough is ready and rolled into those adorable little balls, it’s time to bake! Pop them in the oven for 8-10 minutes. While they bake, you can take a breather and even clean up a bit—multitasking at its finest!
Total Time
In total, you’re looking at around 30-40 minutes from start to finish before you indulge in those heavenly treats. So grab a friend, enjoy the process, and before you know it, you’ll have a plate full of perfect peanut butter blossoms ready to impress! For more baking tips, check out Baker’s Edge for some handy advice.
Nutritional Facts for Perfect Peanut Butter Blossoms
When indulging in perfect peanut butter blossoms, it’s helpful to know what you’re treating yourself to.
Calories per Cookie
Each delightful cookie contains about 100 calories. While they’re a sweet treat, enjoying them in moderation can still keep your diet in check.
Breakdown of Macronutrients
These cookies pack a punch of flavor with a balanced nutritional profile:
- Carbohydrates: Approximately 12g
- Protein: Around 3g, thanks to the peanut butter
- Fat: Roughly 5g, mainly from healthy fats found in the nut butter
Having a cookie here and there can be a part of a balanced diet. If you’re curious about healthier peanut butter options, a great resource to check out is the USDA’s FoodData Central. This can help you make informed choices that suit your nutritional needs while you bake your perfect peanut butter blossoms.
Balancing treats with a nutritious lifestyle is key, so enjoy guilt-free (in moderation) those peanut buttery bursts of joy!
FAQs about Perfect Peanut Butter Blossoms
Can I make these cookies in advance?
Absolutely! Making perfect peanut butter blossoms in advance is a great idea. You can prepare the dough, roll it into balls, and freeze them! Just store the uncooked cookie balls in an airtight container or a ziplock bag, separated by parchment paper to avoid sticking. When you’re ready for freshly baked cookies, simply pop them in the oven directly from the freezer—no thawing necessary—and add a minute or two to the baking time.
How can I store leftover cookies?
If you find yourself with leftover perfect peanut butter blossoms, storing them is easy! Keep them in an airtight container at room temperature for up to a week. For longer freshness, consider refrigerating them. Just be aware that refrigeration may alter their texture slightly. If you’re a fan of soft cookies, the counter is your best bet! For more tips on cookie storage, check out this informative guide on preserving baked goods.
Can I freeze the dough?
Yes! Freezing the dough for your perfect peanut butter blossoms is an excellent way to ensure you always have a cookie option on hand. Just make sure to wrap it tightly in plastic wrap or store it in an airtight container. The dough can be frozen for up to three months. When you’re ready to bake, let it sit in the fridge overnight to thaw, then scoop and bake like normal. This ensures that every batch tastes fresh out of the oven!
Nothing quite beats the joy of warm cookies straight from the oven, right? Happy baking!
Conclusion on Perfect Peanut Butter Blossoms
Creating perfect peanut butter blossoms is an enjoyable and rewarding experience that fills your kitchen with warmth and inviting aromas. The delightful combination of soft, chewy peanut butter cookies and a rich chocolate kiss makes these treats a crowd favorite. Whether you’re baking for a special occasion or just to satisfy your sweet tooth, this recipe is sure to impress.
When indulging in these cookies, consider pairing them with a comforting cup of tea or a refreshing glass of milk. Remember, the joy of baking comes not just from the treats themselves but from sharing them with friends and family. So, gather your ingredients and start baking these irresistible delights today! For additional inspiration and variations, check out resources like King Arthur Baking and The Spruce Eats.
PrintPerfect Peanut Butter Blossoms Recipe: The Best Homemade Treats
The perfect peanut butter blossoms are soft, chewy cookies topped with a chocolate kiss. Delightful and easy to make, these cookies are a classic treat for any occasion.
- Prep Time: 15 minutes
- Cook Time: 10 minutes
- Total Time: 25 minutes
- Yield: 24 cookies 1x
- Category: Desserts
- Method: Baking
- Cuisine: American
- Diet: Vegetarian
Ingredients
- 1 cup peanut butter
- 1 cup granulated sugar
- 1 large egg
- 1 teaspoon baking soda
- 1 teaspoon vanilla extract
- 24 chocolate kisses
Instructions
- Preheat your oven to 350°F (175°C).
- In a bowl, mix together peanut butter, granulated sugar, egg, baking soda, and vanilla extract until well combined.
- Roll the dough into small balls and place them on a baking sheet.
- Bake for 10-12 minutes until they are golden brown.
- Quickly press a chocolate kiss into the center of each cookie right after they come out of the oven.
- Let them cool on a wire rack.
Notes
- For extra flavor, add a pinch of salt to the dough.
- Store in an airtight container for up to a week.
Nutrition
- Serving Size: 1 cookie
- Calories: 110
- Sugar: 10g
- Sodium: 70mg
- Fat: 7g
- Saturated Fat: 1.5g
- Unsaturated Fat: 3.5g
- Trans Fat: 0g
- Carbohydrates: 12g
- Fiber: 1g
- Protein: 3g
- Cholesterol: 5mg
Keywords: peanut butter, cookies, chocolate, dessert, baking