Introduction to Classic 3 Layer Vanilla Birthday Cake
When it comes to celebrating life’s special moments, a Classic 3 Layer Vanilla Birthday Cake stands out as a timeless favorite. Whether it’s an intimate gathering or a grand party, this cake captures the essence of celebration with its rich flavor, elegant layers, and irresistible frosting. But why is this particular cake so essential for birthdays?
First and foremost, the flavor! Vanilla is universally loved, making it a safe yet delightful choice for diverse palates. According to a survey by the International Dairy Foods Association, vanilla is among the top flavors in ice cream and desserts, reflecting its broad appeal. No one can resist the comforting aroma that fills the kitchen as it bakes. It’s a cake that brings back cherished memories from childhood birthdays, making it more than just dessert—it’s an experience.
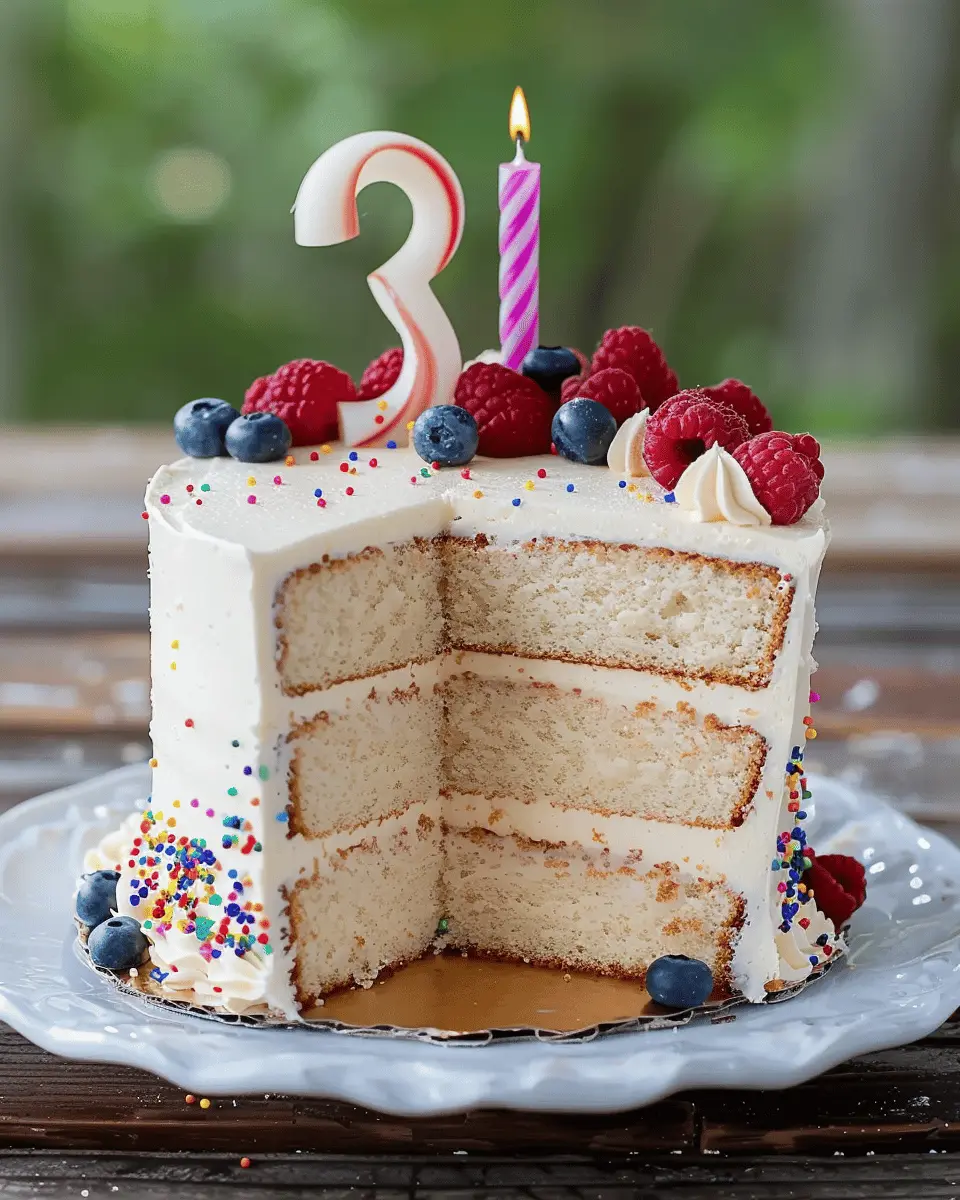
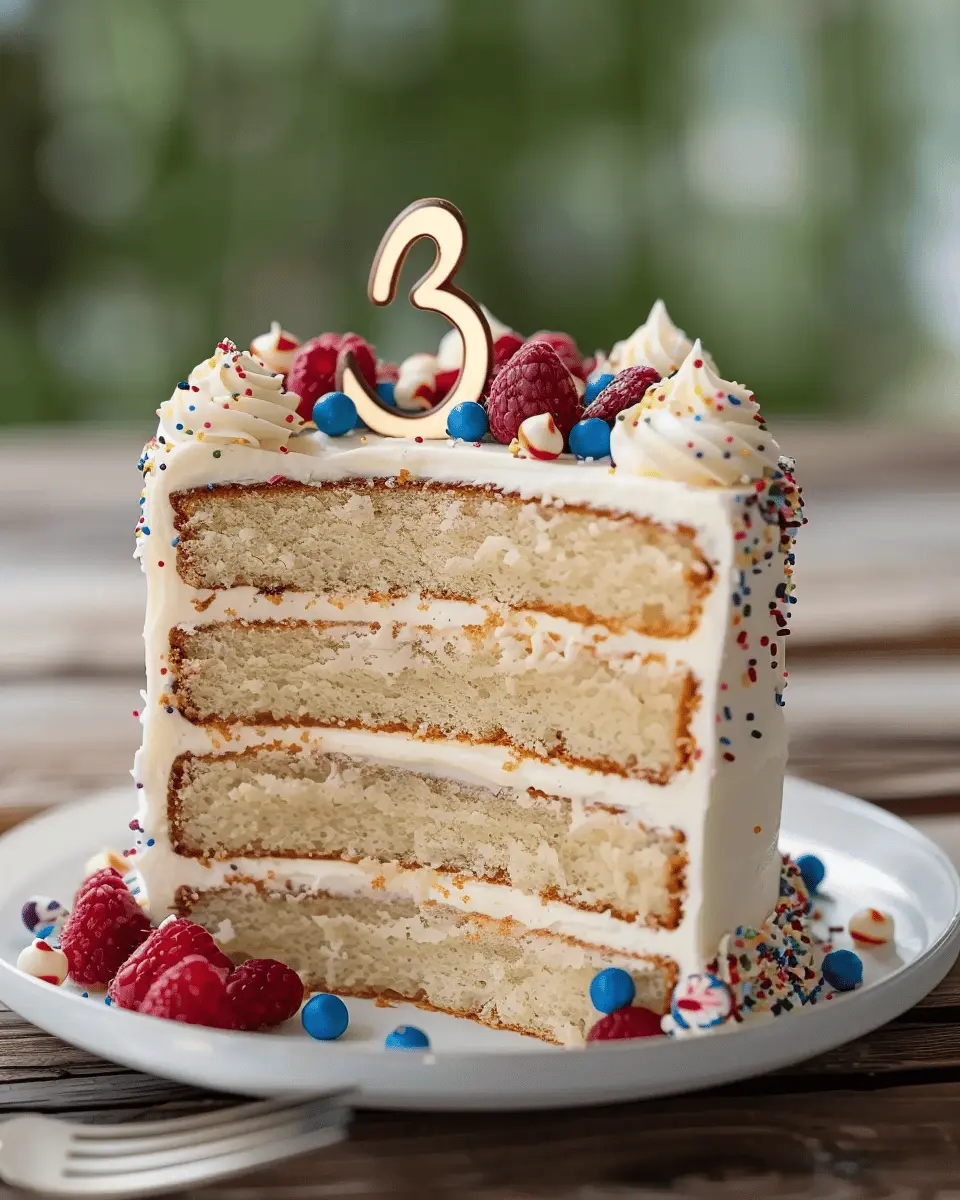
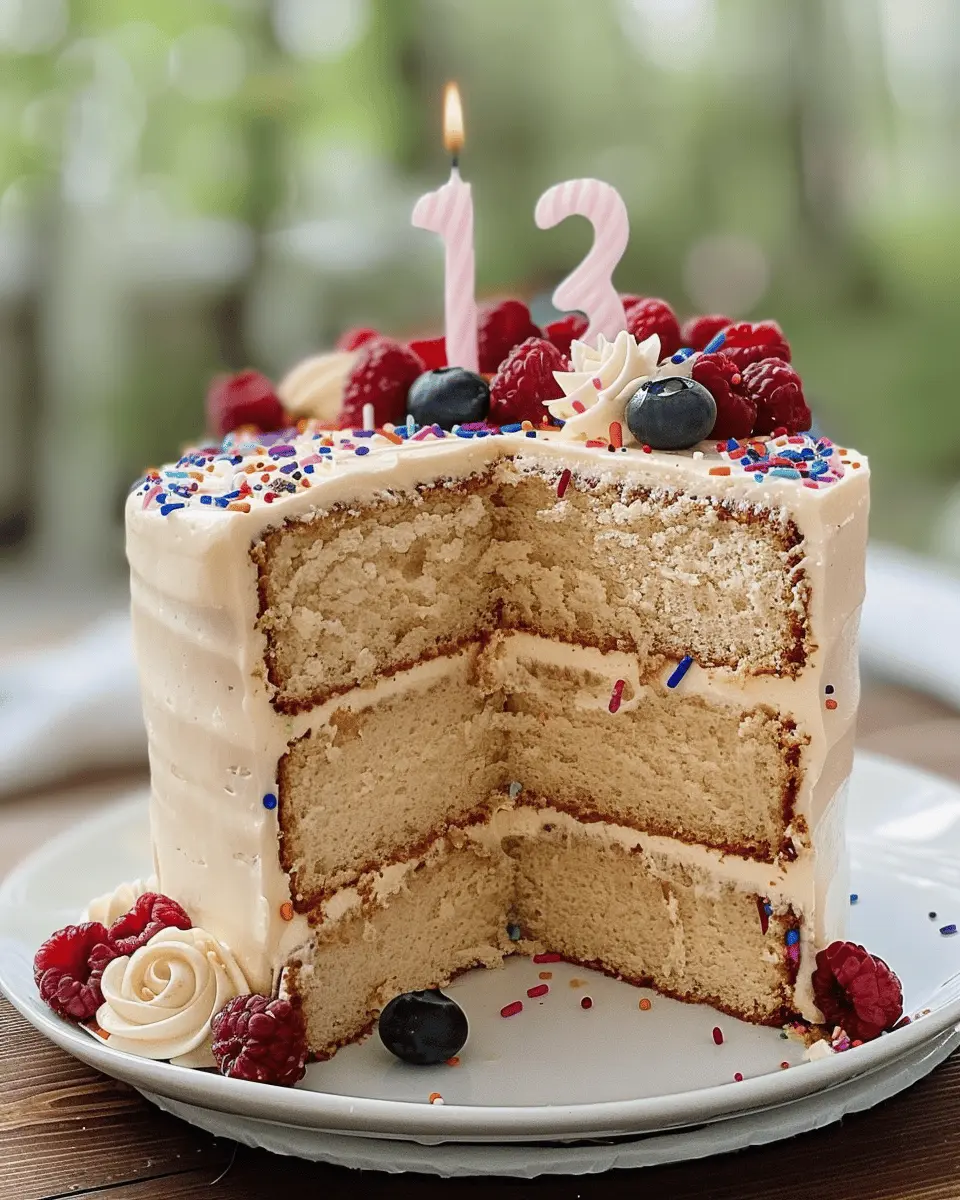
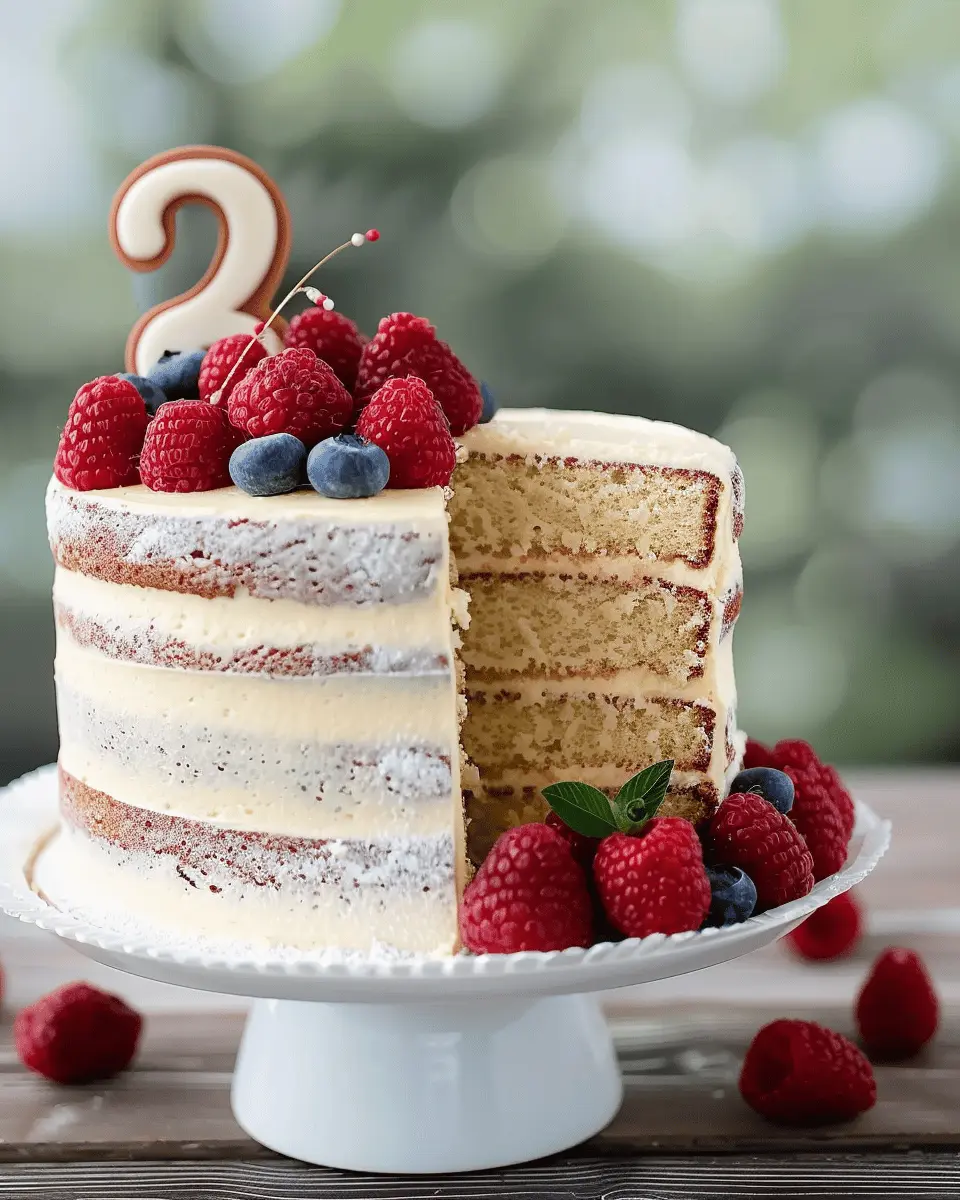
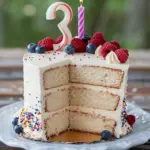
The visual appeal of a Classic 3 Layer Vanilla Birthday Cake adds another layer of excitement. Imagine stacked layers of fluffy vanilla cake, frosted with smooth vanilla buttercream, and perhaps adorned with colorful sprinkles or fresh fruits! Each layer offers a delightful surprise, inviting your guests to dig in. Plus, it’s versatile—personalize it with themed decorations to match the birthday person’s interests. Check out resources like The Spruce Eats for inspiration.
You might be wondering—how do you create that perfect balance of flavor and texture? Achieving a light, moist cake requires the right ingredients and measurements. Quality vanilla extract is crucial, elevating your cake from ordinary to extraordinary. Using organic vanilla can significantly enhance its taste, and it’s worth considering.
Finally, let’s not overlook the personal touch. Baking a cake from scratch is more than just cooking; it’s a labor of love. Picture yourself mixing the batter, pouring it into pans, and watching it transform into a beautiful cake. These moments of joy are what make homemade cake so special.
In the coming sections, you’ll find the full recipe for creating your very own Classic 3 Layer Vanilla Birthday Cake. Gear up to impress your friends and family with this show-stopping dessert that’s bound to elevate any celebration.
Ingredients for Classic 3 Layer Vanilla Birthday Cake
Creating the perfect Classic 3 Layer Vanilla Birthday Cake is all about using fresh, quality ingredients that come together in a delightful way. Here’s what you will need for this timeless treat!
For the Cake
- 2 ¾ cups all-purpose flour: Be sure to sift it before measuring to get that airy texture.
- 2 ½ teaspoons baking powder: This is essential for that fluffy rise.
- ½ teaspoon salt: A must for balancing sweetness.
- 1 cup unsalted butter, softened: Going for room temperature is key for easy blending.
- 2 cups granulated sugar: The sweet star of the show!
- 4 large eggs: Fresh eggs will help with the structure and moisture.
- 1 tablespoon vanilla extract: Opt for pure vanilla for the best flavor.
- 1 cup milk: Whole milk works wonders for richness.
For the Frosting
- 1 ½ cups unsalted butter, softened: Again, room temperature is crucial.
- 6 cups powdered sugar: Sifting it before use prevents lumps.
- 2 teaspoons vanilla extract: Adds that delicious undertone.
- 2-4 tablespoons heavy cream or milk: Adjust to reach your desired consistency.
By following these ingredients with careful measurements and preparation, you’re on your way to making a cake that can turn any birthday into a celebration! For more tips on cake-making techniques, check out resources like The Kitchn for expert insights. Happy baking!
Step-by-Step Preparation of Classic 3 Layer Vanilla Birthday Cake
Creating a Classic 3 Layer Vanilla Birthday Cake is not only a delightful baking project but also a wonderful way to celebrate moments that matter. Whether you’re baking for a loved one’s birthday or just indulging yourself with a sweet treat, this cake is sure to impress! Let’s break down each step to make it an enjoyable experience.
Prepare and Preheat
Start your preparation by gathering all your ingredients. To make the batter for your cake, you’ll need:
- 3 cups all-purpose flour
- 2 cups granulated sugar
- 1 tablespoon baking powder
- 1/2 teaspoon salt
- 1 cup unsalted butter, softened
- 4 large eggs
- 1 tablespoon vanilla extract
- 1 cup whole milk
Once you’ve collected these ingredients, it’s essential to preheat your oven to 350°F (175°C). This allows the batter to cook evenly when you’re ready. Grease and flour three 8-inch round cake pans to ensure your cakes release easily after baking.
Mix the Dry Ingredients
Next, grab a mixing bowl and sift together your dry ingredients: flour, baking powder, and salt. This step is crucial for cake texture, as it helps to aerate the flour, resulting in a lighter cake. Once mixed, set it aside while you tackle the wet ingredients.
For more tips on flour and baking essentials, check out resources like King Arthur Baking.
Create the Cake Batter
In a large mixing bowl, cream together the softened butter and sugar until light and fluffy. This will take about 3–5 minutes. Next, add the eggs one at a time, mixing well after each addition. Then, stir in the vanilla extract.
Now it’s time to combine the dry ingredients with the wet mixture, alternating with the whole milk. Start with one-third of the dry mix, then half the milk, repeating until all ingredients are blended into a smooth batter. Remember, overmixing can lead to a dense cake, so mix just until combined.
Bake the Layers
Divide the batter equally among the three prepared pans. Smooth the top with a spatula to ensure even baking. Bake in the preheated oven for about 25–30 minutes, or until a toothpick comes out clean. Once baked, allow the cakes to cool in the pans for 10 minutes before transferring them to a wire rack to cool completely. Patience is key here; the layers need to be cool before frosting.
Prepare the Vanilla Buttercream Frosting
No Classic 3 Layer Vanilla Birthday Cake would be complete without a generous layer of frosting. For this buttercream, you’ll need:
- 1 cup unsalted butter, softened
- 4 cups powdered sugar
- 1/4 cup whole milk
- 1 tablespoon vanilla extract
In a mixing bowl, beat the butter until creamy, then gradually add in the powdered sugar, followed by the milk and vanilla. Beat on high speed for a light and fluffy texture.
Assemble Your Cake
Now comes the fun part: assembling your cake! Start with the first layer and place it on your cake stand or serving plate. Spread a generous amount of buttercream on top, then add the second layer. Repeat this process for the third layer, ensuring that each layer is even and stable. Once assembled, frost the sides and top of the cake generously. If you’d like to decorate further, consider adding sprinkles or fresh flowers for a festive touch.
And there you have it! Your Classic 3 Layer Vanilla Birthday Cake is ready to be served. Share it with friends and family or enjoy a slice all to yourself. Happy baking!
Variations on Classic 3 Layer Vanilla Birthday Cake
When it comes to baking, there’s always room for creativity! While the Classic 3 Layer Vanilla Birthday Cake is a timeless favorite, here are some fun and delicious variations to elevate your next celebration.
Chocolate Layer Cake Variation
If you’re looking to satisfy a chocolate craving, this variation is the perfect solution. Simply swap out half of the vanilla extract for high-quality cocoa powder or melt some dark chocolate into your batter. You can stack chocolate layers with your classic vanilla frosting for a delightful contrast. Trust me; everyone loves a rich chocolate cake!
Fruit-Filled Layer Option
Adding fruit can instantly brighten your cake! Consider incorporating seasonal berries or fruits like raspberries, strawberries, or peaches into your layers. For a delicious fruit-filled experience, prepare a fresh fruit compote to layer between the cake. This not only adds a splash of color, but the tartness also balances the sweetness of the Classic 3 Layer Vanilla Birthday Cake. For more ideas on fresh fruits and their baking uses, check out Food Network’s suggestions.
Funfetti Celebration Twist
For an extra festive touch, why not turn your Classic 3 Layer Vanilla Birthday Cake into a funfetti masterpiece? Just fold in colorful sprinkles into the batter and watch your cake come to life! Top it off with a playful vanilla frosting and some additional sprinkles for a birthday cake that will make everyone smile. You can even play around with themed sprinkles to match any occasion, making it versatile for any festivities.
With these variations, you can keep that traditional feel while exploring exciting new flavors and textures. Get ready to impress your guests at your next celebration!
Baking Tips and Notes for Classic 3 Layer Vanilla Birthday Cake
Key Tips for Perfect Cake Layers
Crafting the perfect layers for your Classic 3 Layer Vanilla Birthday Cake can be a delightful adventure! Here are a few pointers to make sure your layers rise beautifully:
-
Room Temperature Ingredients: Make sure your butter, eggs, and milk are at room temperature. This helps create a smooth batter, which is crucial for even baking.
-
Don’t Overmix: Once you combine the dry and wet ingredients, mix just until incorporated. Overmixing can lead to a dense cake – not the light, fluffy texture we all crave!
-
Use the Right Pans: Always grease your pans thoroughly or use parchment paper for easy removal. Check out Bake Even Strips for an extra level of support during baking!
Frosting Secrets for a Fluffy Finish
The frosting is just as vital as the cake itself. Here are some insider secrets:
-
Whip It Good: Beat your butter until it’s light and fluffy before adding sugar. This helps trap air and contributes to that dreamy texture.
-
Sift Your Sugar: Sifting powdered sugar removes lumps and helps create an incredibly smooth frosting — a must for a gorgeous finish.
-
Chill Before Frosting: If your cake layers are too warm, let them cool completely. Frosting a warm cake can melt your hard work. Patience is key!
With these tips, you’re well on your way to creating a Classic 3 Layer Vanilla Birthday Cake that will wow your friends and family!
Serving Suggestions for Classic 3 Layer Vanilla Birthday Cake
Creative Presentation Ideas
Elevate your Classic 3 Layer Vanilla Birthday Cake presentation with a few simple tricks. Start by placing it on a beautiful cake stand that complements the colors; a white or pastel stand can really make it pop. Consider garnishing with fresh fruits like strawberries or blueberries for a vibrant touch. And don’t shy away from sprigs of mint or edible flowers to give that extra “wow” factor. For a personal twist, why not decorate with themed baking supplies if it’s for a specific occasion, like colorful birthday candles or fun sprinkles?
Pairing with Favorite Beverages
What’s better than a slice of cake? Enjoying it with the perfect beverage! A classic pairing is a steaming cup of coffee or a refreshing iced tea, both of which balance the sweetness of your Classic 3 Layer Vanilla Birthday Cake beautifully. If you’re looking for something fruity, consider serving it alongside a mixed berry juice or a lemonade. Each option brings out the delectable vanilla flavor while adding a refreshing element to your cake experience. For ideas on delightful beverage recipes, hop over to sites like Serious Eats for inspiration.
Whether hosting a birthday celebration or just treating yourself, these serving suggestions will surely make your cake the star of the show!
Time Breakdown for Classic 3 Layer Vanilla Birthday Cake
Creating a delicious Classic 3 Layer Vanilla Birthday Cake is a delightful endeavor, and knowing the time commitment can make all the difference. Here’s a breakdown to guide you through the process:
Preparation Time
In just about 20-30 minutes, you can gather your ingredients and prepare your batter. Make sure to have everything ready, from the flour to the vanilla extract, to streamline your baking experience.
Baking Time
The actual baking will take around 25-30 minutes per layer. You want those cakes to rise beautifully, so resist the urge to open the oven door too often. Trust the process!
Cooling and Assembly Time
Once your cakes are baked, allow them to cool for at least an hour. This step is crucial for easy assembly and decoration. After cooling, plan for another 30 minutes to an hour for layering and frosting.
With this time breakdown, you’ll be all set to create a show-stopping birthday cake! For tips on frosting techniques, check out this frosting guide. With a little patience and careful timing, your Classic 3 Layer Vanilla Birthday Cake will be the star of any celebration!
Nutritional Facts for Classic 3 Layer Vanilla Birthday Cake
When diving into the delightful world of cakes, understanding the nutritional content of your Classic 3 Layer Vanilla Birthday Cake can help you savor each slice guilt-free. Here’s a brief overview to keep you in the loop:
Calories
A typical serving of this lovely cake holds around 350-400 calories. While this is certainly a treat, it’s perfect for celebrating special occasions!
Sugar Content
Each slice packs about 30 grams of sugar, which contributes to that sweet, buttery flavor we all adore. It’s something to keep in mind, especially if you’re monitoring your sugar intake.
Fat Content
You can expect around 15 grams of fat per slice, primarily from the rich butter and cream. This level of indulgence is what makes the Classic 3 Layer Vanilla Birthday Cake a go-to for birthdays and celebrations.
For more in-depth nutritional insights, feel free to check out this guide on cake baking nutrition, which breaks down calorie and nutrient content in baked goods. Remember, balance is key; enjoy that slice surrounded by friends!
FAQs about Classic 3 Layer Vanilla Birthday Cake
How can I ensure my cake layers are even?
Achieving perfectly even cake layers is easier than you might think! Here are a few simple tips:
- Use a kitchen scale. Instead of measuring by volume, weigh your batter. A scale ensures each layer has the same amount, which leads to uniformity.
- Level your pans. A quick way to check this is by filling them with water to see if they sit evenly on your counter. If they don’t, a little adjustment is all you need!
- Baking strips. These handy tools help insulate your cake pans, promoting even baking and reducing dome tops. Just soak them in water, wrap them around the pans, and get ready for perfection.
Why is sour cream used in the cake?
Using sour cream in your Classic 3 Layer Vanilla Birthday Cake is a game-changer. It adds moisture and richness, creating a tender crumb that melts in your mouth. Additionally, the slight acidity balances the sweetness, enhancing the overall flavor. For a deeper dive into the subject, consider checking out King Arthur Baking’s insights.
Can I make this cake ahead of time?
Absolutely! You can prepare your cake layers a day or two in advance. Just make sure to cool them completely before wrapping them tightly in plastic wrap. If you want to store them longer, consider freezing them. Thaw them in the fridge overnight before frosting. This tip is particularly handy for those with busy schedules, allowing you to take the stress out of last-minute baking.
By following these tips, you’re well on your way to baking a memorable Classic 3 Layer Vanilla Birthday Cake that will impress friends and family alike!
Conclusion on Classic 3 Layer Vanilla Birthday Cake
Final Thoughts on Baking a Classic!
Baking a Classic 3 Layer Vanilla Birthday Cake is not just about following a recipe; it’s about creating memories. As you gather around the cake, singing “Happy Birthday,” you’re delighting in not just the flavors but the love and joy shared within those layers. Remember, the secret to a moist cake lies in the balance of ingredients and baking time, so don’t rush the process!
- Use high-quality vanilla for an exceptional taste.
- Don’t skip on the frosting; it’s the crowning glory!
Each slice offers a piece of nostalgia, bringing everyone together. So, roll up your sleeves and start experimenting—this cake is your canvas! For more baking tips, check out resources like King Arthur Baking or Serious Eats. Happy baking!
PrintClassic 3 Layer Vanilla Birthday Cake: The Best Homemade Delight
This classic 3 layer vanilla birthday cake is a delightful treat that will make any celebration special.
- Prep Time: 20 minutes
- Cook Time: 30 minutes
- Total Time: 50 minutes
- Yield: 12 servings 1x
- Category: Dessert
- Method: Baking
- Cuisine: American
Ingredients
- 2 cups all-purpose flour
- 1 ½ cups granulated sugar
- ¾ cup unsalted butter, softened
- 1 cup milk
- 4 large eggs
- 1 tablespoon vanilla extract
- 2 ½ teaspoons baking powder
- ½ teaspoon salt
Instructions
- Preheat oven to 350°F (175°C).
- In a bowl, cream the butter and sugar together until light and fluffy.
- Add eggs one at a time, beating well after each addition. Stir in the vanilla.
- In another bowl, combine flour, baking powder, and salt.
- Gradually add the dry ingredients to the wet mixture, alternating with milk.
- Pour batter into greased cake pans and bake for 25-30 minutes.
- Let the cakes cool before frosting with your favorite vanilla frosting.
Notes
- Make sure all ingredients are at room temperature before starting.
- For a richer flavor, add an extra teaspoon of vanilla extract.
Nutrition
- Serving Size: 1 slice
- Calories: 350
- Sugar: 25g
- Sodium: 180mg
- Fat: 15g
- Saturated Fat: 9g
- Unsaturated Fat: 4g
- Trans Fat: 0g
- Carbohydrates: 48g
- Fiber: 1g
- Protein: 5g
- Cholesterol: 75mg
Keywords: Classic 3 Layer Vanilla Birthday Cake, Vanilla Cake, Birthday Cake