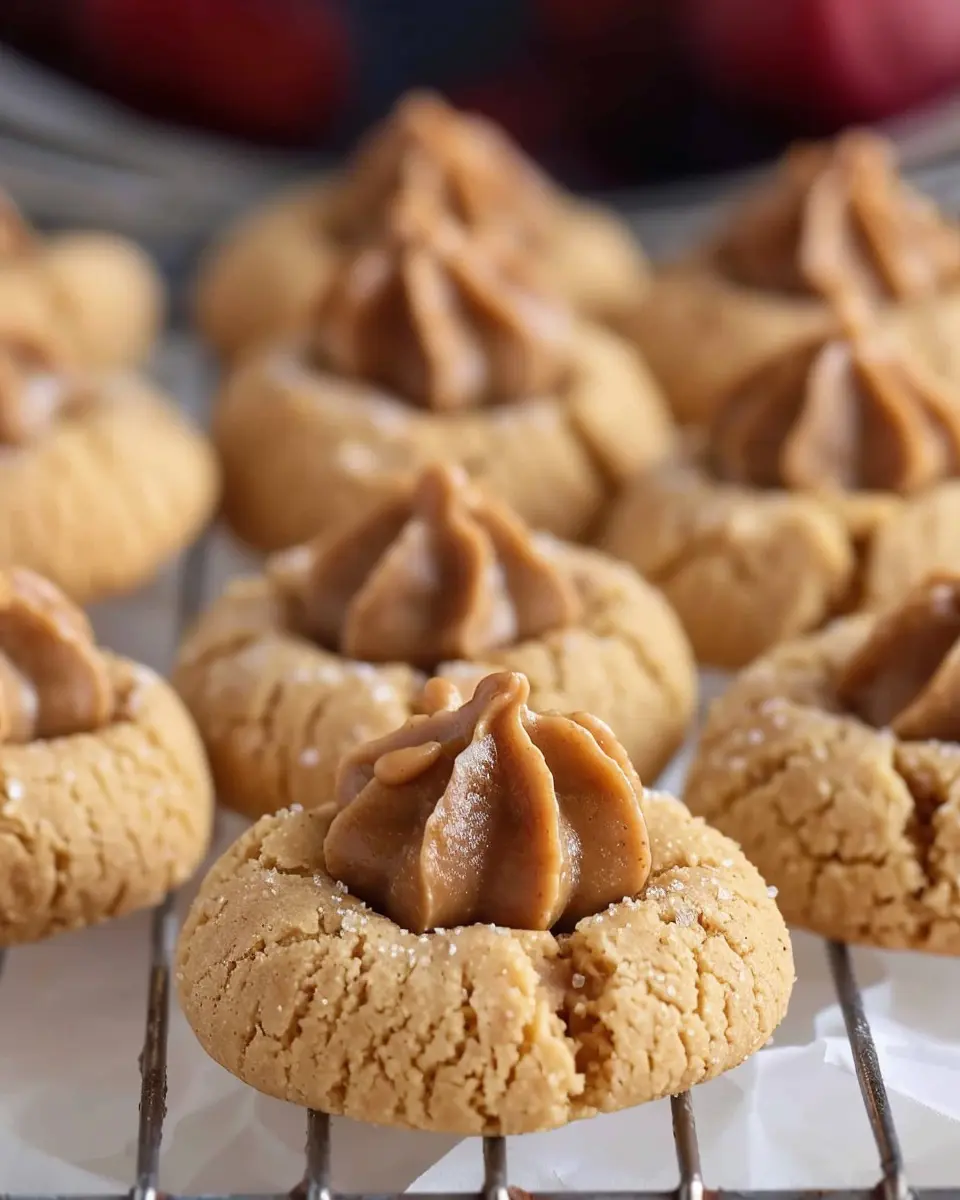
Introduction to Peanut Butter Blossoms
If you’re looking for a delightful treat to brighten up your day, peanut butter blossoms should be at the top of your list! These classic cookies, with their combination of rich peanut butter cookie dough and a delectable chocolate kiss on top, are a hit for a reason. So, what exactly makes these cookies not just tasty but also a favorite among dessert lovers?
What are Peanut Butter Blossoms and Why You’ll Love Them?
Peanut butter blossoms are more than just a cookie; they bring a warm sense of nostalgia that many of us cherish. Picture this: soft, chewy peanut butter cookies that melt in your mouth, enhanced with a touch of chocolate. These lovely confections are easy to prepare, making them a perfect activity for young professionals seeking a quick, satisfying baking project after a long week.
Here’s a little background on their origin. These cookies first gained popularity in the United States around the mid-20th century. You might be surprised to learn that one of the earliest printed recipes appeared in a Pillsbury cookbook back in the 1950s! Ever since, they have been a staple at family gatherings, holiday parties, and cookie exchanges.
You might wonder, “Why choose peanut butter blossoms over other desserts?” Here’s why:
- Effortless Preparation: With simple ingredients you likely have at home, these cookies can come together in a snap.
- Versatile: Whether you prefer crunchy or creamy peanut butter, you can customize the flavor to your liking.
- Nostalgic Comfort: Just one bite of these cookies can take you back to childhood memories, making them a delightful way to unwind.
Did you know that peanut butter is not only delicious but also a source of protein and healthy fats? Pairing it with chocolate creates a balanced indulgence that satisfies both your sweet tooth and your hunger.
So, grab your baking supplies and let’s dive into making these delightful peanut butter blossoms! With their irresistible charm, you’ll find yourself baking them time and time again. For more inspiration, check out this article on how to store cookies properly.
Ingredients for Peanut Butter Blossoms
Creating the perfect peanut butter blossoms is all about the right ingredients. Here’s what you’ll need to whip up these delicious treats that blend nostalgia with flavor!
Key Ingredients You’ll Need
- Peanut Butter: Choose creamy or crunchy based on your texture preference—both work beautifully!
- Granulated Sugar: This adds sweetness and pairs perfectly with the nuttiness of peanut butter.
- Brown Sugar: A touch of brown sugar enhances the cookie’s depth with its rich, caramel notes.
- All-Purpose Flour: Essential for structure, you can’t skimp on this ingredient.
- Baking Soda: This helps the cookies rise and achieve that classic, chewy texture.
- Milk: Needed for moisture and to bring it all together.
- Chocolate Kisses: The crowning glory of peanut butter blossoms, adding a delightful chocolatey finish.
Optional Extras for Variation
Want to switch things up? Here are a few ideas to get your creative juices flowing:
- Chopped Nuts: Add some crunch by mixing in chopped peanuts or walnuts.
- Flavored Extracts: Almond or vanilla extract can elevate the profile of your cookies.
- Chocolate Chips: Mixing in semi-sweet or dark chocolate chips for an extra chocolatey kick is always a winner.
- Sprinkles: For a fun twist, roll your dough in colorful sprinkles before baking—perfect for a festive touch!
Whichever route you choose, remember that the heart of these cookies is the balance of flavors and textures. Happy baking! If you’re curious about more variations, check out Ghirardelli’s site for interesting ideas!
Step-by-step Preparation of Peanut Butter Blossoms
Making peanut butter blossoms at home is a delightful experience—one that fills your kitchen with an aroma a mix of toasted nuts and melting chocolate. Whether you’re gearing up for the holidays or simply want a sweet treat for movie night, these cookies are sure to impress. Here’s how to prepare them step-by-step.
Gather your ingredients
Before diving into the baking process, it’s essential to gather all your ingredients. This prevents any last-minute scrambles and ensures a smooth workflow. You will need:
- 1 cup peanut butter (creamy or crunchy, your choice!)
- 1/2 cup unsalted butter, softened
- 1 cup granulated sugar
- 1 cup packed brown sugar
- 2 large eggs
- 2 1/2 cups all-purpose flour
- 1 teaspoon baking soda
- 1 teaspoon baking powder
- 1/2 teaspoon salt
- 1 teaspoon vanilla extract
- 1 bag milk chocolate kisses (your main attraction!)
Mix the dry ingredients
Start by mixing your dry ingredients. In a mixing bowl, whisk together the all-purpose flour, baking soda, baking powder, and salt. This step is crucial because it evenly distributes the leavening agents, giving your peanut butter blossoms the perfect rise. You might be surprised how much a simple whisking can affect your cookies!
Cream the butter and sugars
In another large bowl, it’s time to cream the softened unsalted butter and both sugars together. Using an electric mixer on medium speed, blend until the mixture is light and fluffy—this usually takes about 3-5 minutes. The air that’s incorporated here is what makes your cookies tender and chewy. It’s like fluffy clouds for your tastebuds!
Add the eggs and vanilla
Now, let’s elevate the flavor! Add in the eggs one at a time, mixing well after each addition. Then, stir in the vanilla extract. There’s something magical about the smell of vanilla that can instantly make your space feel warm and welcoming.
Combine dry and wet ingredients
Slowly add the dry ingredients into the wet mixture while mixing on low speed. Be careful not to overmix; just blend until there are no visible flour streaks. If your dough is too sticky, a sprinkle of flour can help.
Chill the dough
Patience is a virtue here! Cover the dough and refrigerate it for at least 30 minutes. Chilling helps the flavors meld and improves the dough’s texture, making it easier to mold into perfect little balls. Plus, you get to look forward to a fresh batch of cookies while you wait!
Shape and roll the cookie dough
Once chilled, it’s shaping time! Preheat your oven to 375°F (190°C). Scoop about a tablespoon of dough and roll it into a ball. Then, roll it in granulated sugar for an extra sweet touch—this step gives the cookies a nice crunch on the outside.
Bake the cookies
Place the dough balls about 2 inches apart on a lined baking sheet. Bake for about 8-10 minutes, or until the edges are just starting to turn golden. Keep an eye on them; you want that irresistible chewy center!
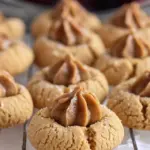
Add the chocolate kisses
Immediately upon removing the cookies from the oven, you’ll want to press a chocolate kiss into the center of each cookie. The warmth of the cookie will gently melt the chocolate, creating that iconic peanut butter blossom look we all adore.
Let them cool on the baking sheet for a few minutes before transferring them to a wire rack. And there you have it: your very own homemade peanut butter blossoms. Enjoy with a glass of milk or a warm cup of tea!
For more delicious recipes, check out resources like The Cookie Research Institute for tips on baking and ingredient substitutions, or explore American Institute of Baking for professional insights into cookie perfection!
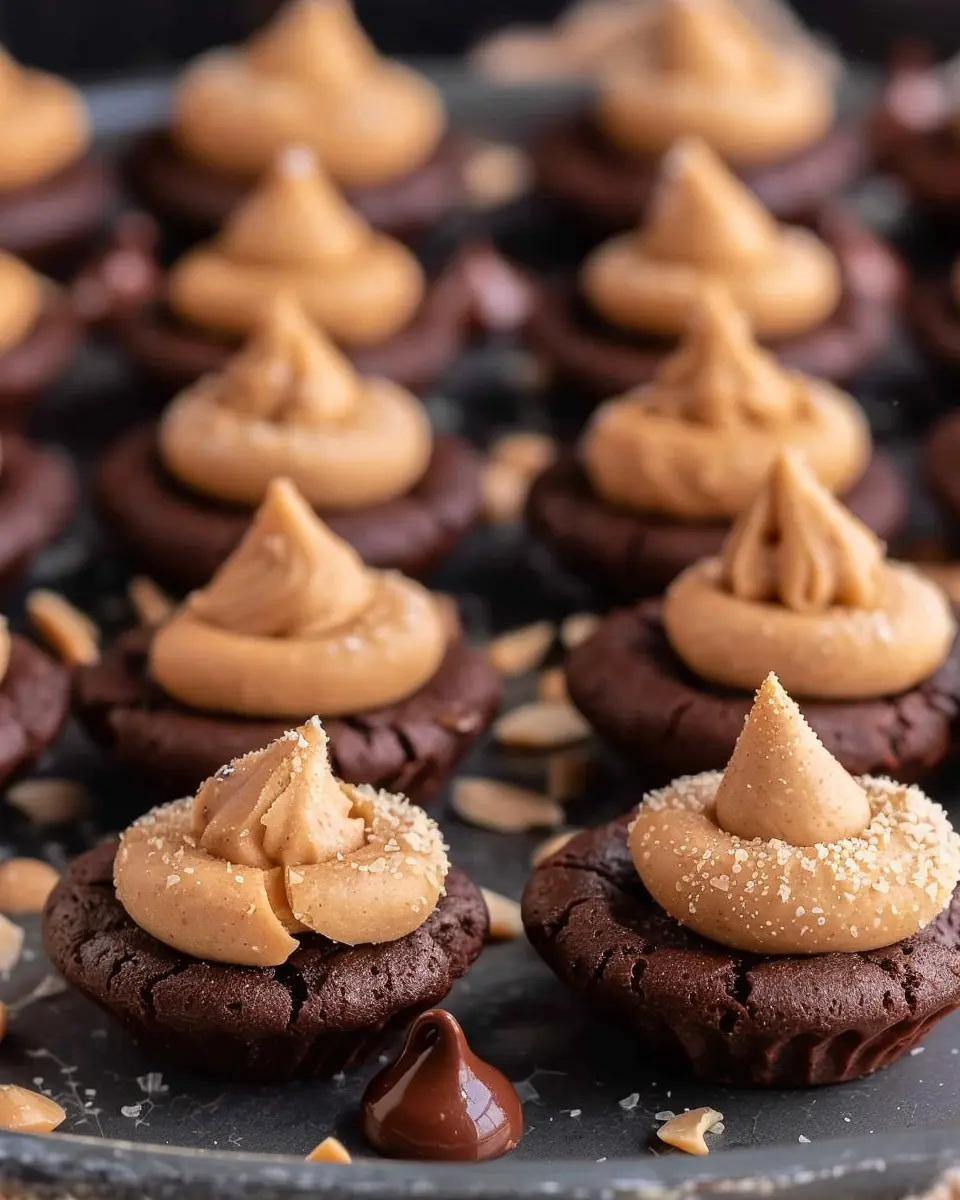
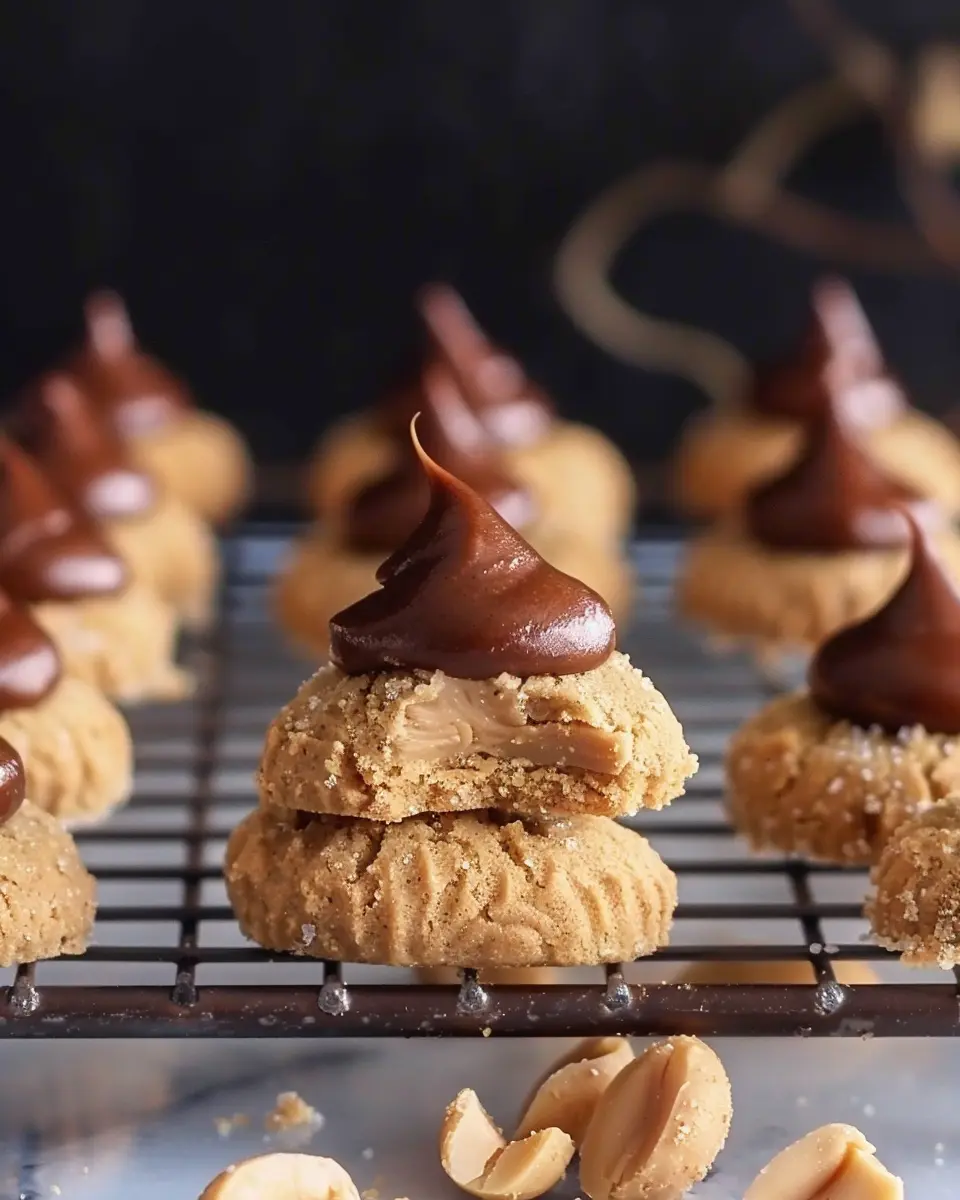
Variations on Peanut Butter Blossoms
Peanut butter blossoms are a beloved treat, but there’s always room to get creative in the kitchen! Here are a couple of delightful variations that promise the same nostalgic flavor and warmth.
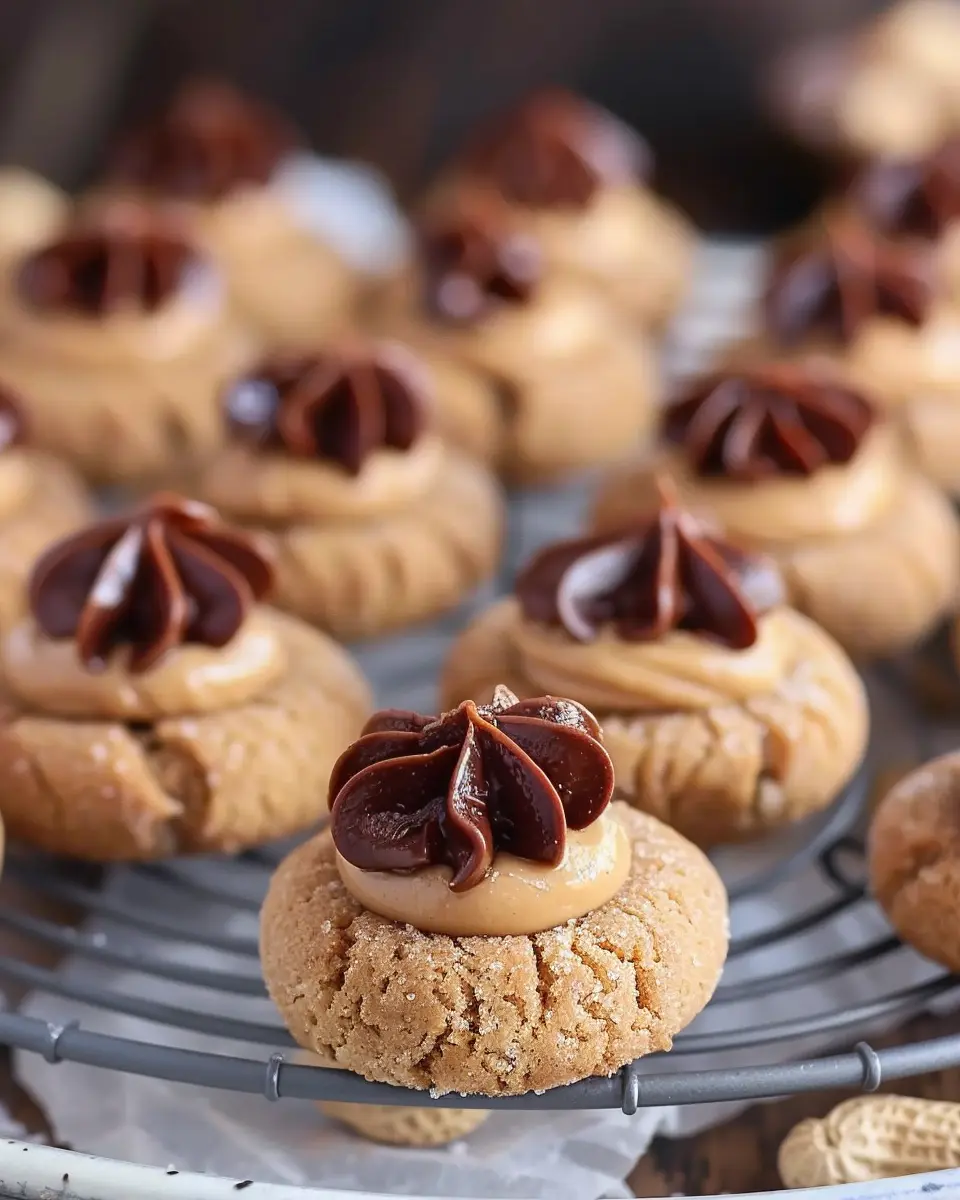
Thumbprint Cookie Variation
If you’re looking to reinvent those classic* peanut butter blossoms* but keep the essence of childhood, try a thumbprint cookie twist. Instead of pressing a chocolate kiss into the center, make an indention with your thumb and fill it with your favorite jam or fruit preserves.
- What to Use: Strawberry, raspberry, or apricot jams are fantastic choices.
- Baking Tips: After baking, let them cool slightly before filling to ensure the jam stays put!
This variation not only adds a pop of color but also a burst of fruity flavor that beautifully complements the rich taste of peanut butter. Plus, it’s a fun way to customize each cookie to your liking!
Crinkle Cookie Twist
For a fun twist that adds a bit of festivity, turn your peanut butter blossoms into thick and chewy crinkle cookies. The key here is to incorporate cocoa powder into your dough.
- How to Make It: Combine your usual peanut butter blossom ingredients with 1/3 cup of cocoa powder.
- Finishing Touch: Roll the dough balls in powdered sugar before baking. As they spread in the oven, they’ll create those beautiful crinkle patterns that are not only gorgeous but provide a delightful contrast in flavor.
This variation is perfect for holiday gatherings or whenever you’re feeling a little extra. Why not experiment and find your favorite filling or topping to truly make these cookies your own? For more inspiration, check out this baking resource for expert advice and tips!
Choosing these variations can add a personalized touch to your baking and keep your cookie jar exciting!
Cooking Tips and Notes for Peanut Butter Blossoms
Ensuring the Perfect Texture
Achieving perfectly chewy peanut butter blossoms is all about balancing the ingredients. Here are some tips to help you out:
- Use fresh ingredients: Old flour or stale baking powder can alter the texture.
- Room temperature butter: This helps achieve that desired creamy consistency.
- Don’t overmix: Once you combine the wet and dry ingredients, mix until just combined to avoid tough cookies.
- Chill the dough: If time allows, refrigerate your dough for 30 minutes. This helps to prevent spreading while baking, giving you those beautiful domes.
Storage Tips for Freshness
To keep your peanut butter blossoms delightful and fresh, consider these storage tips:
- Airtight container: Store your cookies in an airtight container at room temperature to maintain softness.
- Freeze for later: Layer cookies in a freezer-safe bag; they can last up to three months. Just let them thaw at room temperature before enjoying.
- Don’t stack while storing: Prevent potential squishing by placing parchment paper between layers if you have to stack them.
These little tips can make a significant difference in your baking journey. Happy baking! For more on similar cookie recipes, check out Food Network or Martha Stewart.
Serving Suggestions for Peanut Butter Blossoms
Ideal Pairings with Milk or Coffee
When enjoying peanut butter blossoms, nothing complements their rich, nutty sweetness quite like a cold glass of milk or a robust cup of coffee. Imagine biting into a warm, chocolate-topped cookie while sipping your favorite brew—it’s a match made in dessert heaven! For a twist, try pairing them with a delightful hazelnut coffee or even a creamy caramel latte, which enhances the nutty flavors of the cookies. If you prefer a non-caffeinated option, a classic glass of almond milk is both smooth and tasty.
Creative Ways to Serve
Think beyond the cookie jar! Here are some fun ideas to elevate your peanut butter blossoms experience:
- Dessert Platter: Arrange your cookies on a decorative platter alongside fresh fruit or yogurt for a sweet and savory snack.
- Ice Cream Sandwiches: Sandwich a scoop of vanilla or chocolate ice cream between two cookies for a delicious treat, perfect for warm evenings.
- Gifts: Package a box of these homemade delights with a handwritten note, making for a heartfelt gift for friends or coworkers.
For more serving inspiration, check out resources like Food52. Why not get creative and experiment with your favorite combinations? Your taste buds will thank you!
Time Breakdown for Peanut Butter Blossoms
Preparation Time
Making Peanut Butter Blossoms might sound labor-intensive, but preparation only takes about 15 minutes. Gather all your ingredients, including peanut butter, sugar, and Hershey’s Kisses for that iconic touch. A quick tip: having everything ready to go makes the process smoother and more enjoyable!
Baking Time
Once your dough is formed, it’s time to bake! These delightful cookies will need approximately 10-12 minutes of baking at 350°F (175°C). Keep an eye on them; you want a delightful golden hue without burning.
Total Time
In just about 30 minutes, you’ll have a batch of warm, gooey Peanut Butter Blossoms ready to impress. Who wouldn’t want to spend half an hour creating something so delicious?
For additional ideas on cookie varieties, check out this cookie recipe roundup!
Nutritional Facts for Peanut Butter Blossoms
Calories per cookie
When indulging in homemade peanut butter blossoms, it’s good to know what you’re consuming. Each cookie generally contains around 100 calories. While they’re a sweet treat, they can still fit into a balanced diet—especially when enjoyed occasionally.
Breakdown of key nutrients
Let’s dive into what makes these cookies not just tasty but somewhat nutritious as well.
- Protein: With peanut butter as the star ingredient, expect about 3 grams of protein per cookie, which can help keep you feeling satisfied.
- Fat: Each cookie has around 5 grams of fat, most of which come from healthy unsaturated fats found in peanut butter.
- Carbohydrates: At around 12 grams per cookie, this is where the sweetness comes from—think of the sugar content as a delightful treat, but keep moderation in mind.
For a deeper understanding of how cookies can fit into your diet, check out the USDA’s dietary guidelines. Always remember, balance is key when enjoying baked goods!
FAQs about Peanut Butter Blossoms
Can I use natural peanut butter?
Absolutely! Natural peanut butter can be a great choice for your peanut butter blossoms, as it brings an authentic flavor and a slightly different texture. Just be mindful of the oil separation; stir it well before measuring to ensure you get the right consistency. Keep in mind that natural peanut butter can make your cookies a bit denser, but they’ll still taste delicious and wholesome.
How do I store leftover cookies?
If you’re lucky enough to have leftovers (which, let’s be honest, is a rare occurrence with these tasty treats), storing your peanut butter blossoms properly is key to maintaining their freshness.
- Room Temperature: Place them in an airtight container; they’ll stay fresh for about 5 days.
- Refrigeration: If you want them to last longer, you can keep them in the fridge for about a week. Just remember to let them come back to room temperature before enjoying.
- Freezing: For longer storage, freeze them! Wrap each cookie in plastic wrap and place them in a freezer-safe bag. They’ll be good for up to 3 months. Simply thaw at room temperature when you’re ready for a treat.
What can I substitute for chocolate kisses?
If you’re looking for alternatives to traditional chocolate kisses, you’re in luck! Consider these tasty substitutes:
- Peanut Butter Cups: For a double-dose of peanut butter flavor.
- Caramel Candies: A sweet twist that pairs beautifully with the cookie.
- White Chocolate: A deliciously sweet alternative adding a different flavor profile.
Feel free to get creative—after all, baking should be fun! If you want some more info on ingredient substitutes, check out this helpful guide.
Conclusion on Peanut Butter Blossoms
Why you’ll want to make these cookies again
If you’ve never tried peanut butter blossoms before, now is the perfect time to change that! These delightful cookies blend the nutty richness of peanut butter with the sweetness of chocolate, creating a nostalgic flavor that’s hard to resist.
Here are a few reasons to whip up another batch:
- Versatile Treat: Great for any occasion — from festive holidays to casual gatherings.
- Kid-Friendly: Perfect for involving little ones in the kitchen. They’ll love pressing the chocolate kisses on top!
- Simple Ingredients: You likely have everything you need in your pantry already.
Once you’ve tasted these cookies, I guarantee your friends and family will be asking for more. Try serving them with a glass of milk or a cozy cup of hot cocoa for a delightful pairing. For more baking tips, check out resources like Joy of Baking or Baking 101 for inspiration. Happy baking!
PrintPeanut Butter Blossoms: The Best Indulgent Treat for Any Occasion
Discover the deliciousness of Peanut Butter Blossoms, the perfect sweet treat for every occasion.
- Prep Time: 15 minutes
- Cook Time: 10 minutes
- Total Time: 25 minutes
- Yield: 24 cookies 1x
- Category: Desserts
- Method: Baking
- Cuisine: American
- Diet: Vegetarian
Ingredients
- 1 cup creamy peanut butter
- 1 cup sugar
- 1 egg
- 1 teaspoon baking soda
- 1 teaspoon vanilla extract
- 24 chocolate kisses
Instructions
- Preheat your oven to 350°F (175°C).
- In a mixing bowl, combine peanut butter, sugar, egg, baking soda, and vanilla extract.
- Mix until well combined and the dough is smooth.
- Roll the dough into 1-inch balls and place them on a baking sheet.
- Bake for 10 minutes, then remove from the oven.
- Press a chocolate kiss into the center of each cookie while they are still warm.
- Let cool before serving.
Notes
- For a variation, try using different flavored chocolate candies.
- Make sure to store the cookies in an airtight container to keep them fresh.
Nutrition
- Serving Size: 1 cookie
- Calories: 100
- Sugar: 10g
- Sodium: 50mg
- Fat: 5g
- Saturated Fat: 2g
- Unsaturated Fat: 3g
- Trans Fat: 0g
- Carbohydrates: 12g
- Fiber: 1g
- Protein: 2g
- Cholesterol: 10mg
Keywords: Peanut Butter Blossoms, cookies, desserts, indulgent treat